Install & Activate Shop Manager Pro
Shop Manager Pro runs alongside the free plugin rather than replacing it, so the order matters: free first, then Pro, then your licence key. This page covers those three steps. For what Pro includes, see Shop Manager pricing.
What You Need First
- The free Shop Manager for WooCommerce plugin, installed and active
- Your licence key and access to your Freemius account, where the purchase, downloads and invoices live
- Administrator access to your WordPress site
Pro will not run on its own. If the free plugin is not active, Pro shows a notice saying it requires Shop Manager for WooCommerce, and stays switched off.
Step 1: Install the Free Plugin
Follow How to Install Shop Manager for WooCommerce. Once the Shop Manager menu appears in your WordPress admin, move on.
Step 2: Upload the Pro Plugin
Pro is not on the WordPress.org directory, so you download it from your account.
- Log in to your Freemius account and download the Pro ZIP. Your licence key is on the same screen.
- In WordPress, go to Plugins → Add New and click Upload Plugin.
- Choose the ZIP, click Install Now, then Activate Plugin.
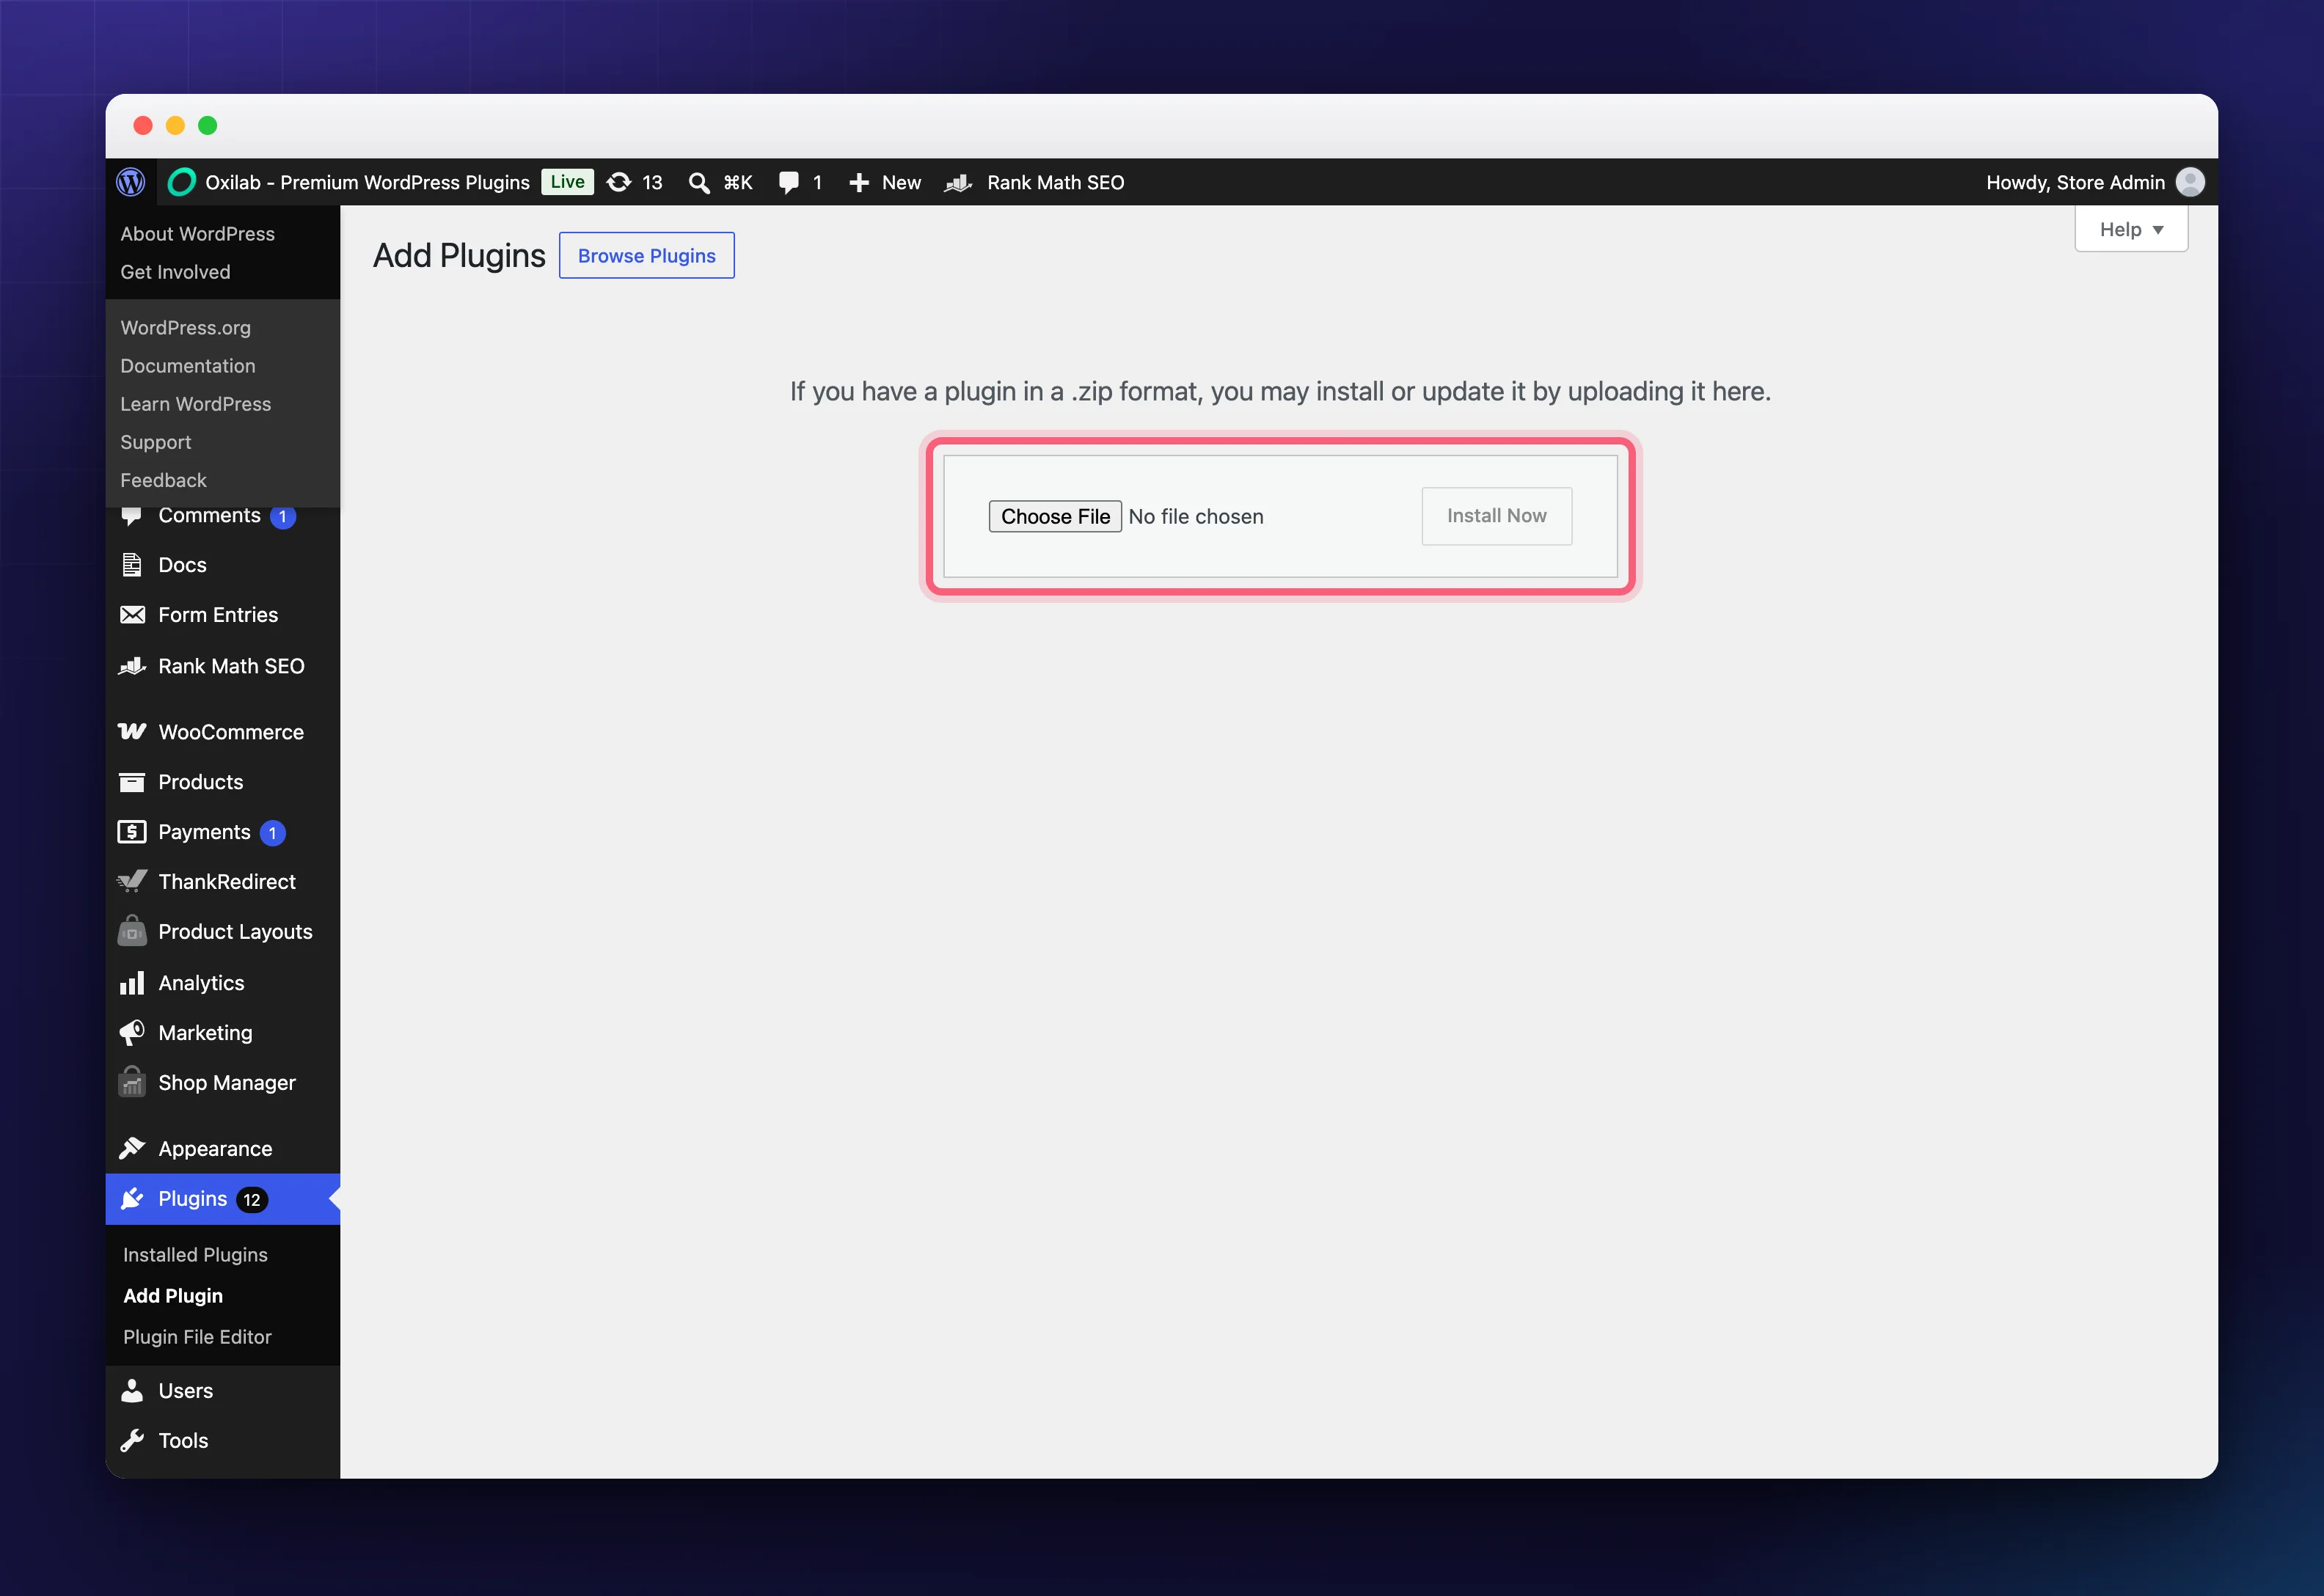
Upload the ZIP as you downloaded it, without unzipping. Keep both plugins active, that is how Pro is meant to run.
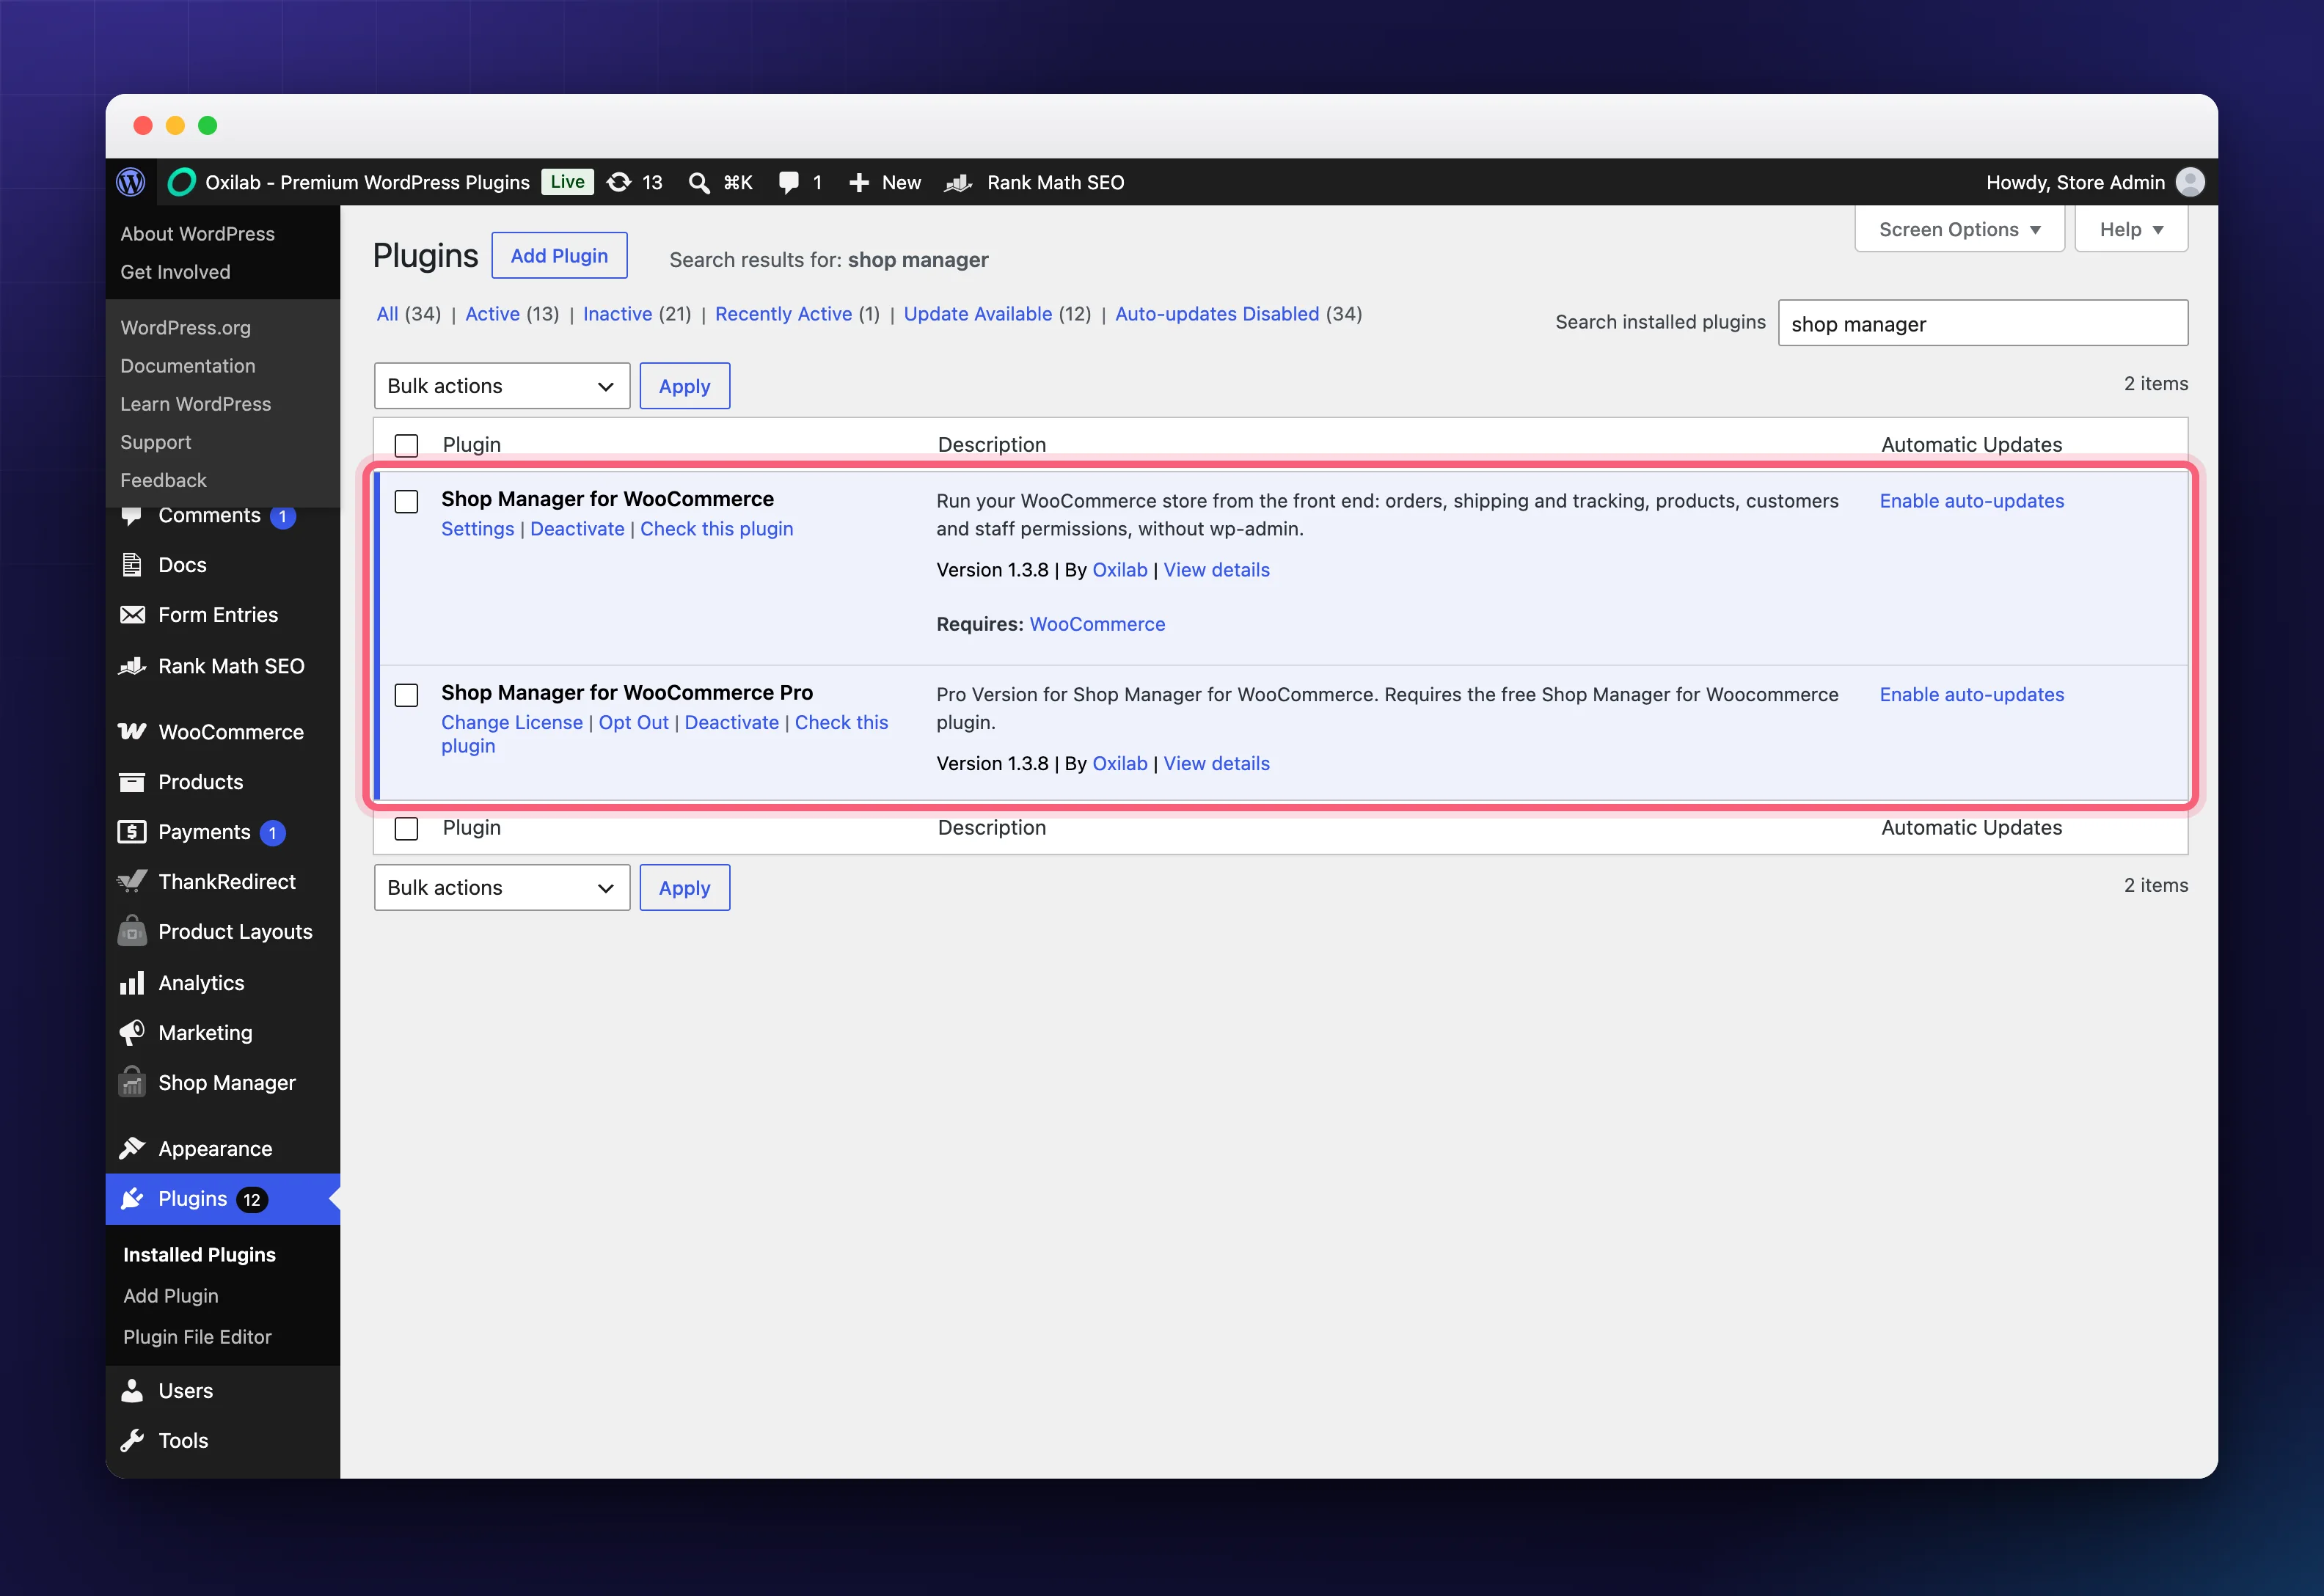
Your Plugins screen now lists both entries. The Pro row carries an Activate License link, which is what you use in the next step. Once a licence is active it changes to Change License.
Step 3: Activate Your Licence Key
Uploading the plugin is not enough. The licence is what switches the features on, and you do it from the Plugins screen.
- Go to Plugins in your WordPress admin and type shop manager into the Search installed plugins box, so only the two Shop Manager entries are left.
- Find the Shop Manager for WooCommerce Pro row and click Activate License underneath it.
- Paste your licence key into the box that opens and click Activate License.
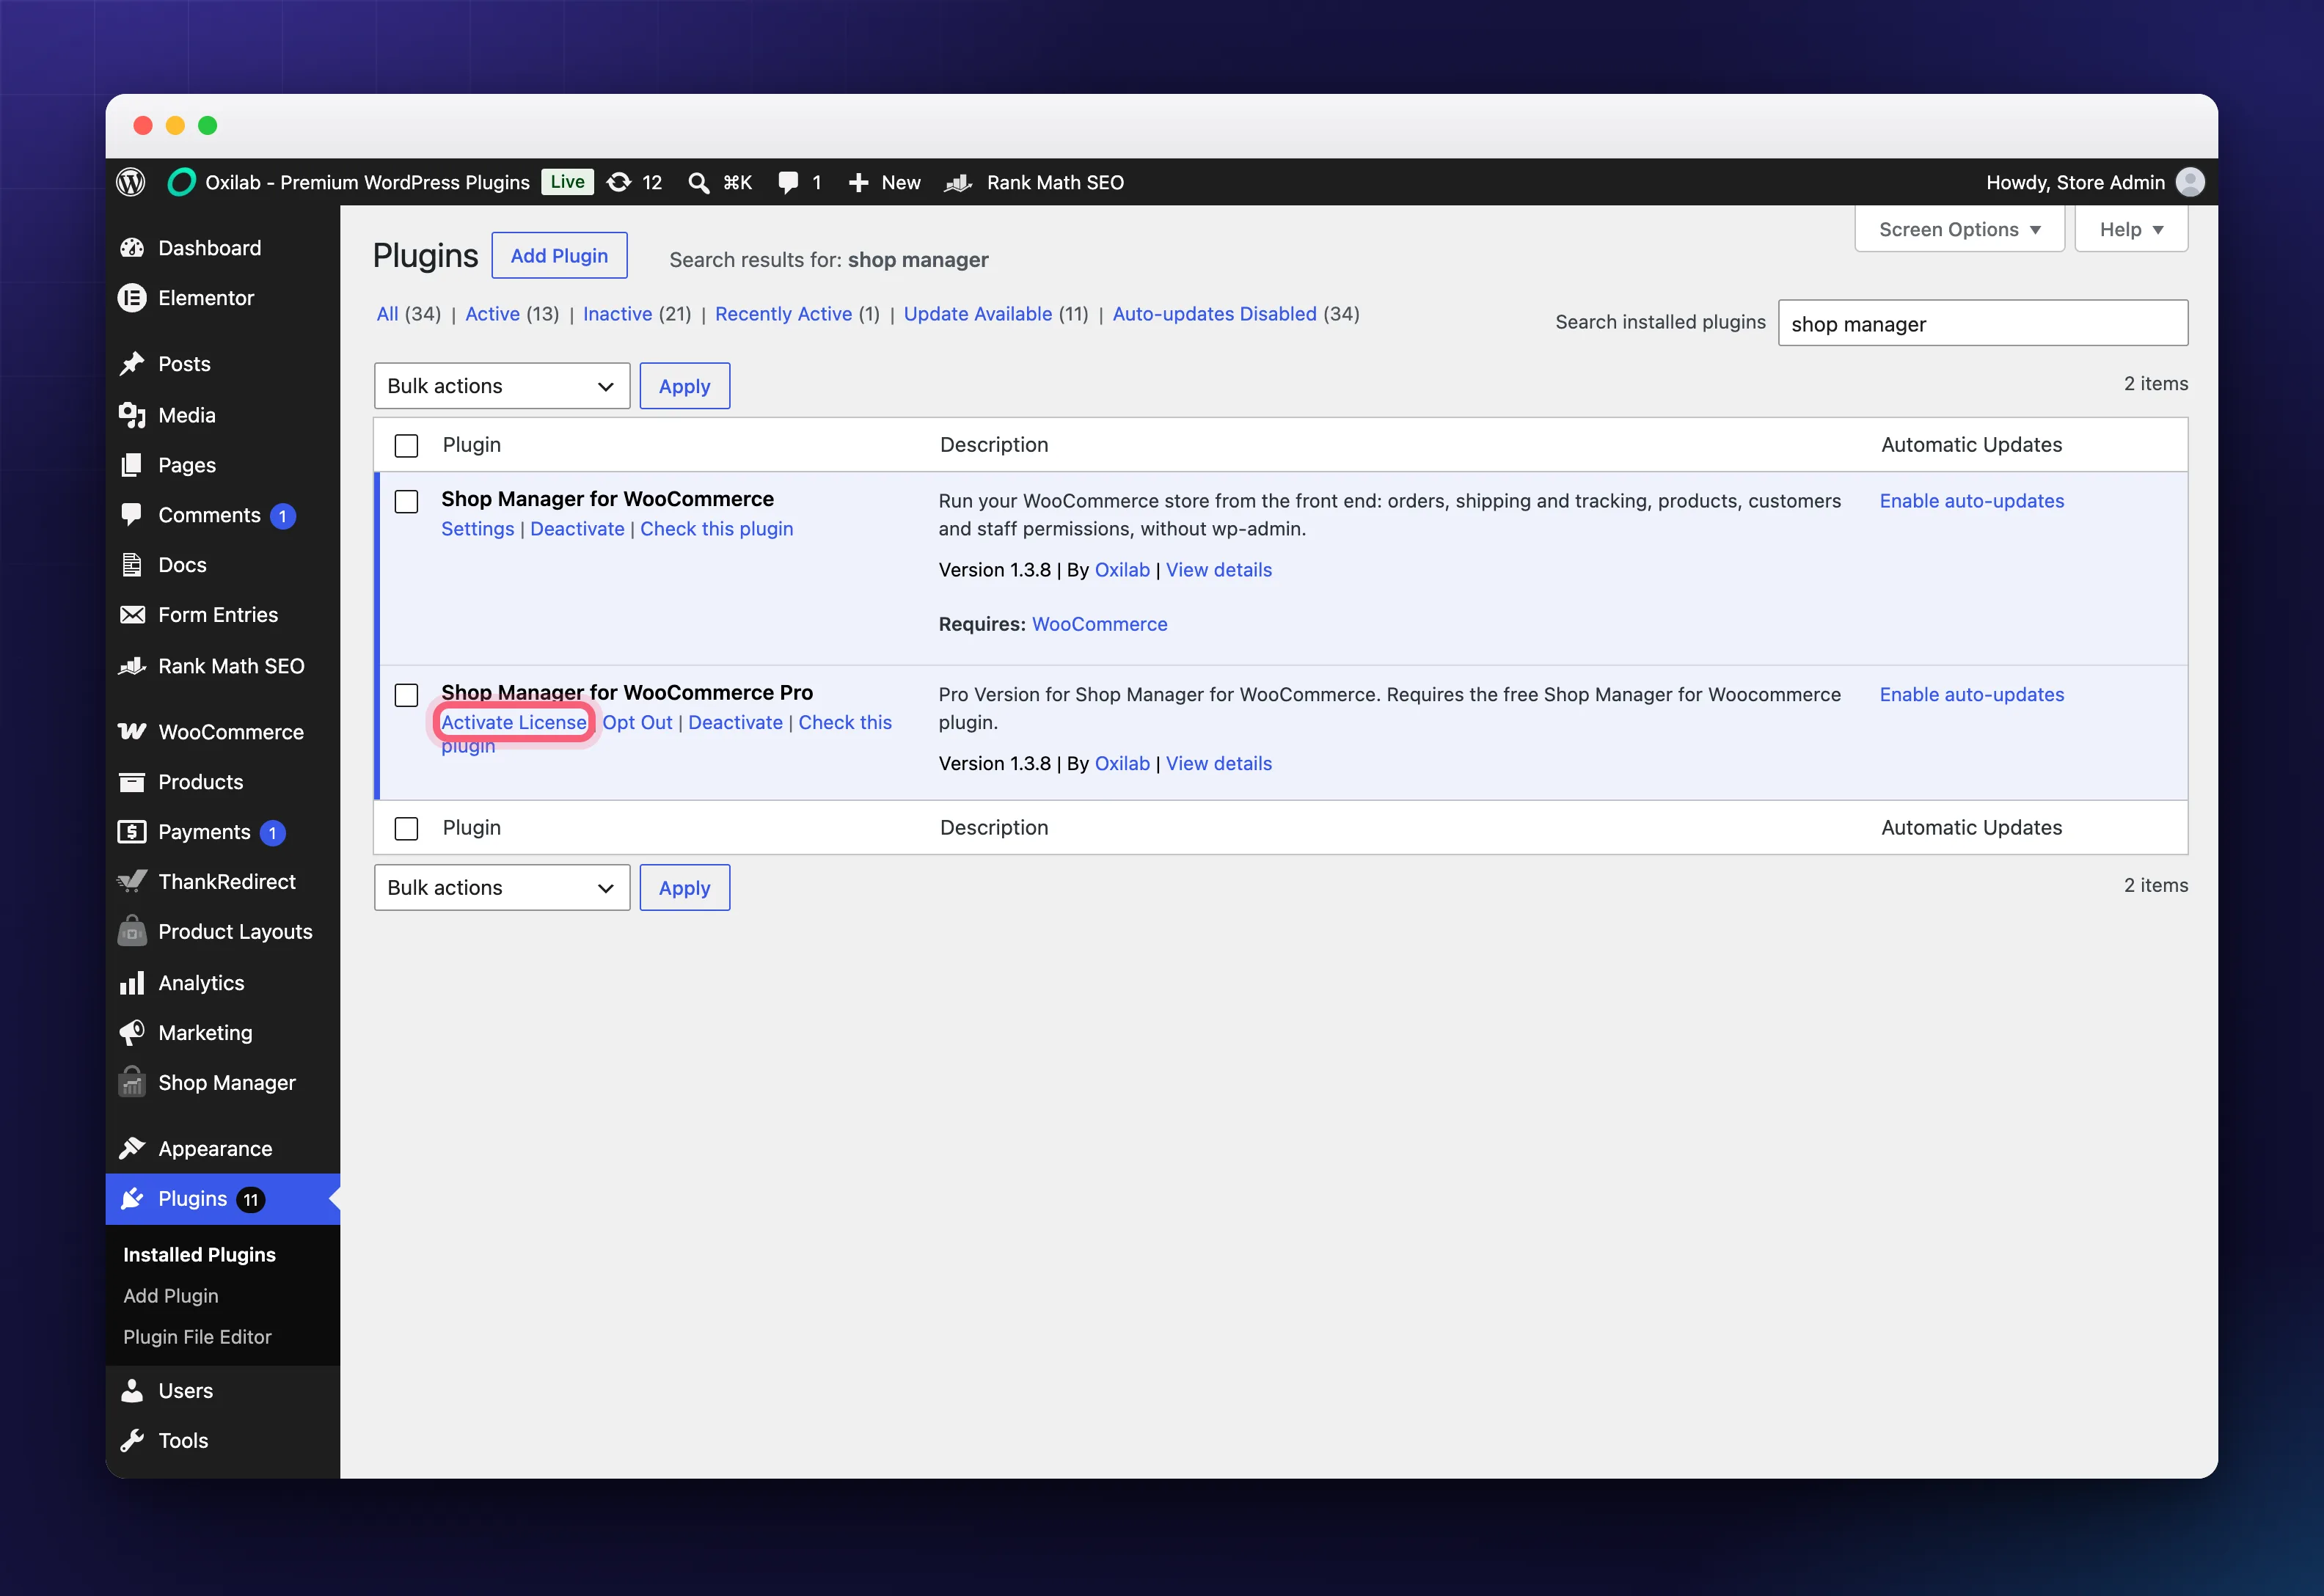
The link is highlighted above, on the Pro row rather than the free one. Searching first matters here: other plugins show a licence link of their own, and each opens its own box, so it is easy to activate the wrong one on a busy site.
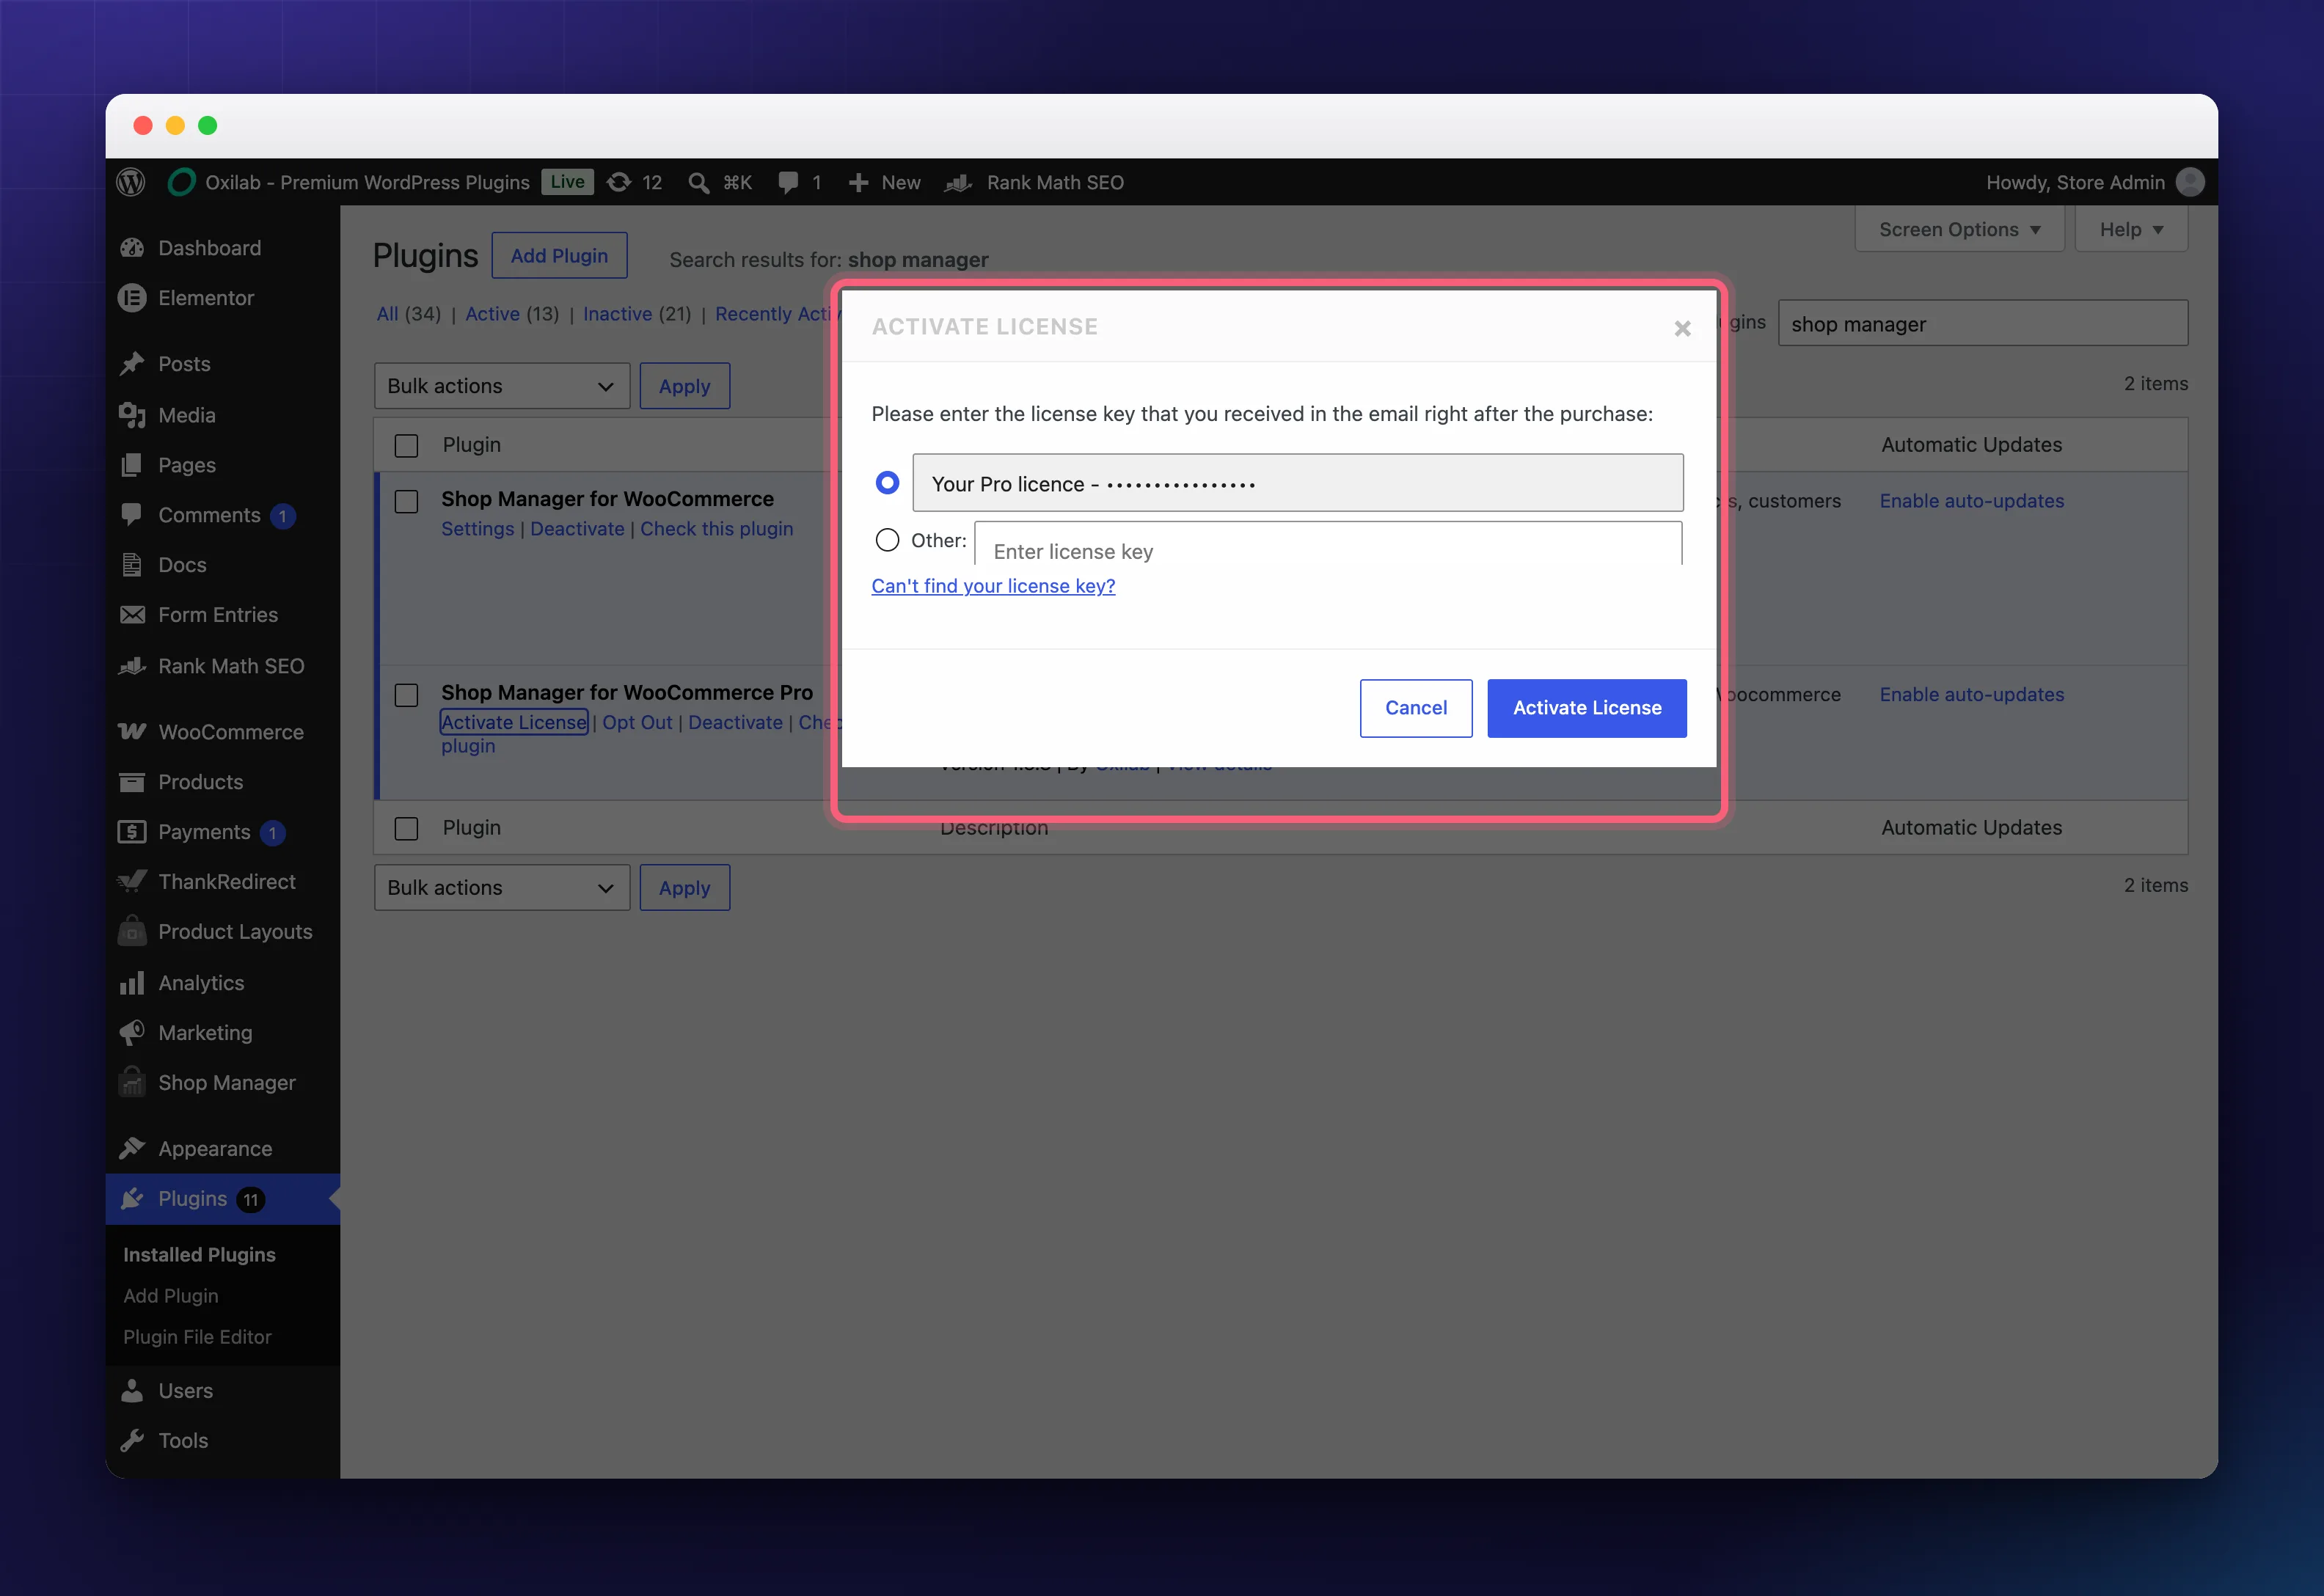
Paste the key next to Other and press Activate License. If you have bought Shop Manager Pro before with the same email, the box may also offer a licence you already own, so you can pick that instead of typing.
If you see an Account item under Shop Manager, it does the same job and adds Sync and Deactivate License for later. It is not on every install, so the Plugins screen above is the route that always works.
Checking It Worked
- Both plugins show as active on the Plugins screen.
- The Pro row’s link has changed from Activate License to Change License.
- The PRO locks are gone from the dashboard.
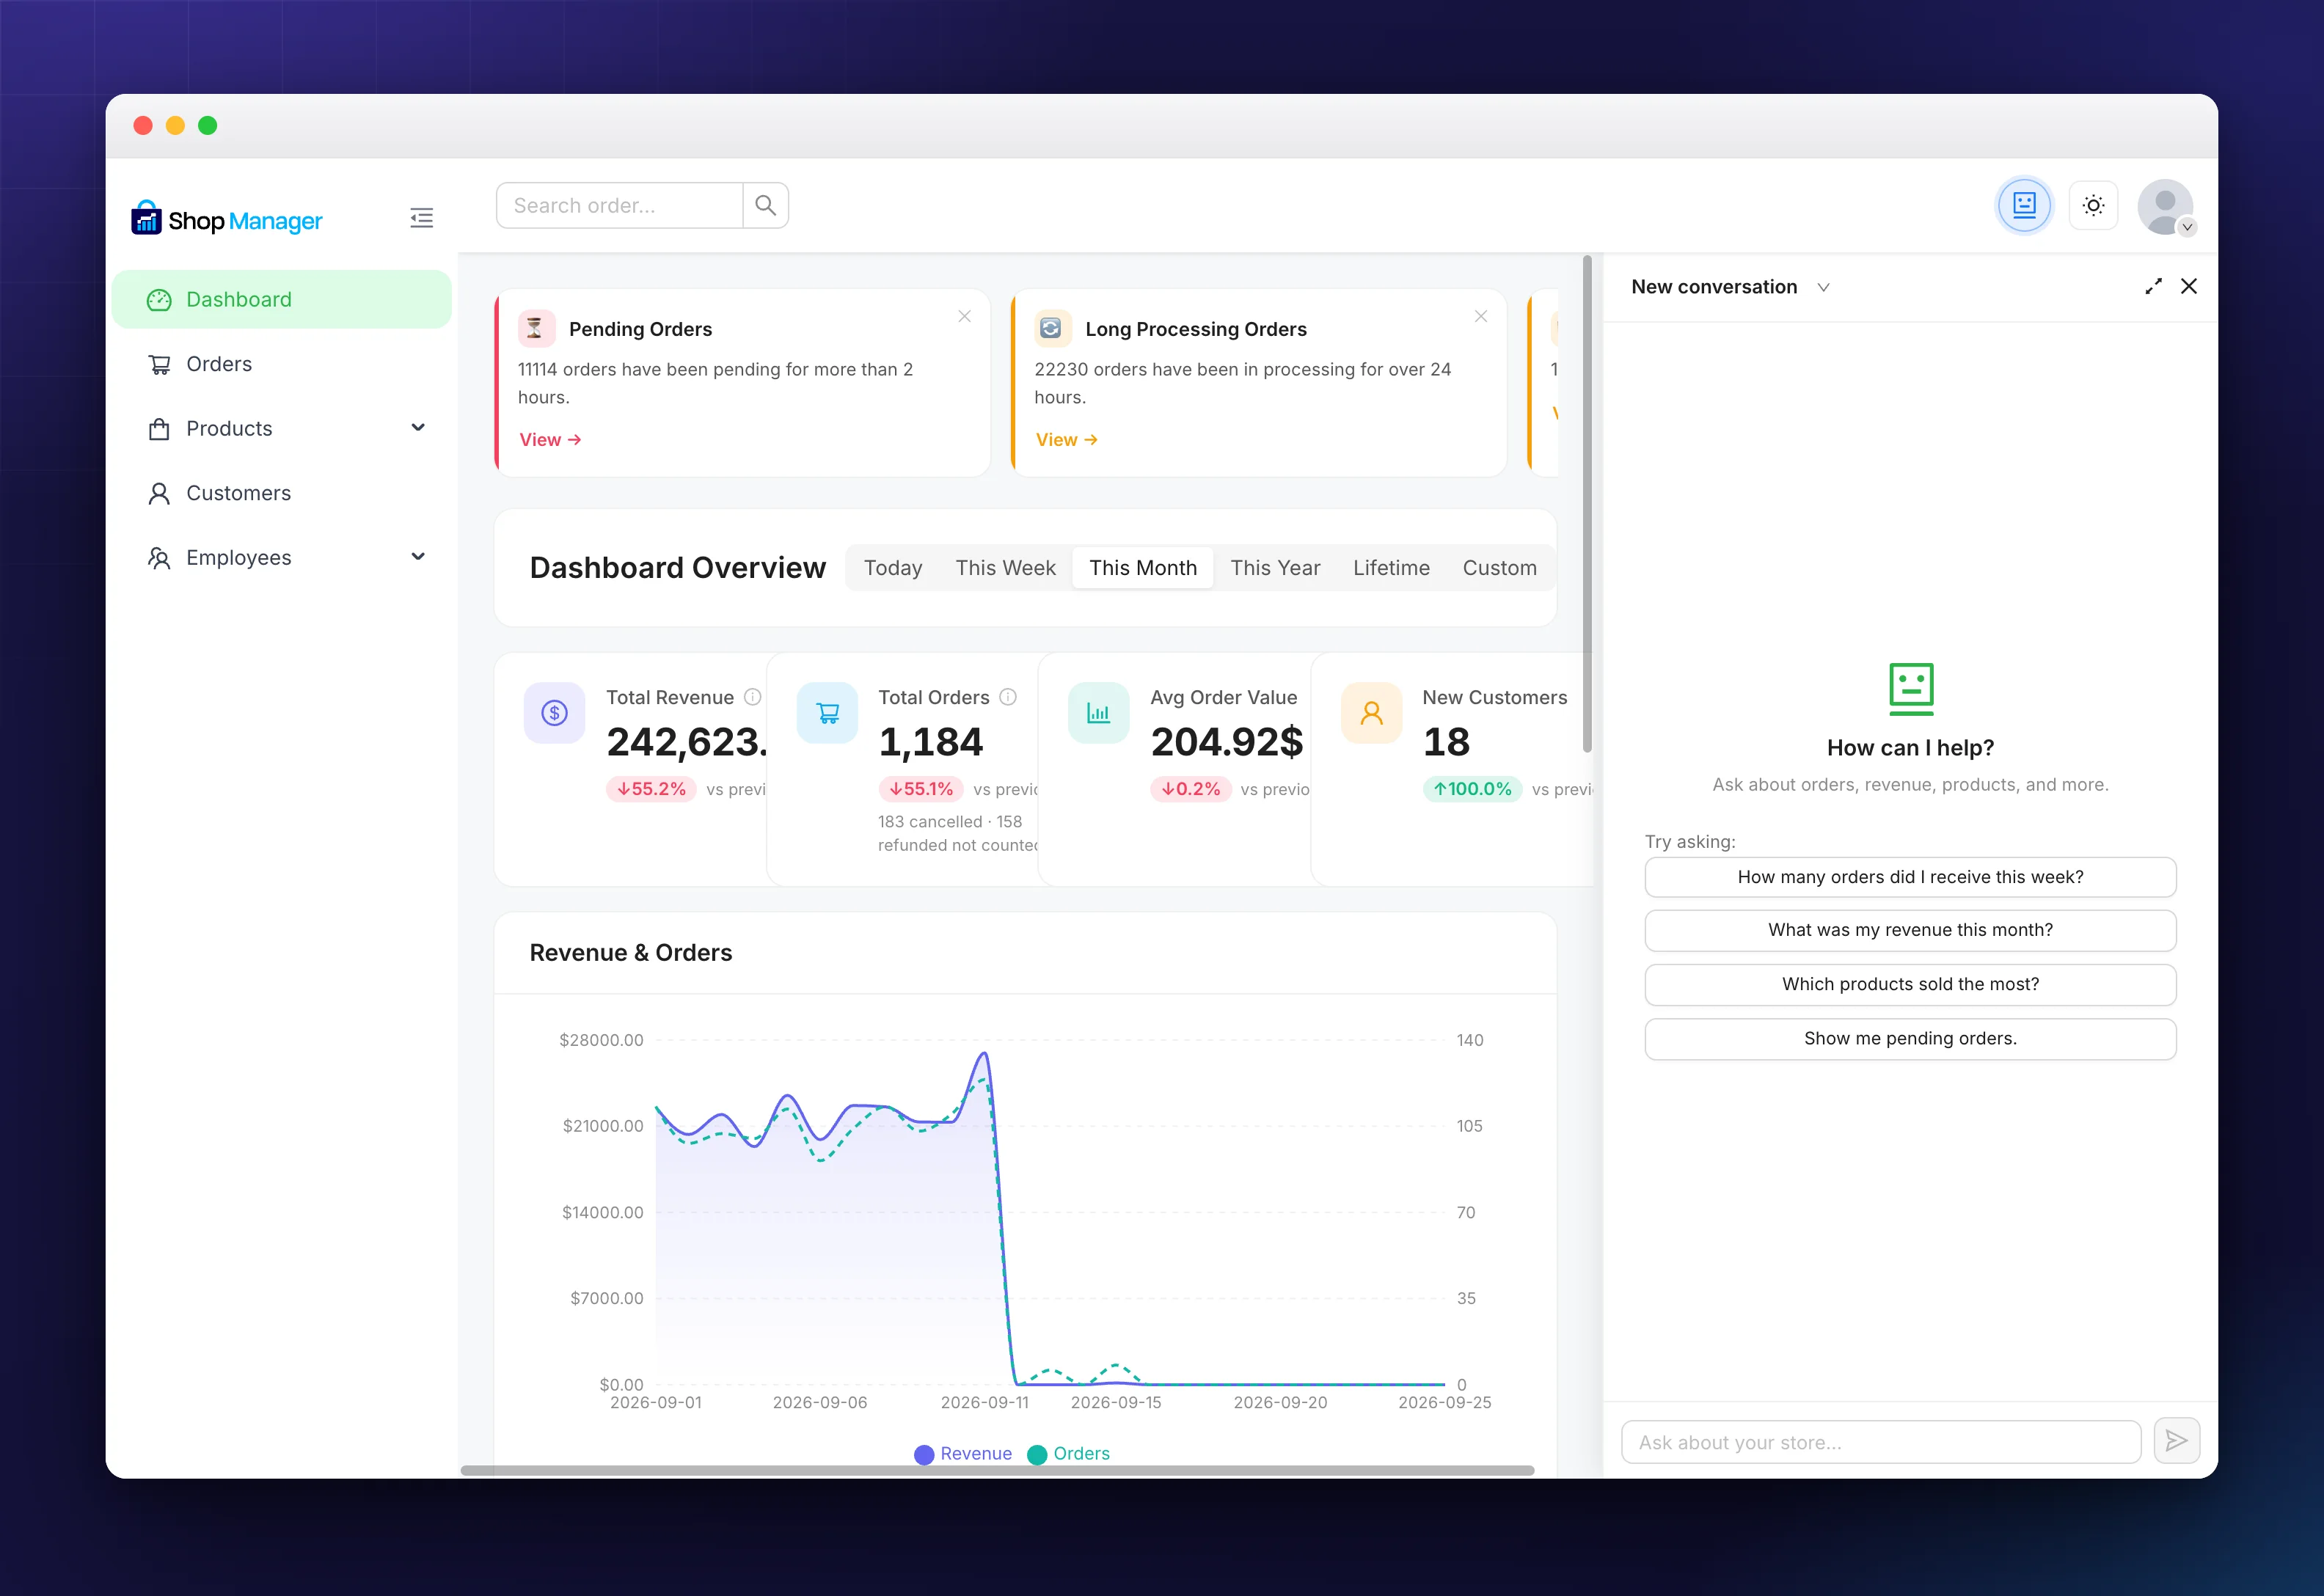
The AI Assistant button in the dashboard header is an easy thing to check. It opens a chat panel on the right with example prompts to get you started. The AI tools also need a provider key, which is covered in Configure AI Settings & API Keys.
Troubleshooting
“Requires Shop Manager for WooCommerce to be installed and active.”
Install and activate the free plugin first, then Pro will start.
My licence key will not activate.
Copy the key straight from your Freemius account to avoid typos, check it is not already used on the maximum number of sites, and make sure your server can reach the internet, because the key is verified remotely.
Pro features are still hidden after activating.
Reopen the licence box from the Plugins screen to confirm the key took. If an Account item is available under Shop Manager, press Sync there. Then clear any caching plugin and reload the dashboard.
My licence expired.
Pro features switch off and custom employee roles stop working, so affected staff see an explanation rather than an error. Nothing is deleted, and renewing brings it all back.
Related Documentation
- How to Install Shop Manager for WooCommerce: the free plugin Pro needs.
- Shop Manager pricing: what Pro includes, and the refund terms.
- Configure AI Settings & API Keys: set up the AI tools.