WooCommerce Custom Order Status Made Easy
Order statuses say where every order is in your workflow. Shop Manager lets you change a status in one click and recolour the built-in ones, both free. Creating statuses of your own, like Ready to Ship or Packed, needs Shop Manager Pro.
Changing an Order’s Status
Three places, all free, all needing the Change Status permission on your role:
- From the order row. Open the row’s actions menu on the order list and pick a status.
- From the order itself. Open an order and change it there.
- In bulk. Tick several orders, then Bulk Actions → Change Status. This is the quick way to move a batch from Processing to Completed after a despatch run.
Recolouring the Built-in Statuses
In your WordPress admin, go to Shop Manager → Settings → Orders. The Default Statuses card lists WooCommerce’s own statuses.
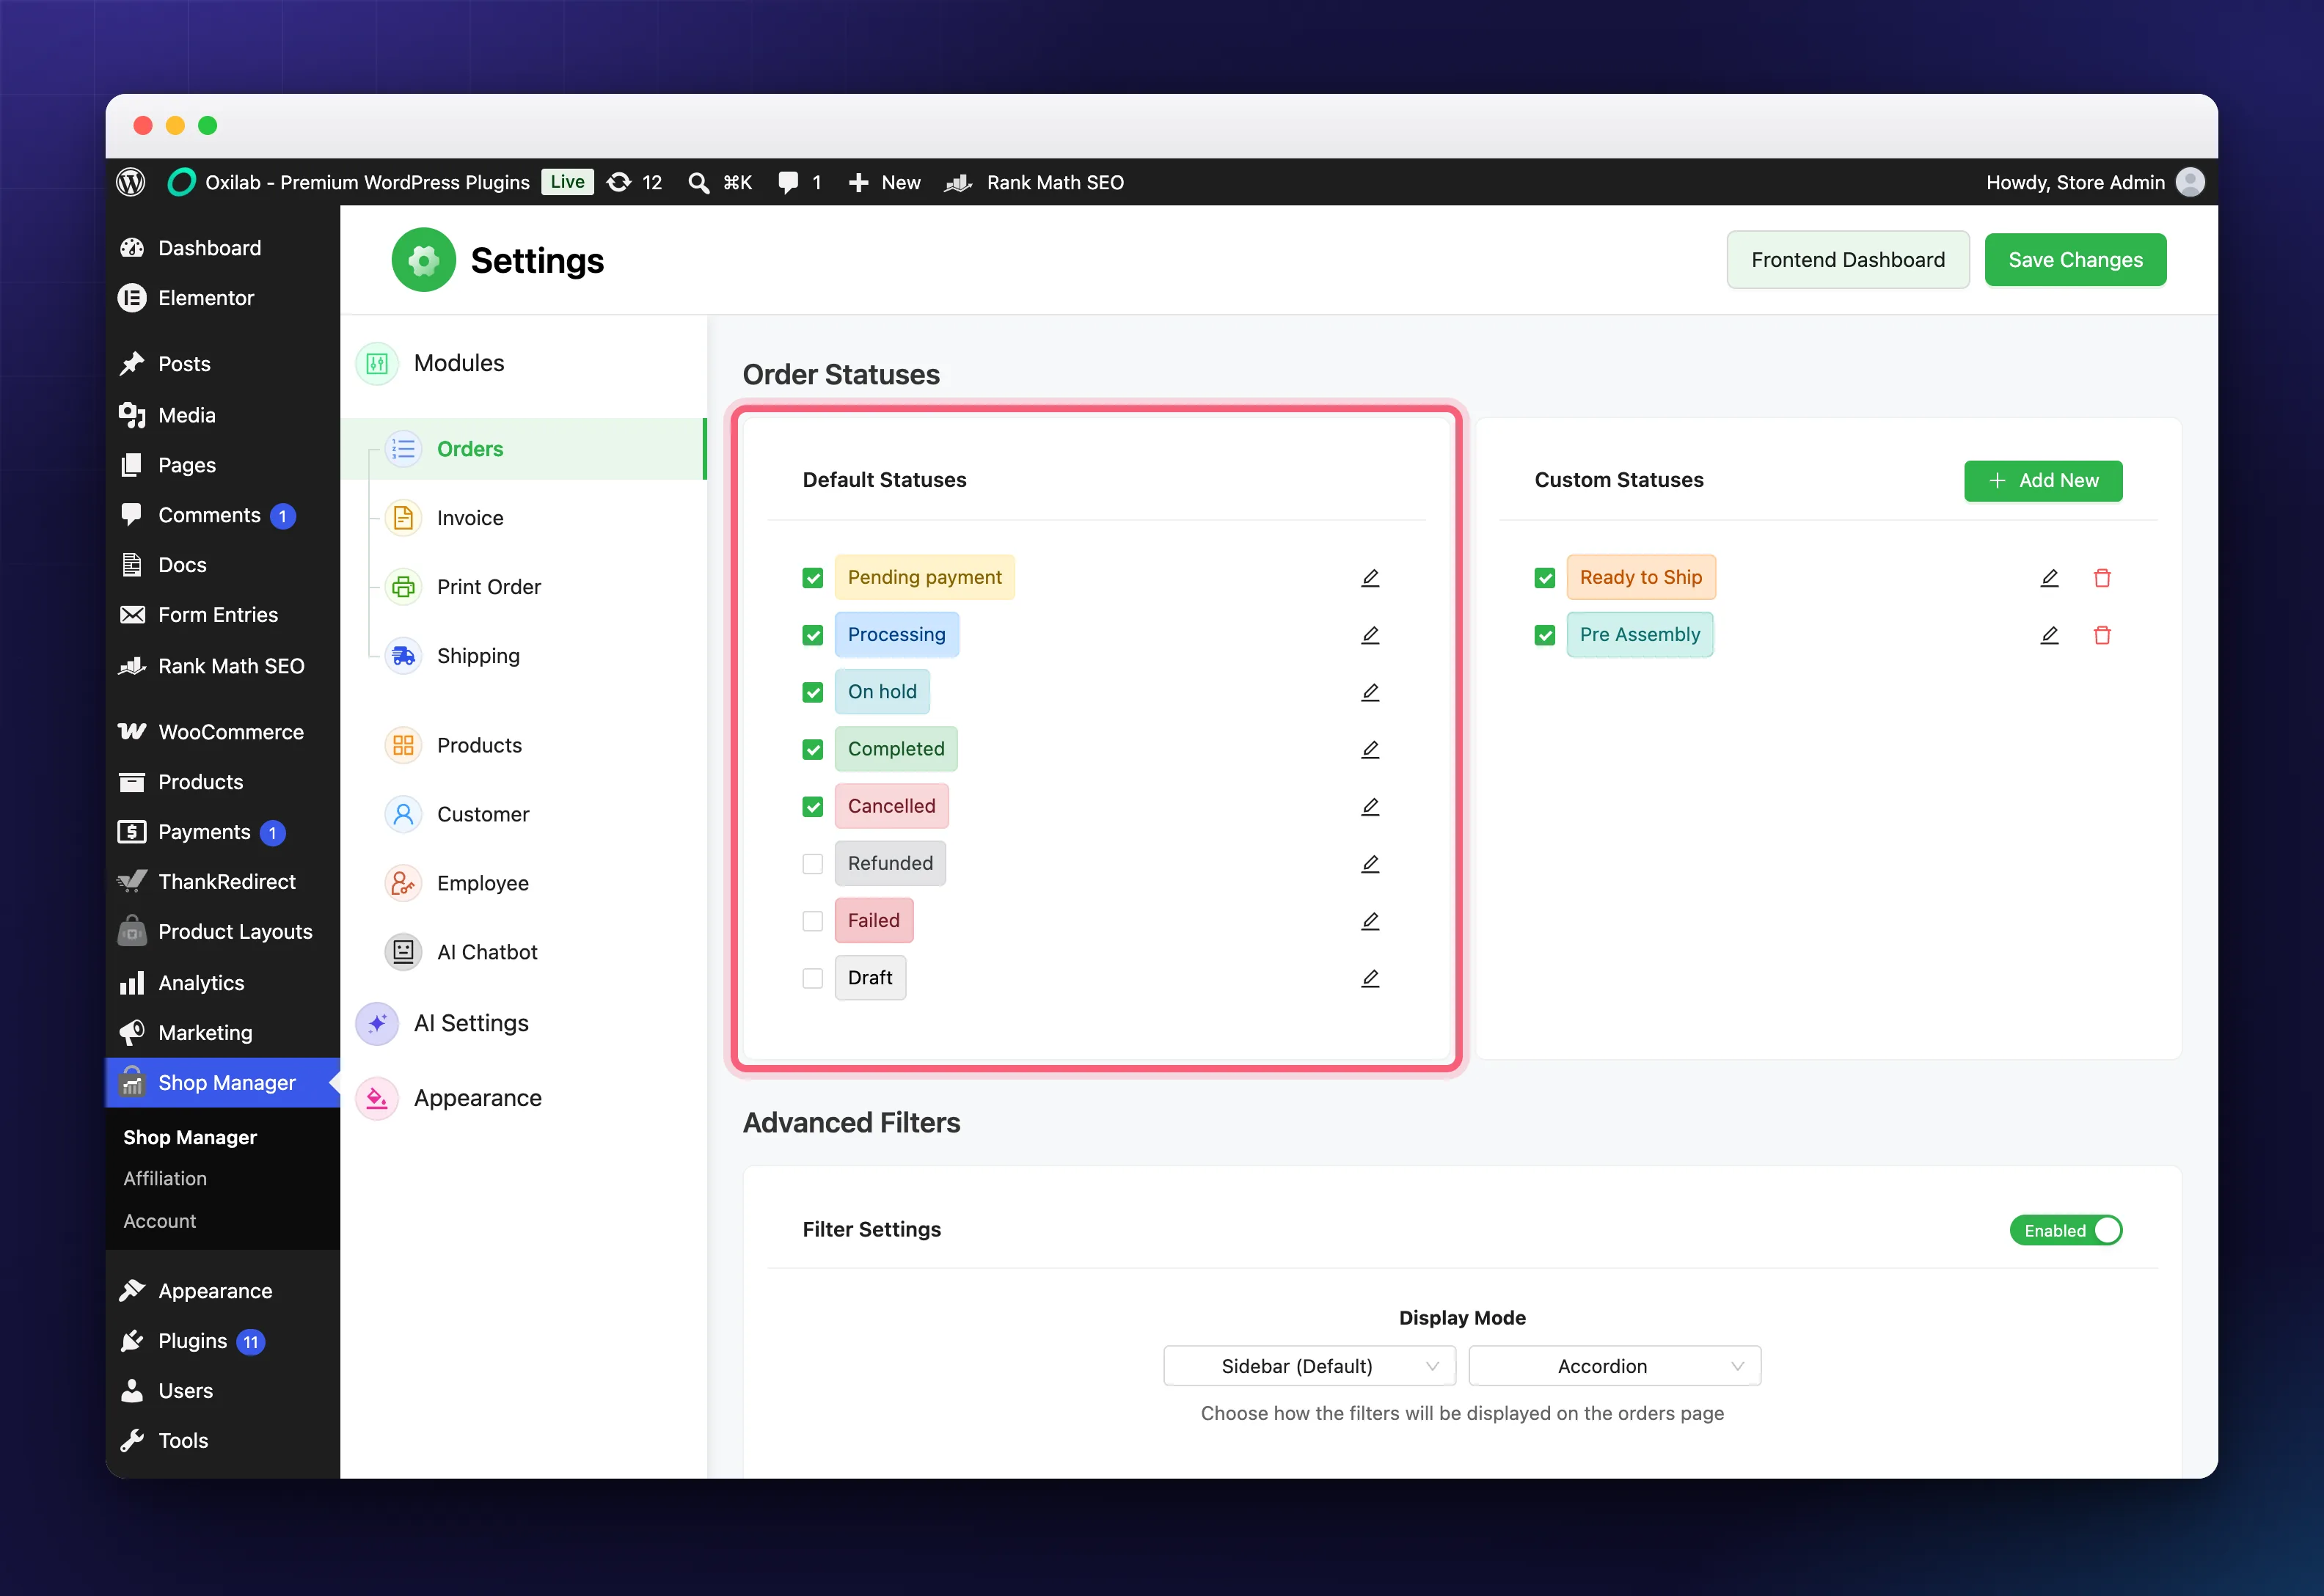
Each row has two controls. The pencil opens the colour editor, where you pick a preset or set your own background, text and border colours. The checkbox decides whether that status gets a tab on your frontend Orders screen, which is how you hide statuses your shop never uses.
Save the editor, then press Save Changes at the top of the settings page. Two saves, and forgetting the second one is the usual reason a change seems not to stick.
Creating a Custom Status (Pro)
When the built-in statuses do not match how you actually work, add your own: Packed, Ready for Pickup, Awaiting Stock, Out for Delivery. There is no limit on how many.
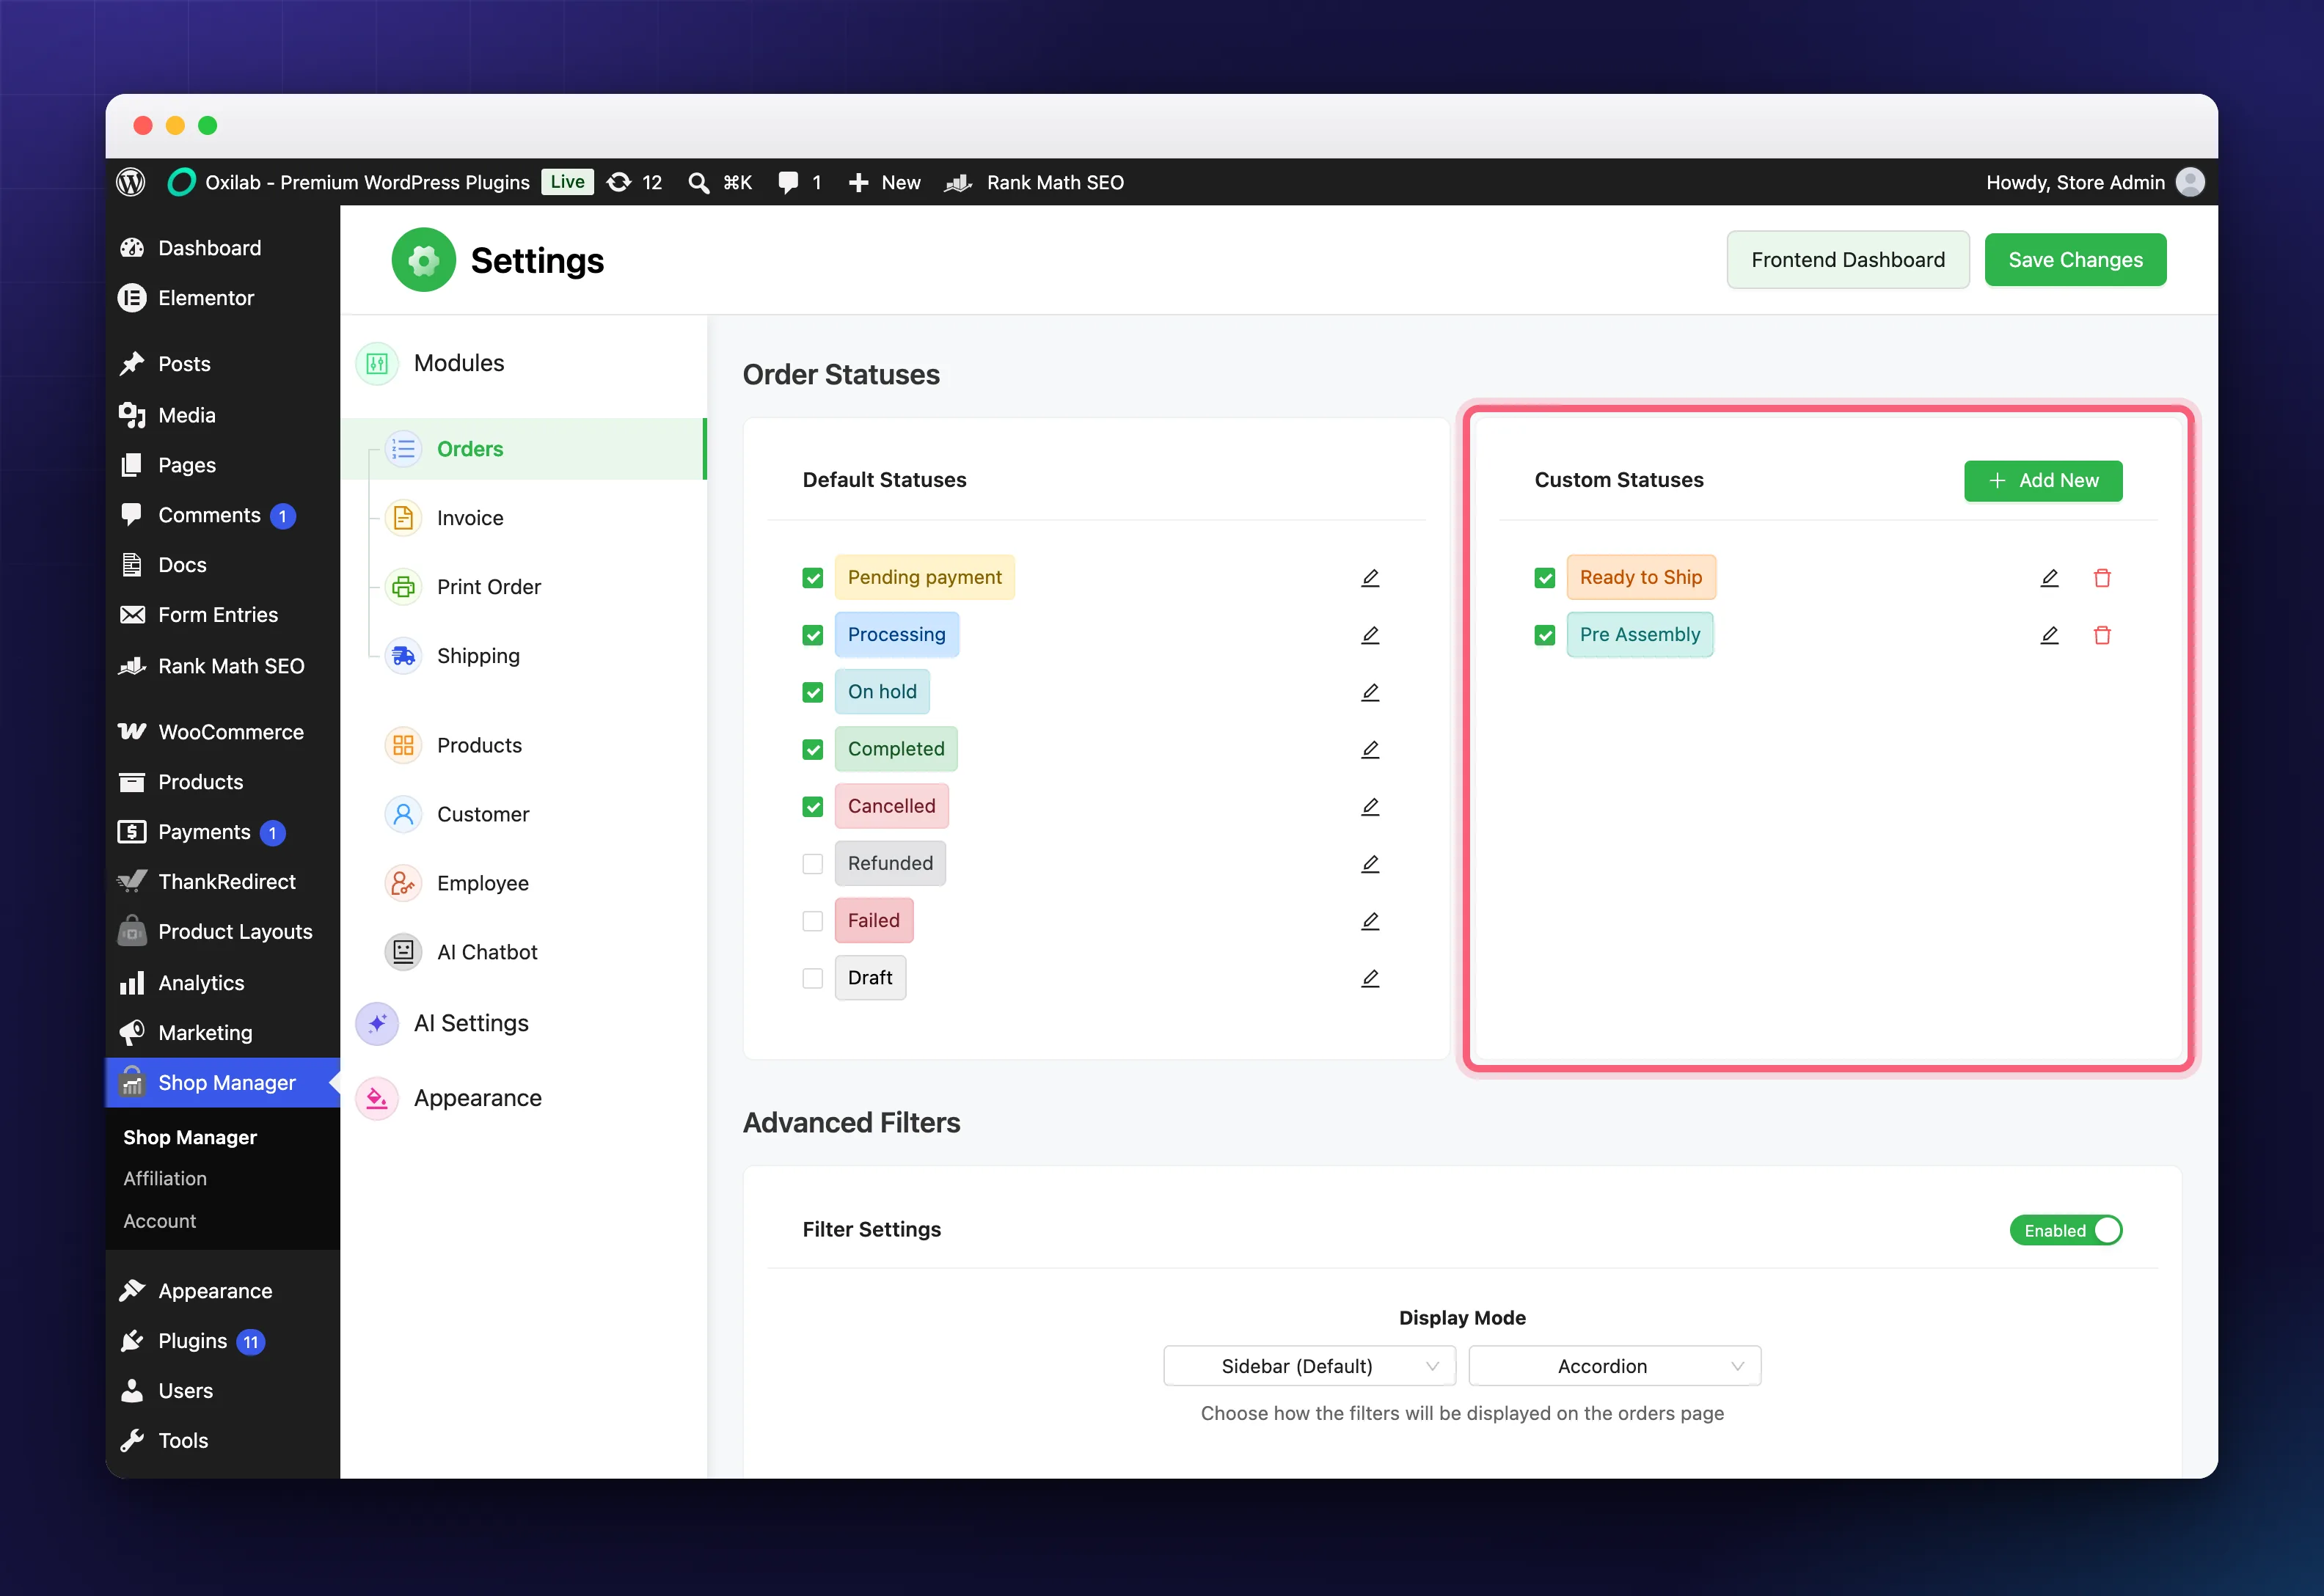
The Custom Statuses card sits beside the default one. Click Add New, or the pencil on an existing status to edit it. Without Pro this card is locked and shows a PRO tag.
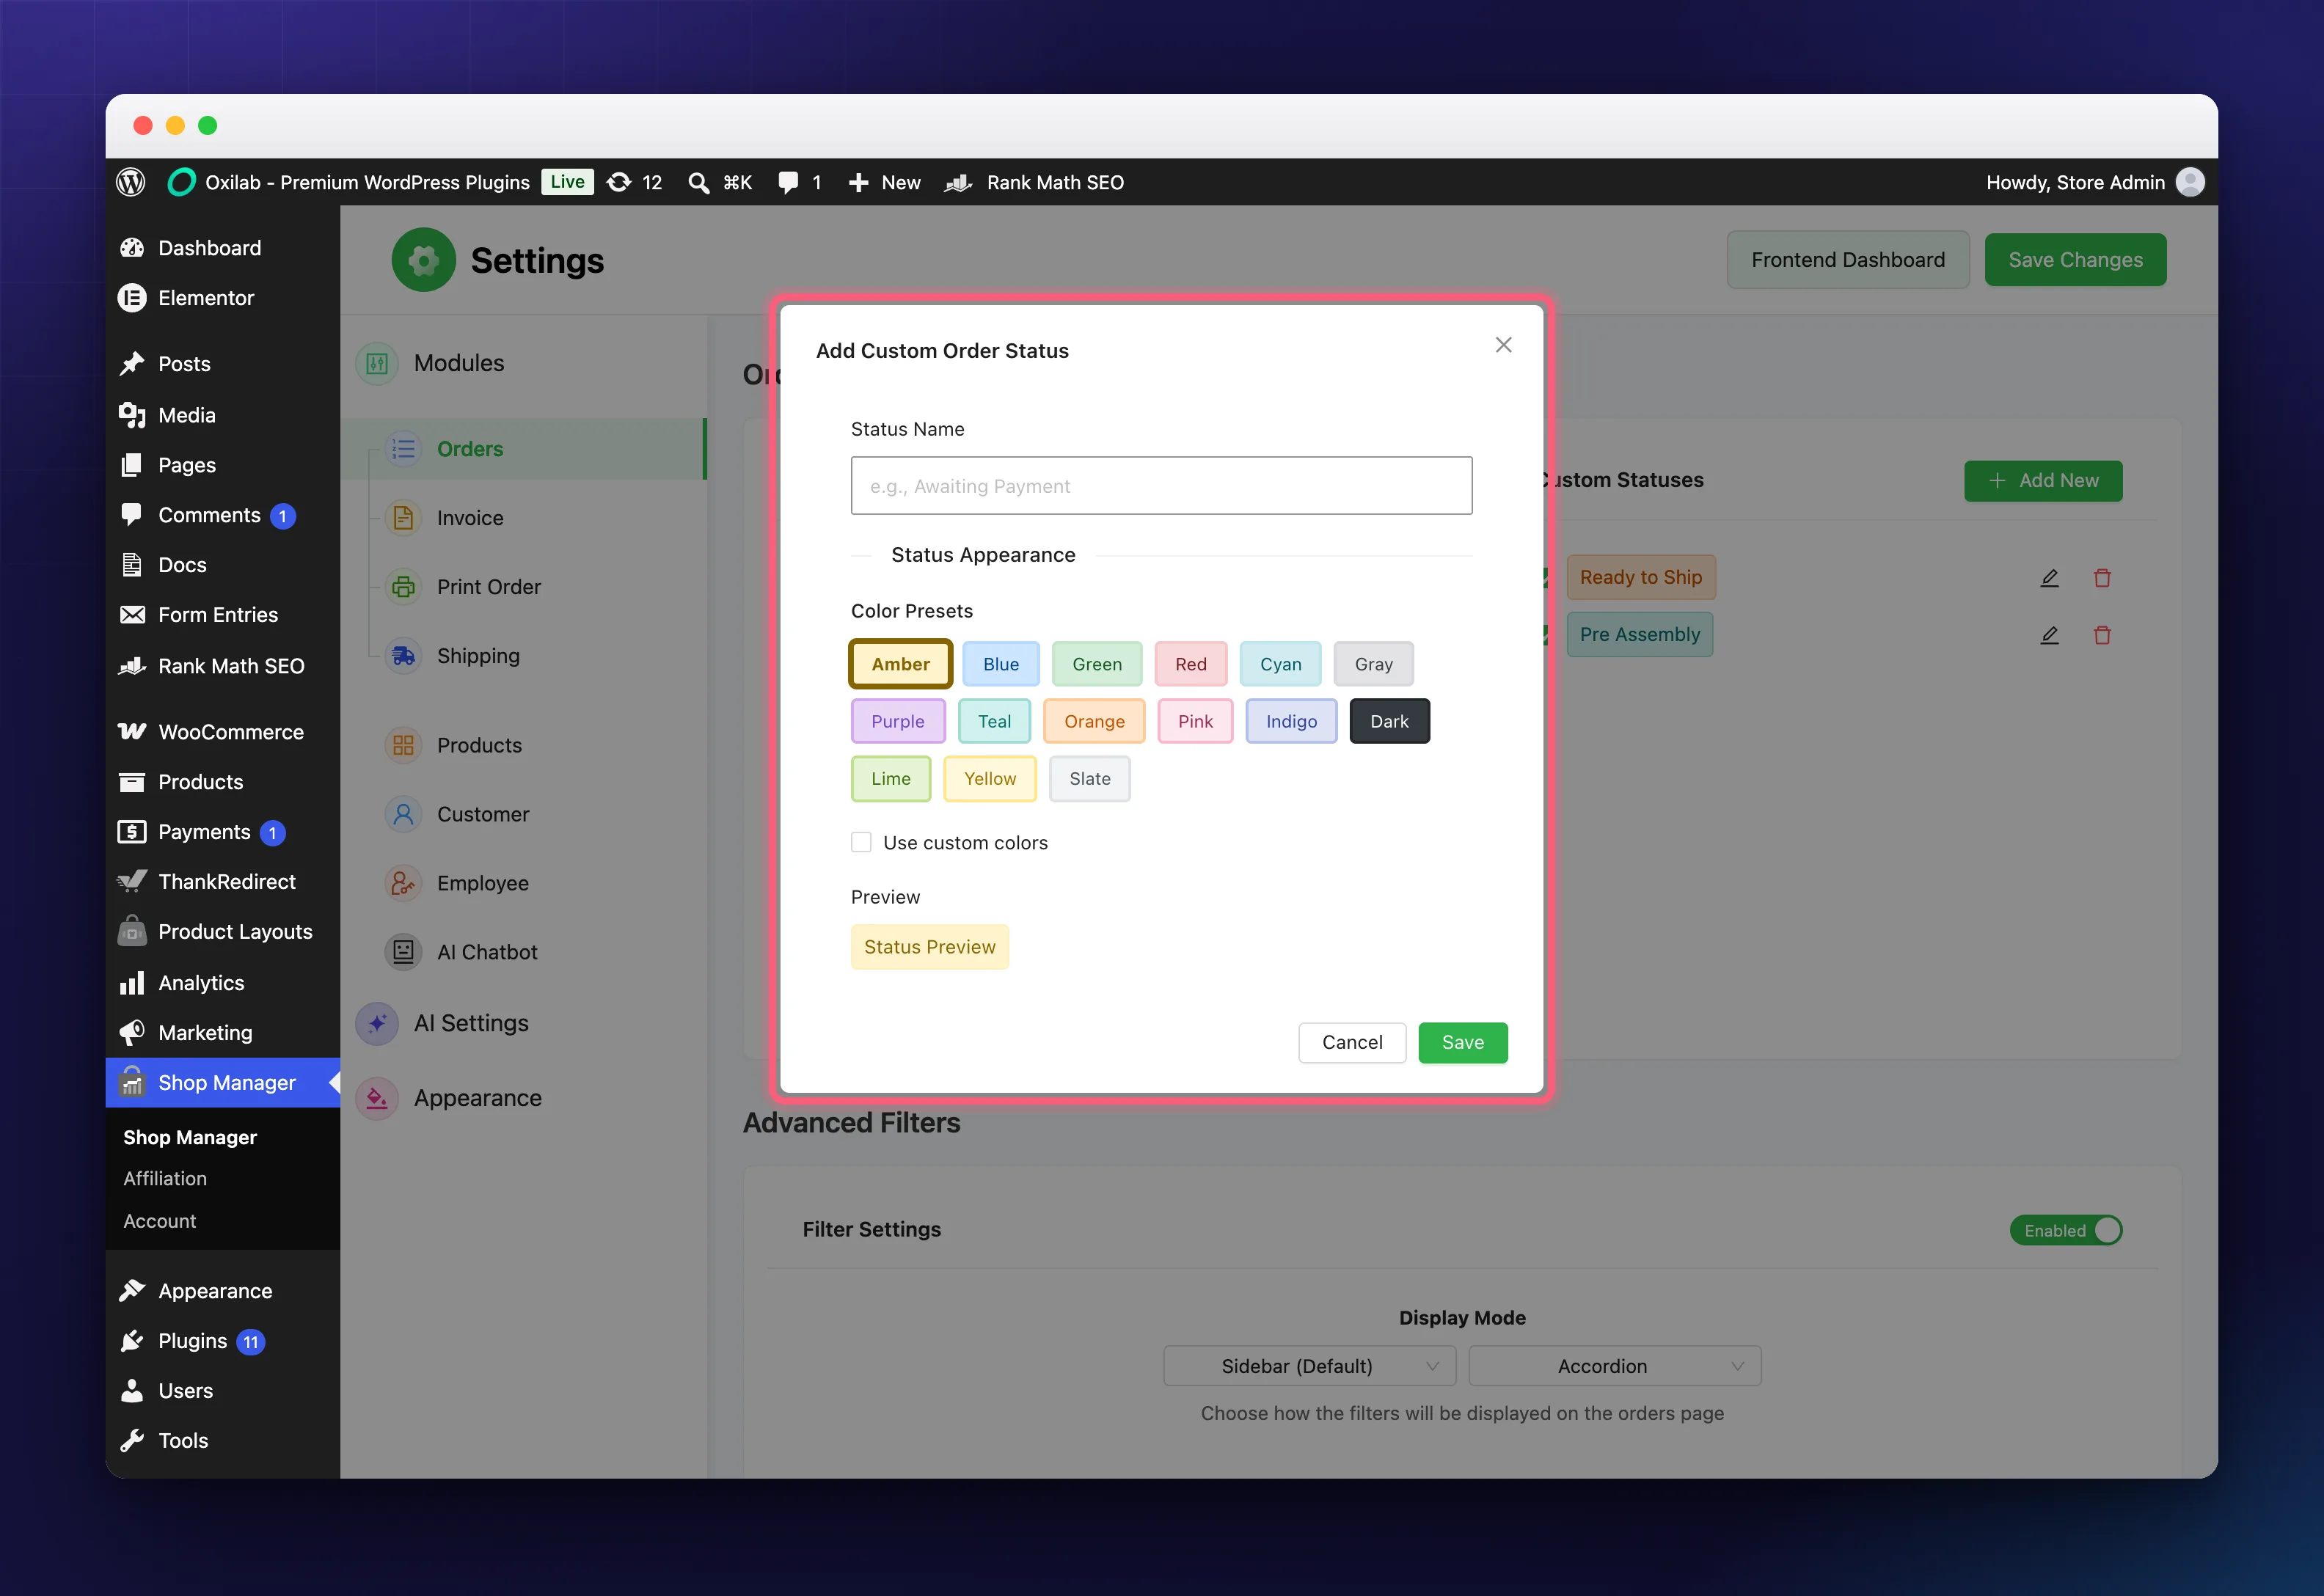
- Type a Status Name. Keep it short, because it has to read well on a small badge: Packed beats Order has been packed. The slug is generated for you.
- Pick one of the 15 colour presets, or tick Use custom colors for your own. Preview shows the badge as you go.
- Click Save in the editor, then Save Changes on the settings page.
- Tick the new status in the card so it gets a tab on the frontend Orders screen, and save again.
Using colour consistently pays off here: greens for finished states, ambers for waiting ones, and the order list becomes readable at a glance.
Where a Custom Status Shows Up
A custom status is registered with WooCommerce itself, not just with Shop Manager, so it behaves like a real status everywhere:
- In the status tabs and status menus of your Shop Manager dashboard.
- In WooCommerce’s own order status dropdown, placed right after Processing.
- In WooCommerce analytics reports, with your colours carried into the wp-admin order list.
If Pro is deactivated, the statuses stop being registered with WooCommerce and the card locks again. Nothing is deleted: your definitions stay in the settings and come back when Pro is active.
Troubleshooting
The Custom Statuses card is locked with a PRO tag.
Creating custom statuses needs Pro. See Install & Activate Shop Manager Pro.
My status is missing from the tabs.
Check its box is ticked in the card, that you pressed Save Changes afterwards, and that Pro is active.
The colour did not apply.
Reopen the status, choose a preset or set custom colours, save the editor, then save the settings page. Clear any caching plugin if it still looks old.
Related Documentation
- WooCommerce Order Management: the status tabs and bulk actions in use.
- Create WooCommerce Orders Manually: set a status as you build an order.
- All order management guides