Advanced Order Filters for WooCommerce Stores
Status tabs and the search box only get you so far once you are handling hundreds of orders. Advanced filters let you combine conditions, so “completed orders over $100 placed last week” is one query instead of a lot of scrolling. They are part of the free plugin, but they are switched off until you turn them on.
1. Switch Them On
In your WordPress admin, go to Shop Manager → Settings → Orders and scroll to Advanced Filters.
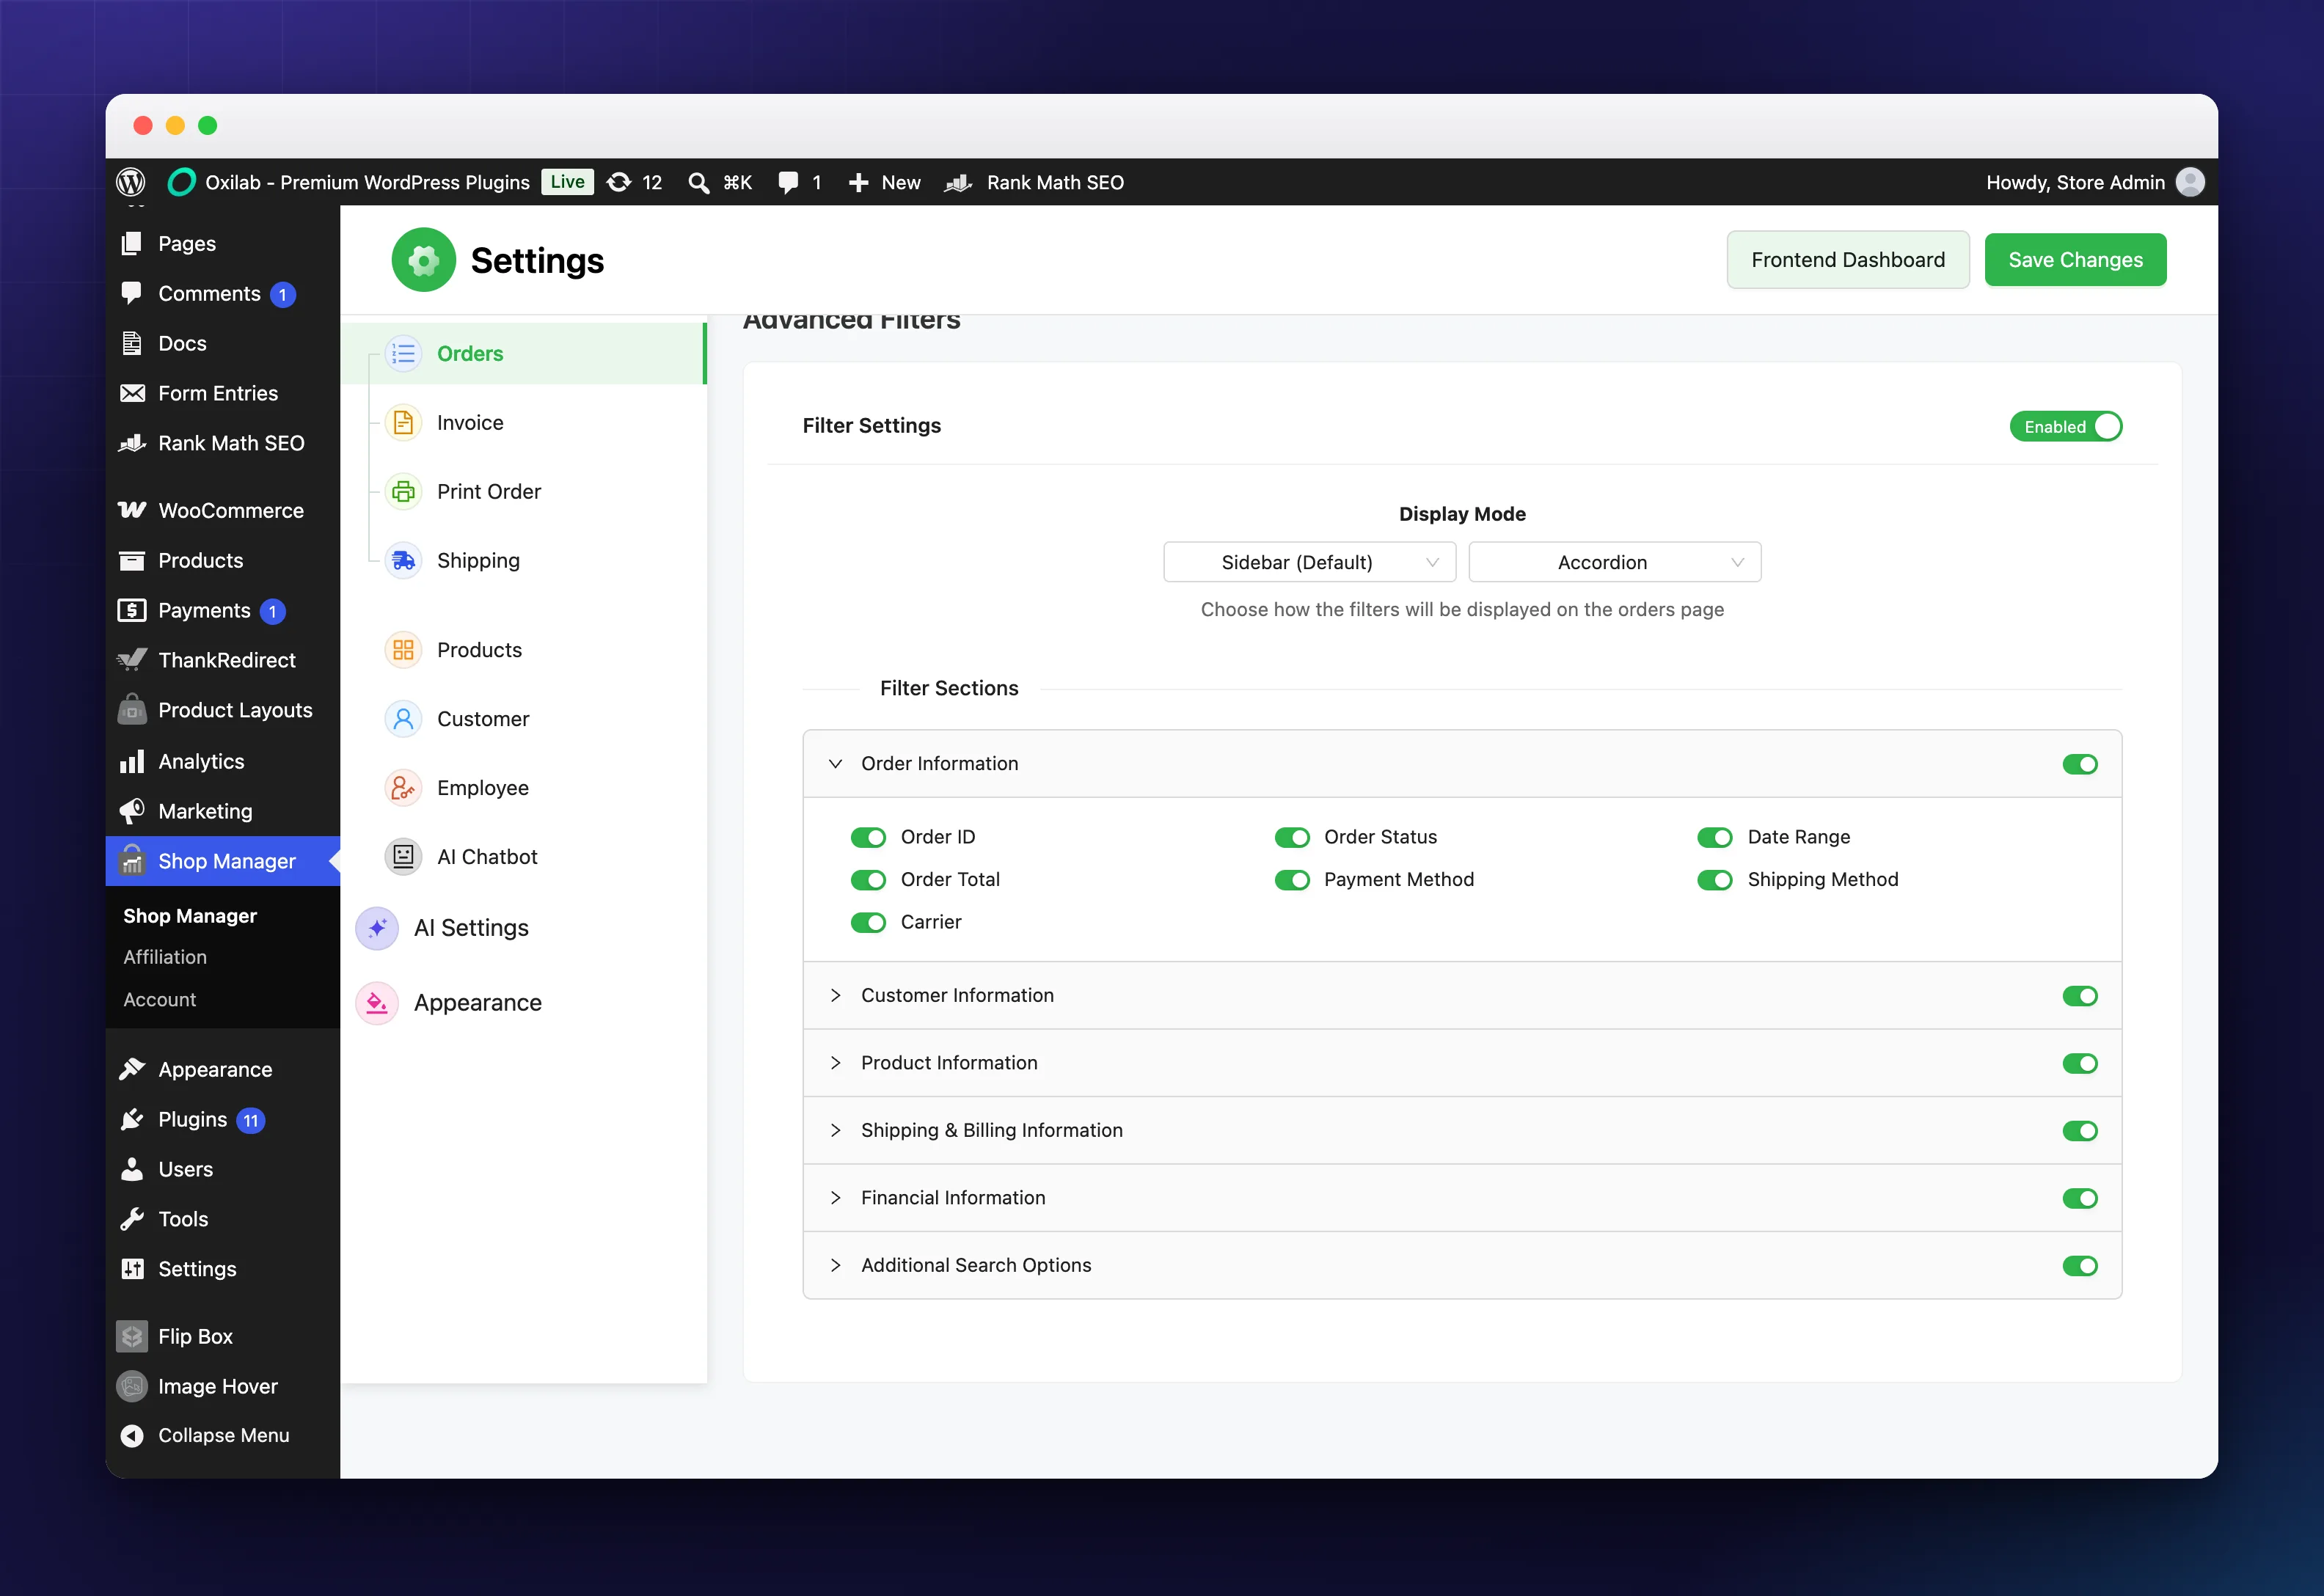
Turn Filter Settings to Enabled, then decide how the panel should appear:
- Display mode: Sidebar slides in from the right (the default), Section opens inline on the page, Modal opens a popup.
- Display style: Accordion keeps the groups collapsed, Expanded Section shows everything at once.
Sidebar suits a desktop, Modal is easier on a small screen. Press Save Changes when you are done.
2. Choose Which Filters Appear
Under Filter Sections, each group has its own switch, and each field inside it has one too. A field stays locked until its section is on.
- Order Information: Order ID, Order Status, Date Range, Order Total, Payment Method, Shipping Method, Carrier.
- Customer Information: Customer Name, Customer Email, Customer Phone, Guest Orders.
- Product Information: Product Name, Product SKU, Product Category.
- Shipping & Billing Information: Shipping Country, Shipping State/Region.
- Financial Information: Coupon Code, Refund Status, Payment Status.
- Additional Search Options: Order Notes, Custom Meta.
Switch on only what your team really uses. A short panel is quicker to work with than one holding twenty fields nobody touches.
3. Filter Your Orders
Back in the dashboard, open Orders. A Filters button now sits in the header.
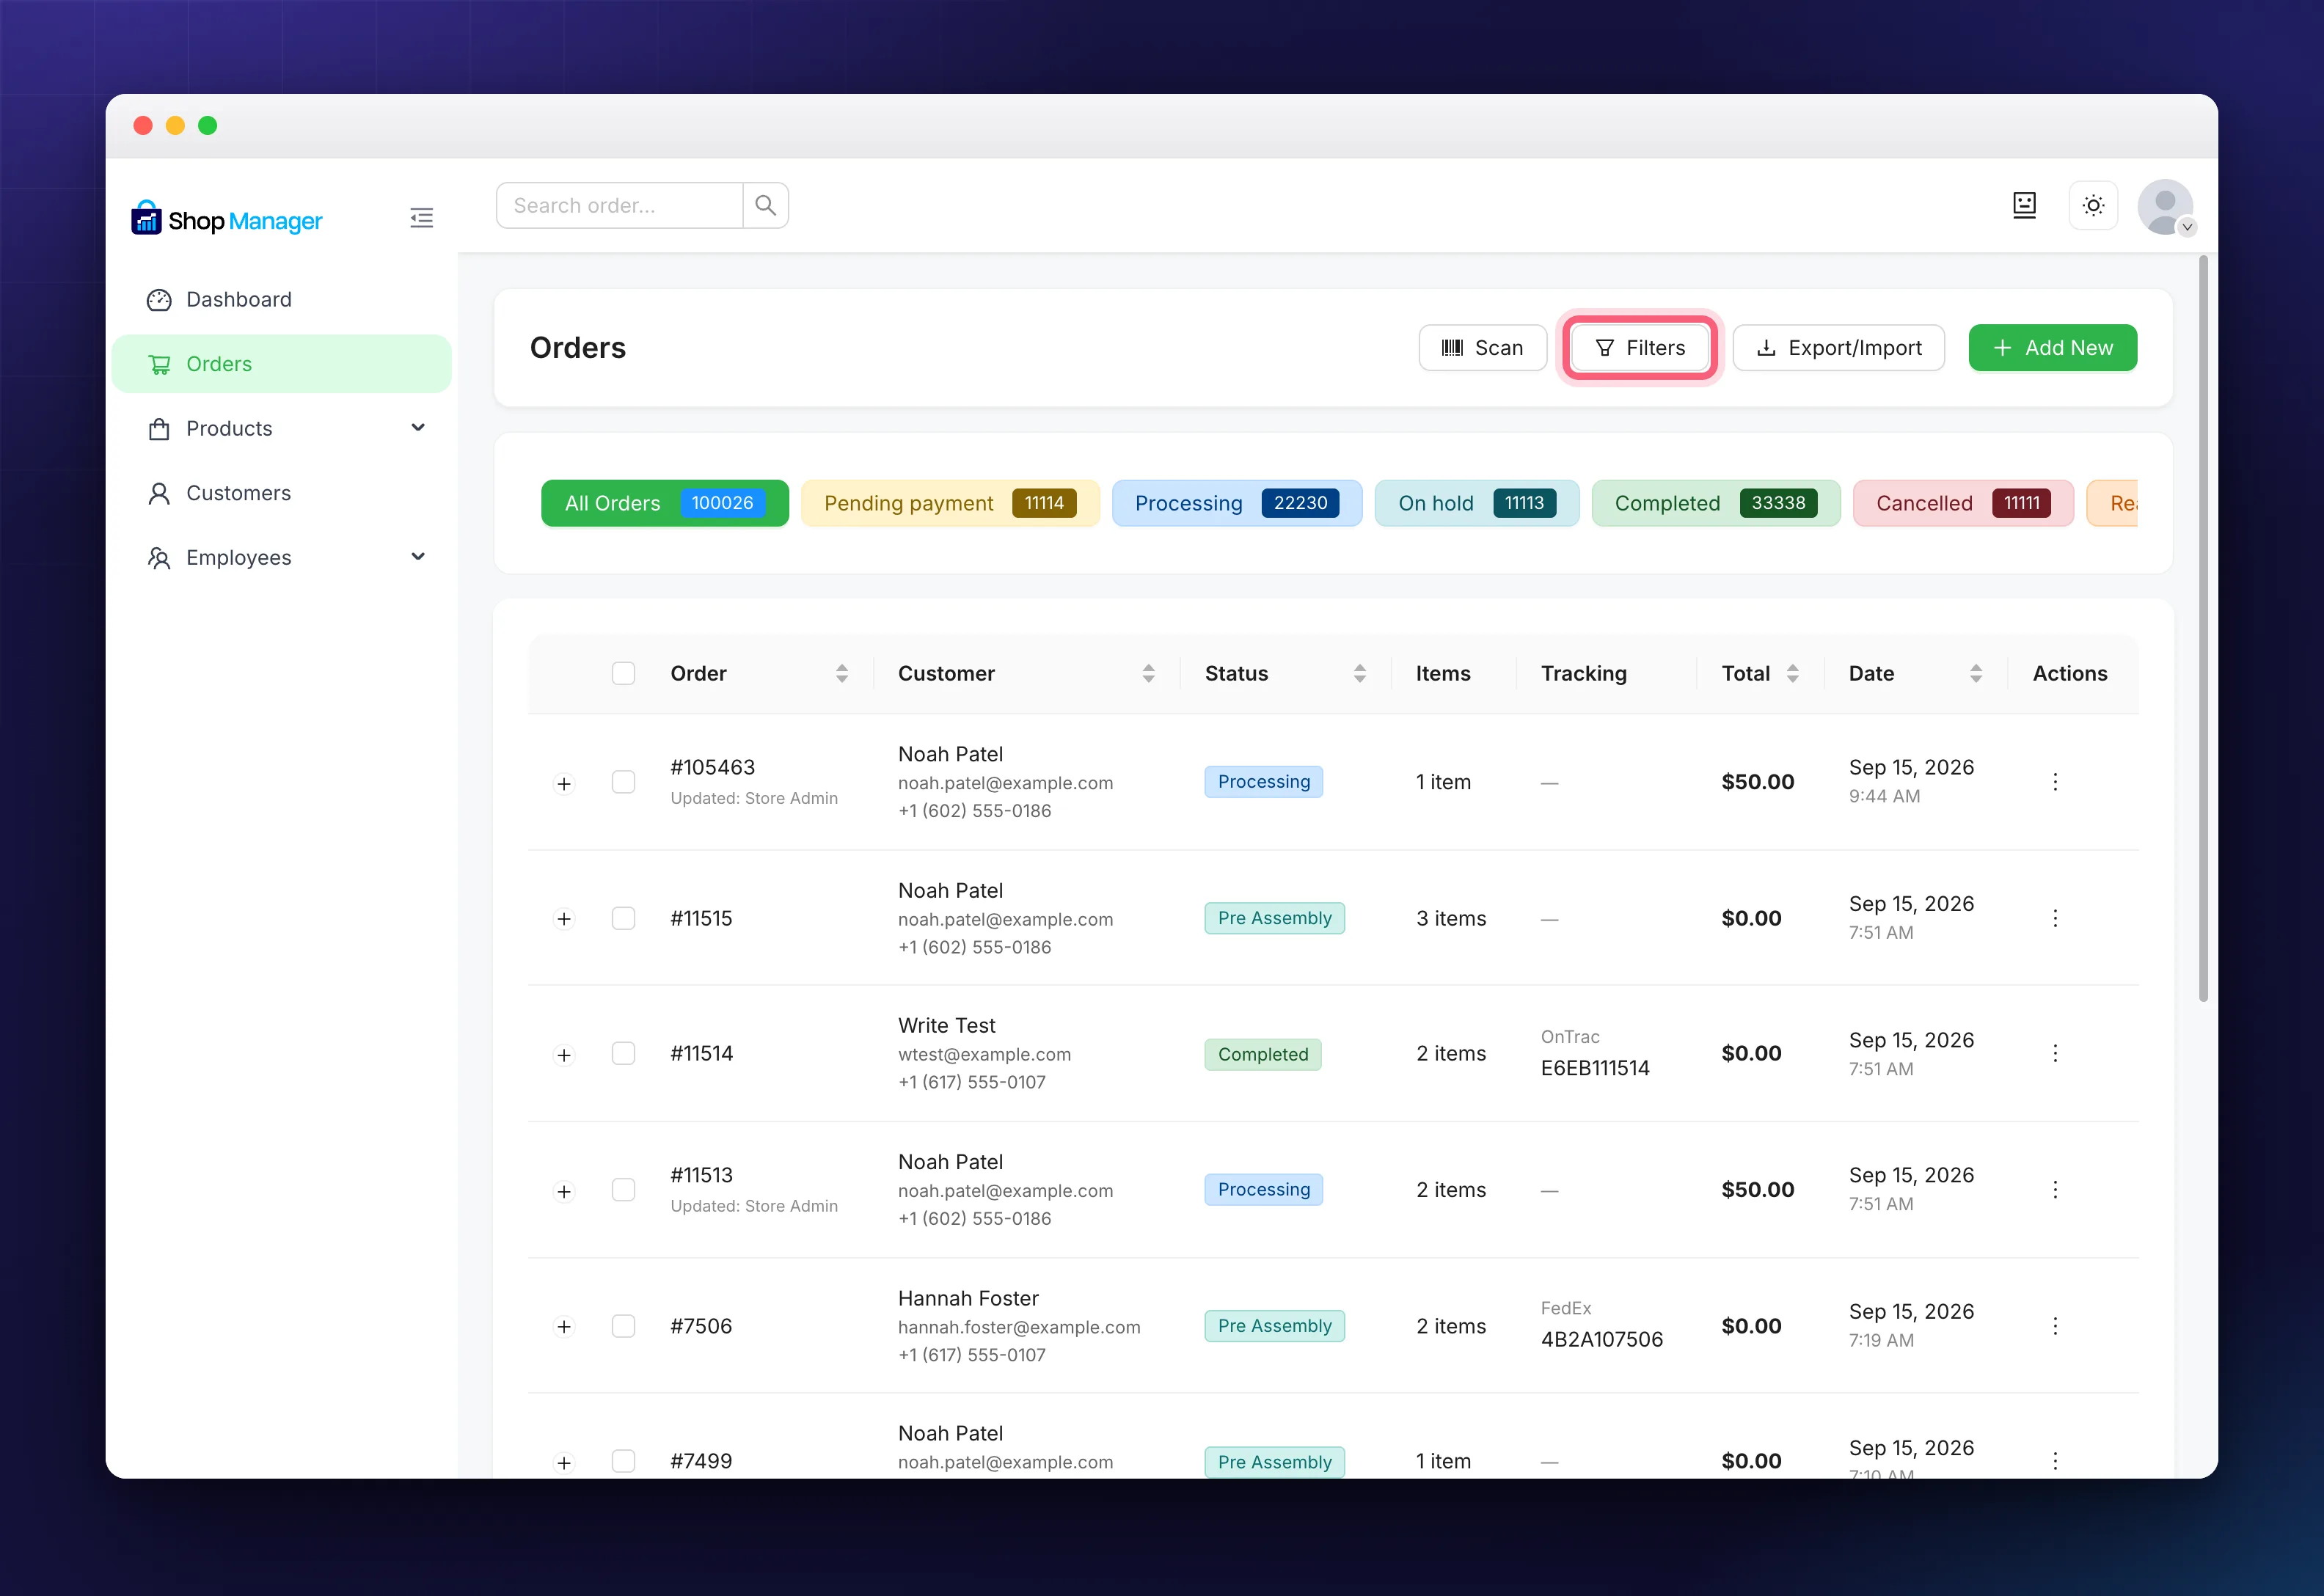
If that button is not there, filters are still switched off in the settings, or the page was not saved.
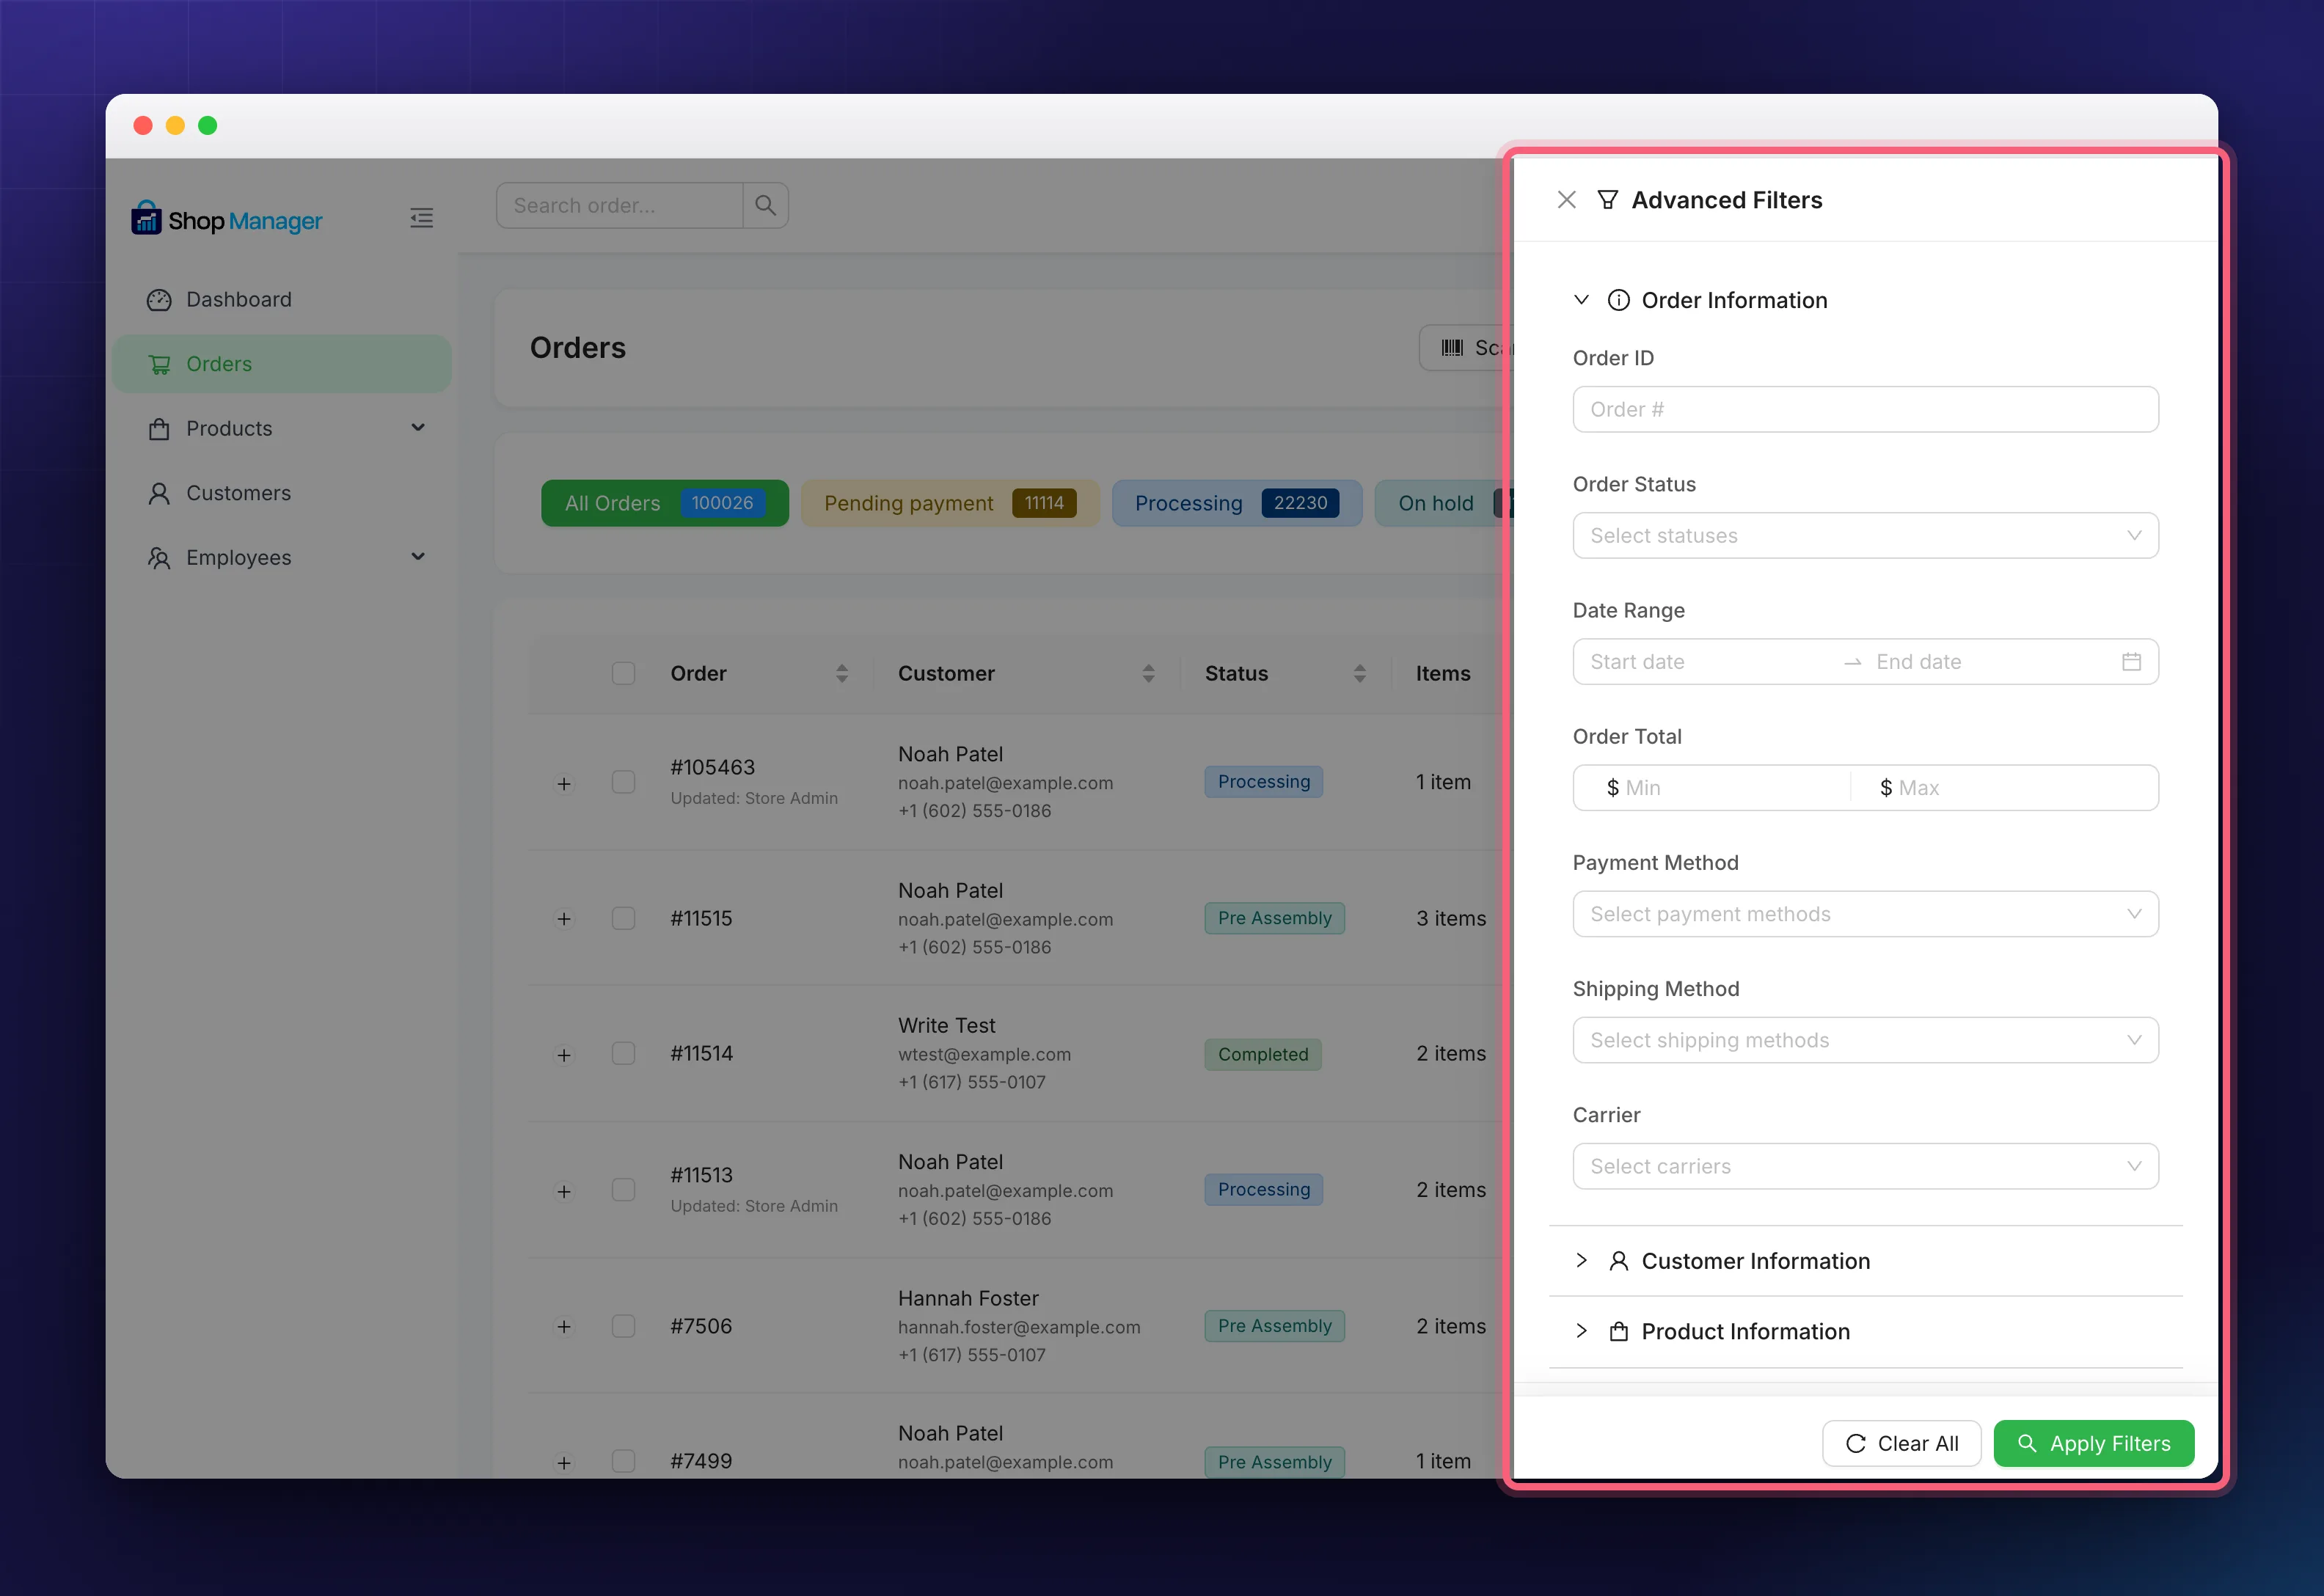
Set your conditions across the groups you enabled, then press Apply Filters. The list narrows to orders matching every condition, so each one you add makes the result smaller. Clear All empties the panel.
Whatever is active appears as chips above the table. Click a chip’s ✕ to drop that one condition, and the Filters button carries a small count badge so you can see at a glance that the list you are looking at is filtered.
Troubleshooting
No Filters button on the Orders screen.
Filters have to be enabled under Shop Manager → Settings → Orders → Advanced Filters, and the page saved afterwards.
A section is on but its fields are missing.
The fields have their own switches. Turn on the ones you want inside the section, then save.
No orders come back.
The conditions are combined, so they may be too narrow together. Drop a chip or two, or press Clear All and build the query up again.
Related Documentation
- WooCommerce Order Management: the status tabs and header search, which need no setup.
- Custom Order Status: statuses of your own to filter by.
- All order management guides