Print WooCommerce Shipping Labels with Barcodes
Shop Manager prints a proper WooCommerce shipping label straight from your browser: the delivery address, a real scannable barcode, the parcel contents and the cash to collect. No PDF plugin, no Pro licence and no monthly fee. It works with a 4-inch label printer, an inexpensive 80 mm or 58 mm thermal roll, or plain A4 paper.
Before You Print a WooCommerce Shipping Label
- The Shipping & Tracking module is switched on. It is on by default, see Shop Manager modules.
- Your role includes the Shipping & Tracking or the Edit Orders permission.
- Your printer is installed on your computer the normal way (see Which Printers Work below).
Printing a WooCommerce Shipping Label
There are three ways to print, and they all open the label in a new browser tab:
- One order: open the order and click Shipping Label at the top, or Label on the Shipping & Tracking card.
- From the Orders list: click the ⋮ menu on any row and choose Shipping Label.
- Many at once: tick several orders and click Shipping Label in the bar that appears above the list. You get one document with one label per order, up to 100 orders at a time.
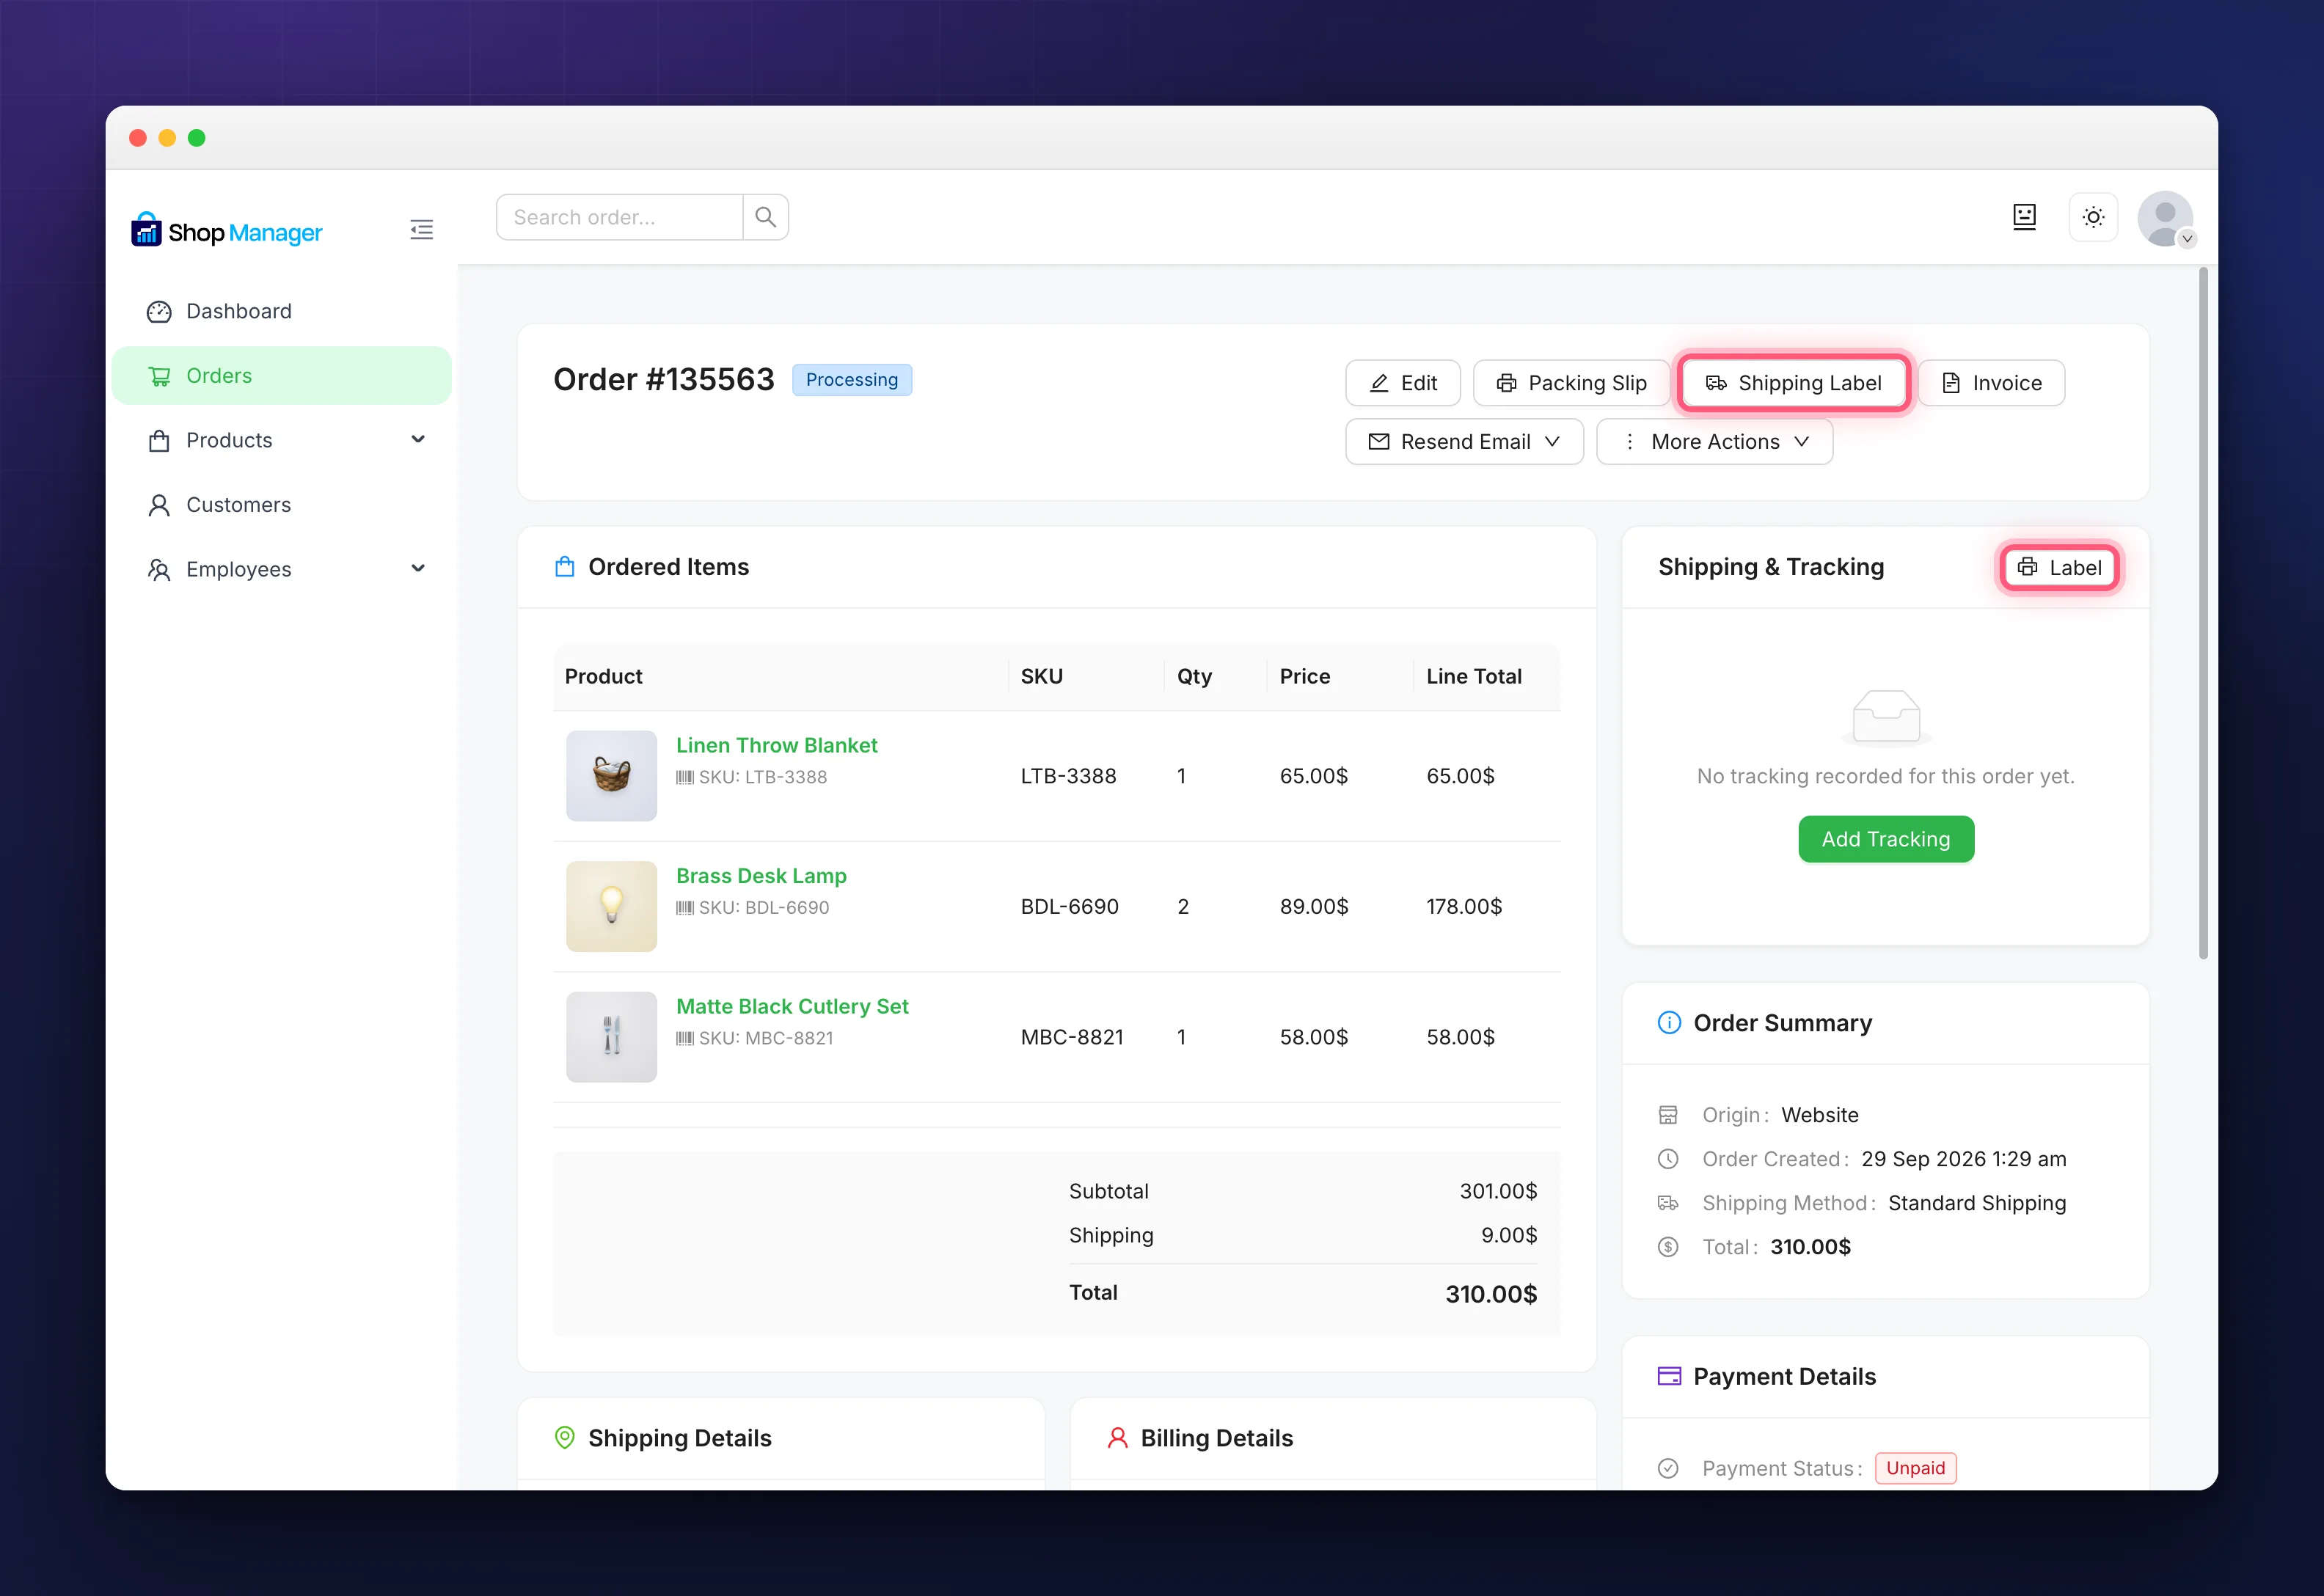
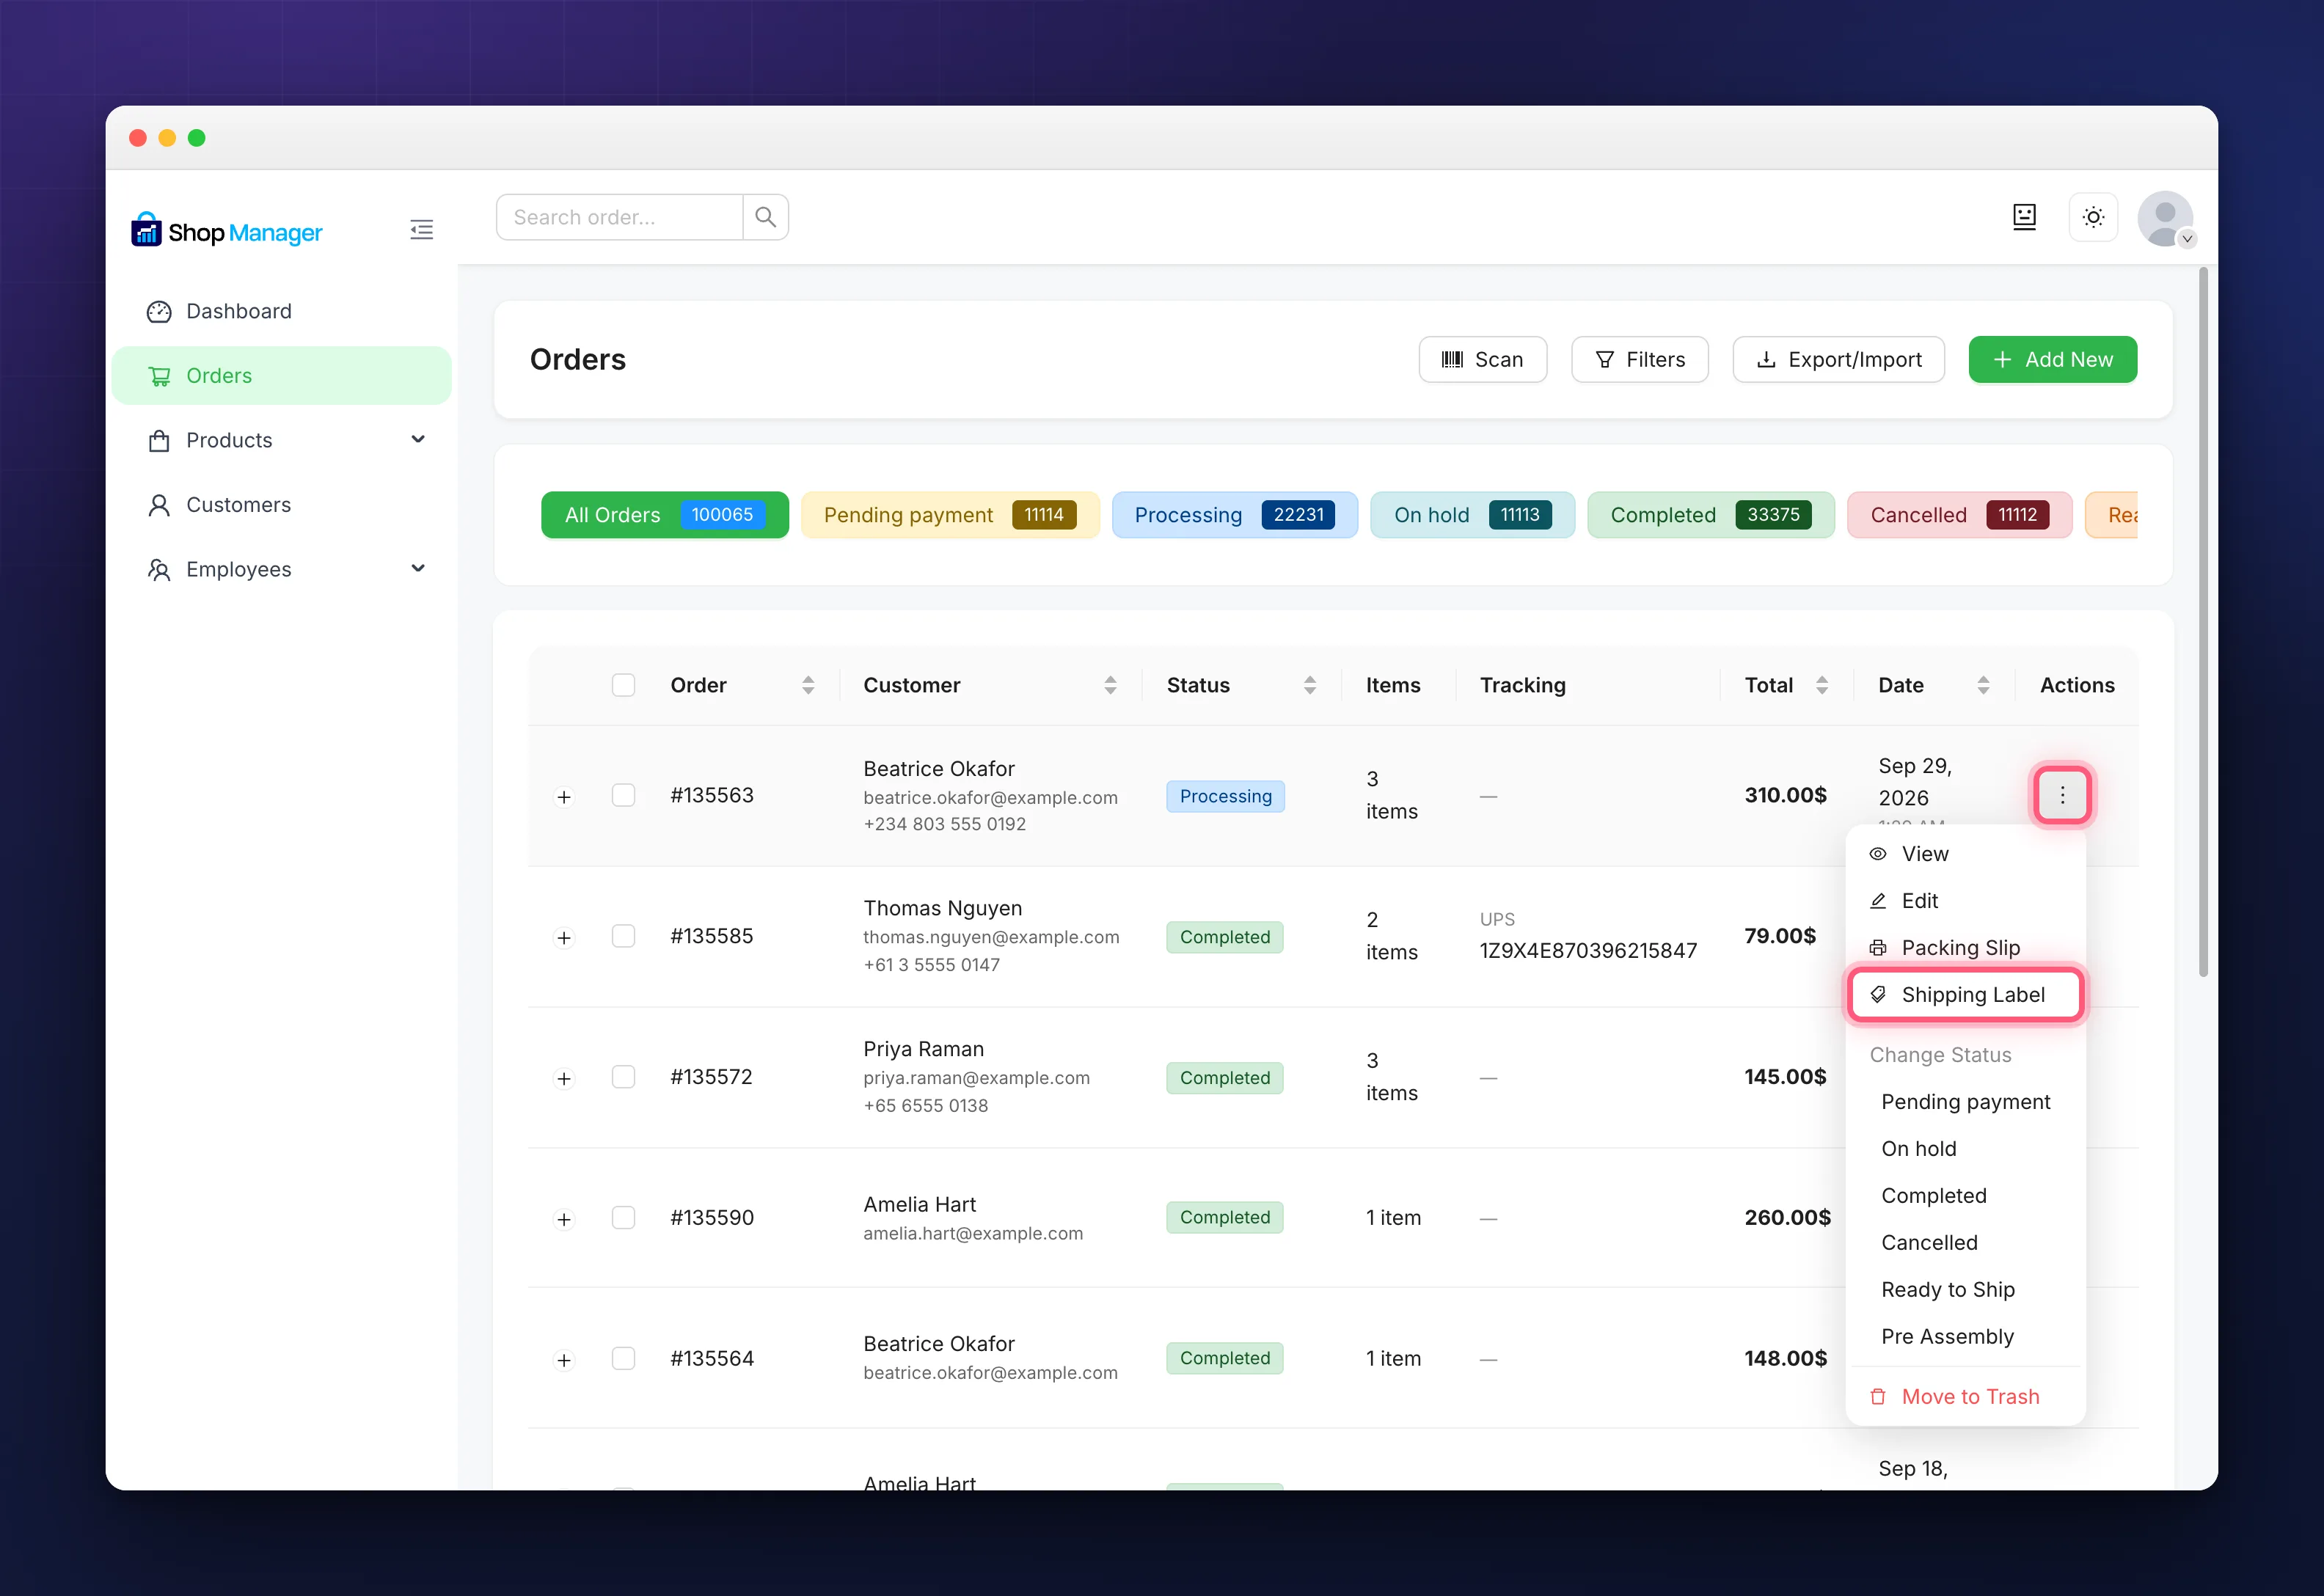
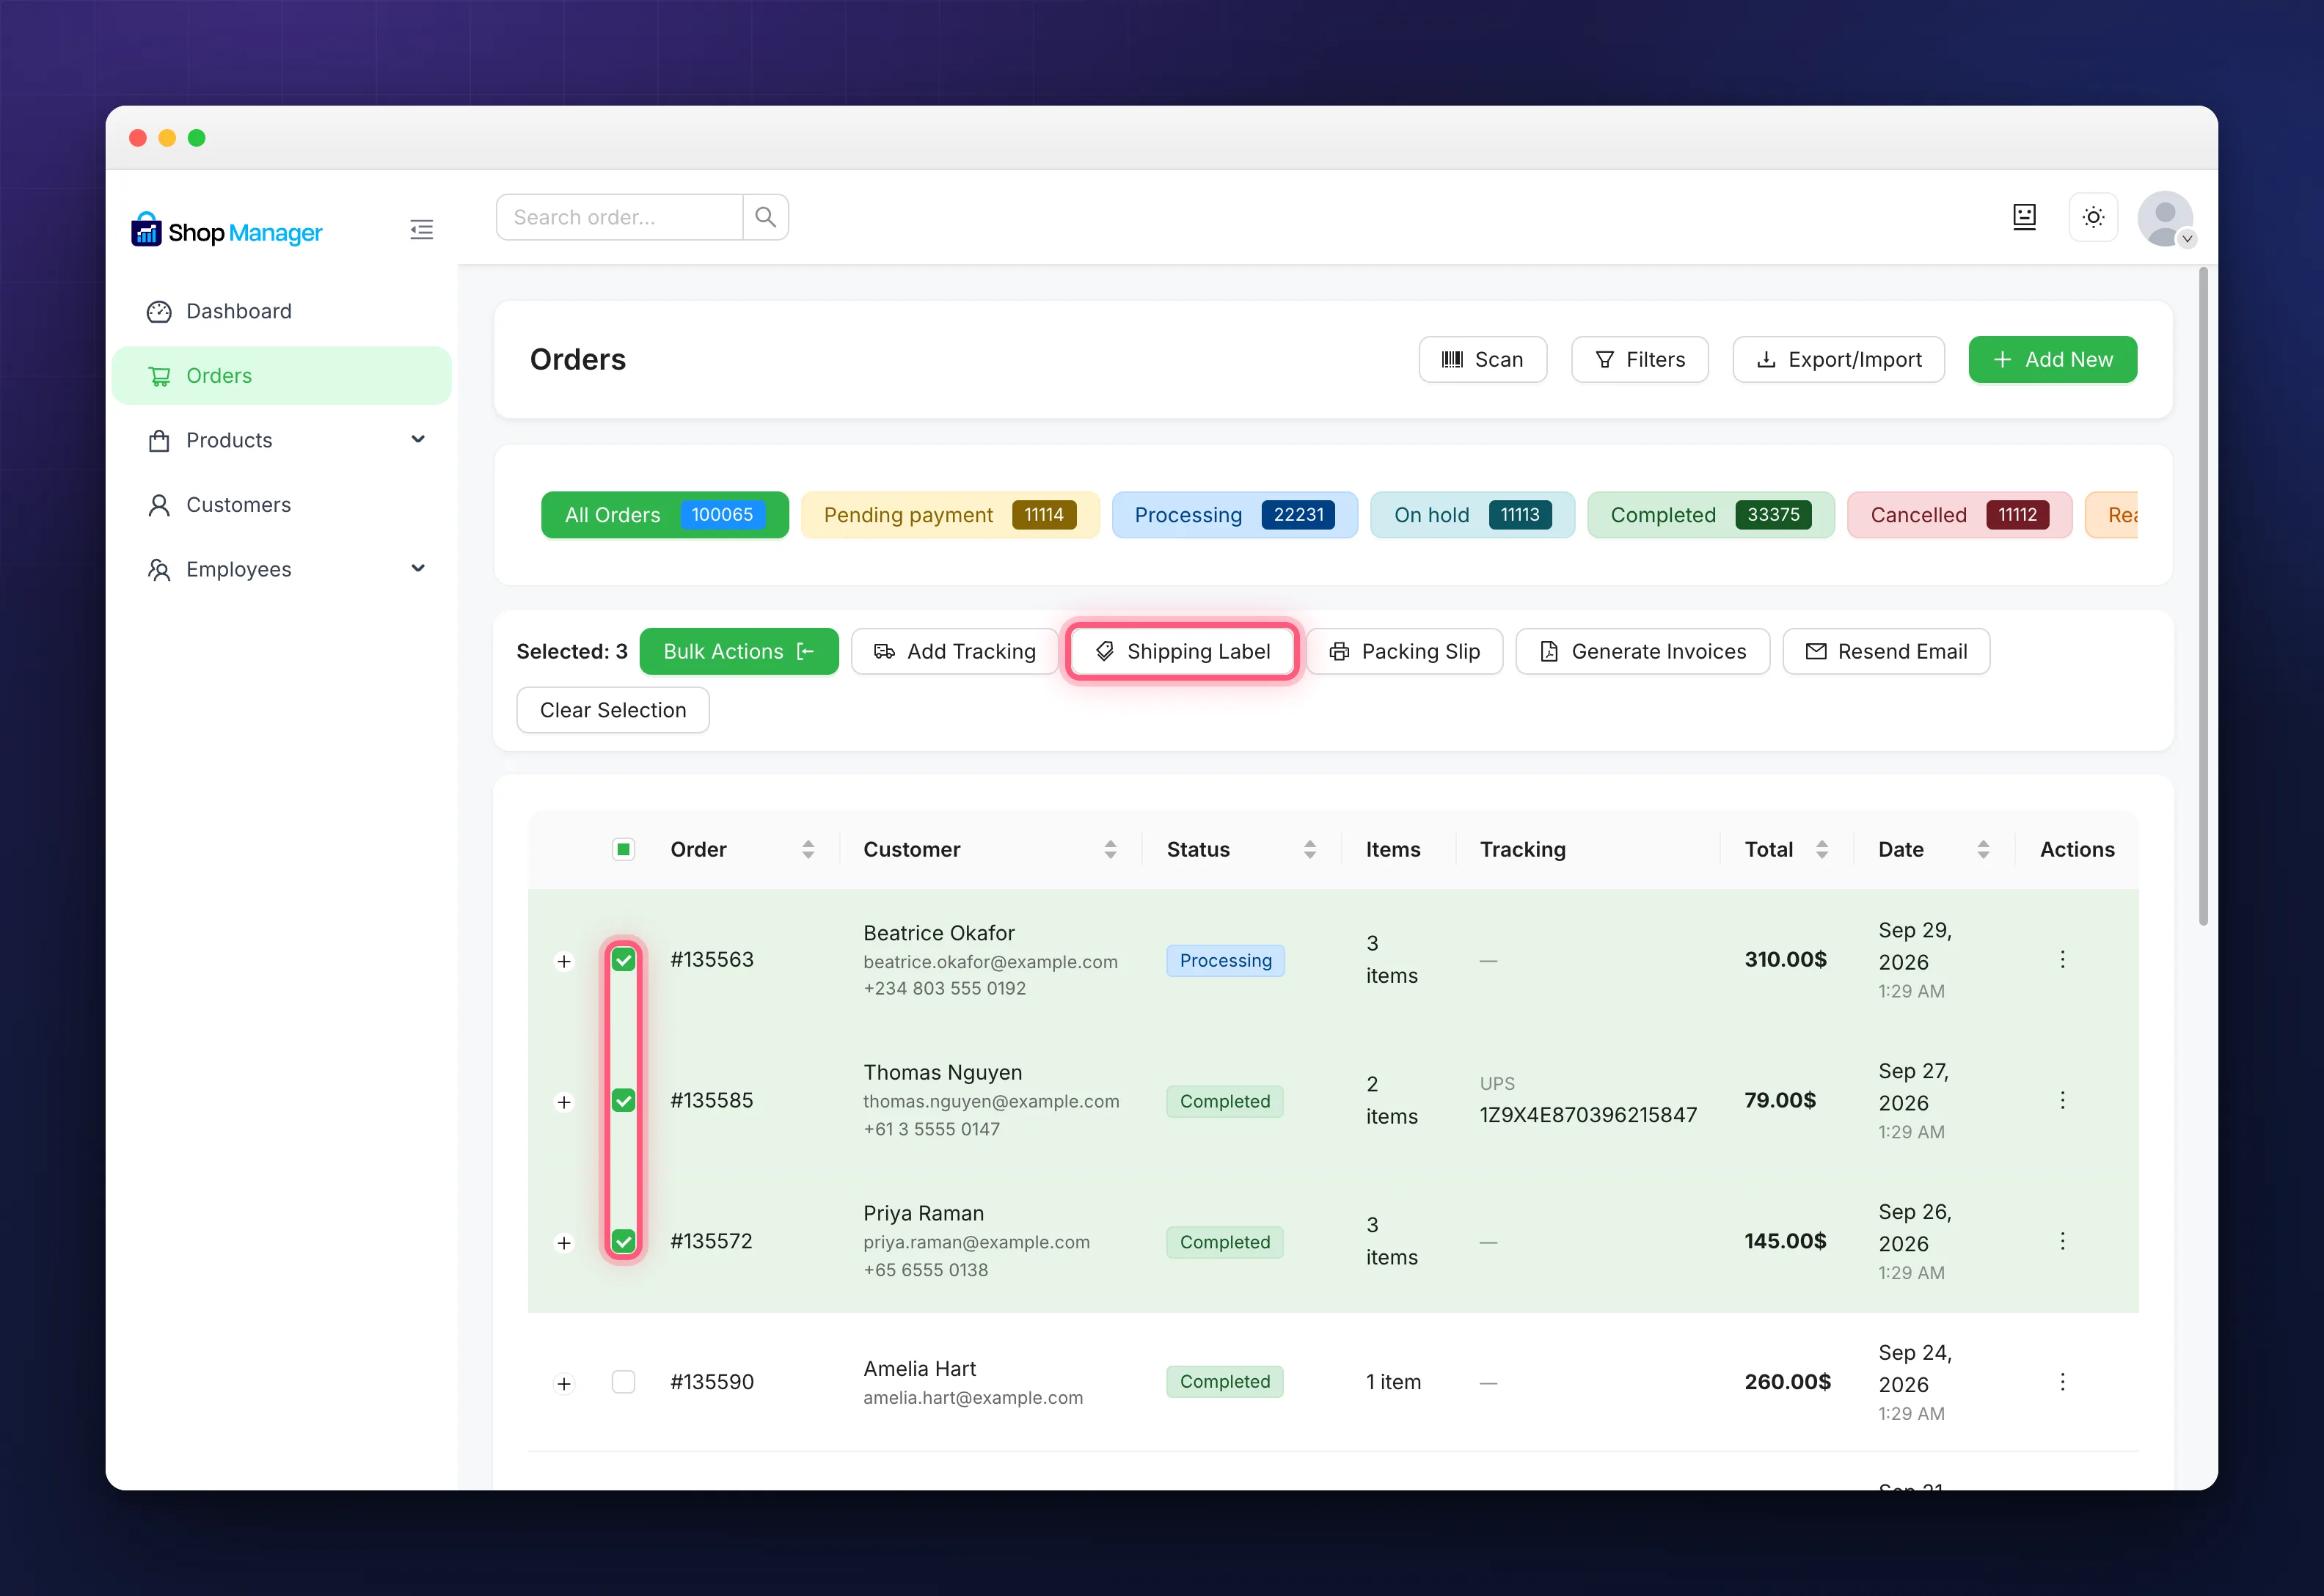
The buttons are named after your label’s Document Title, so if you rename it (for example to “Address Label”), the buttons follow.
The new tab shows the label with Print and Close buttons at the top. By default your browser’s print dialog opens by itself. If you have switched that off, check the label and click Print.
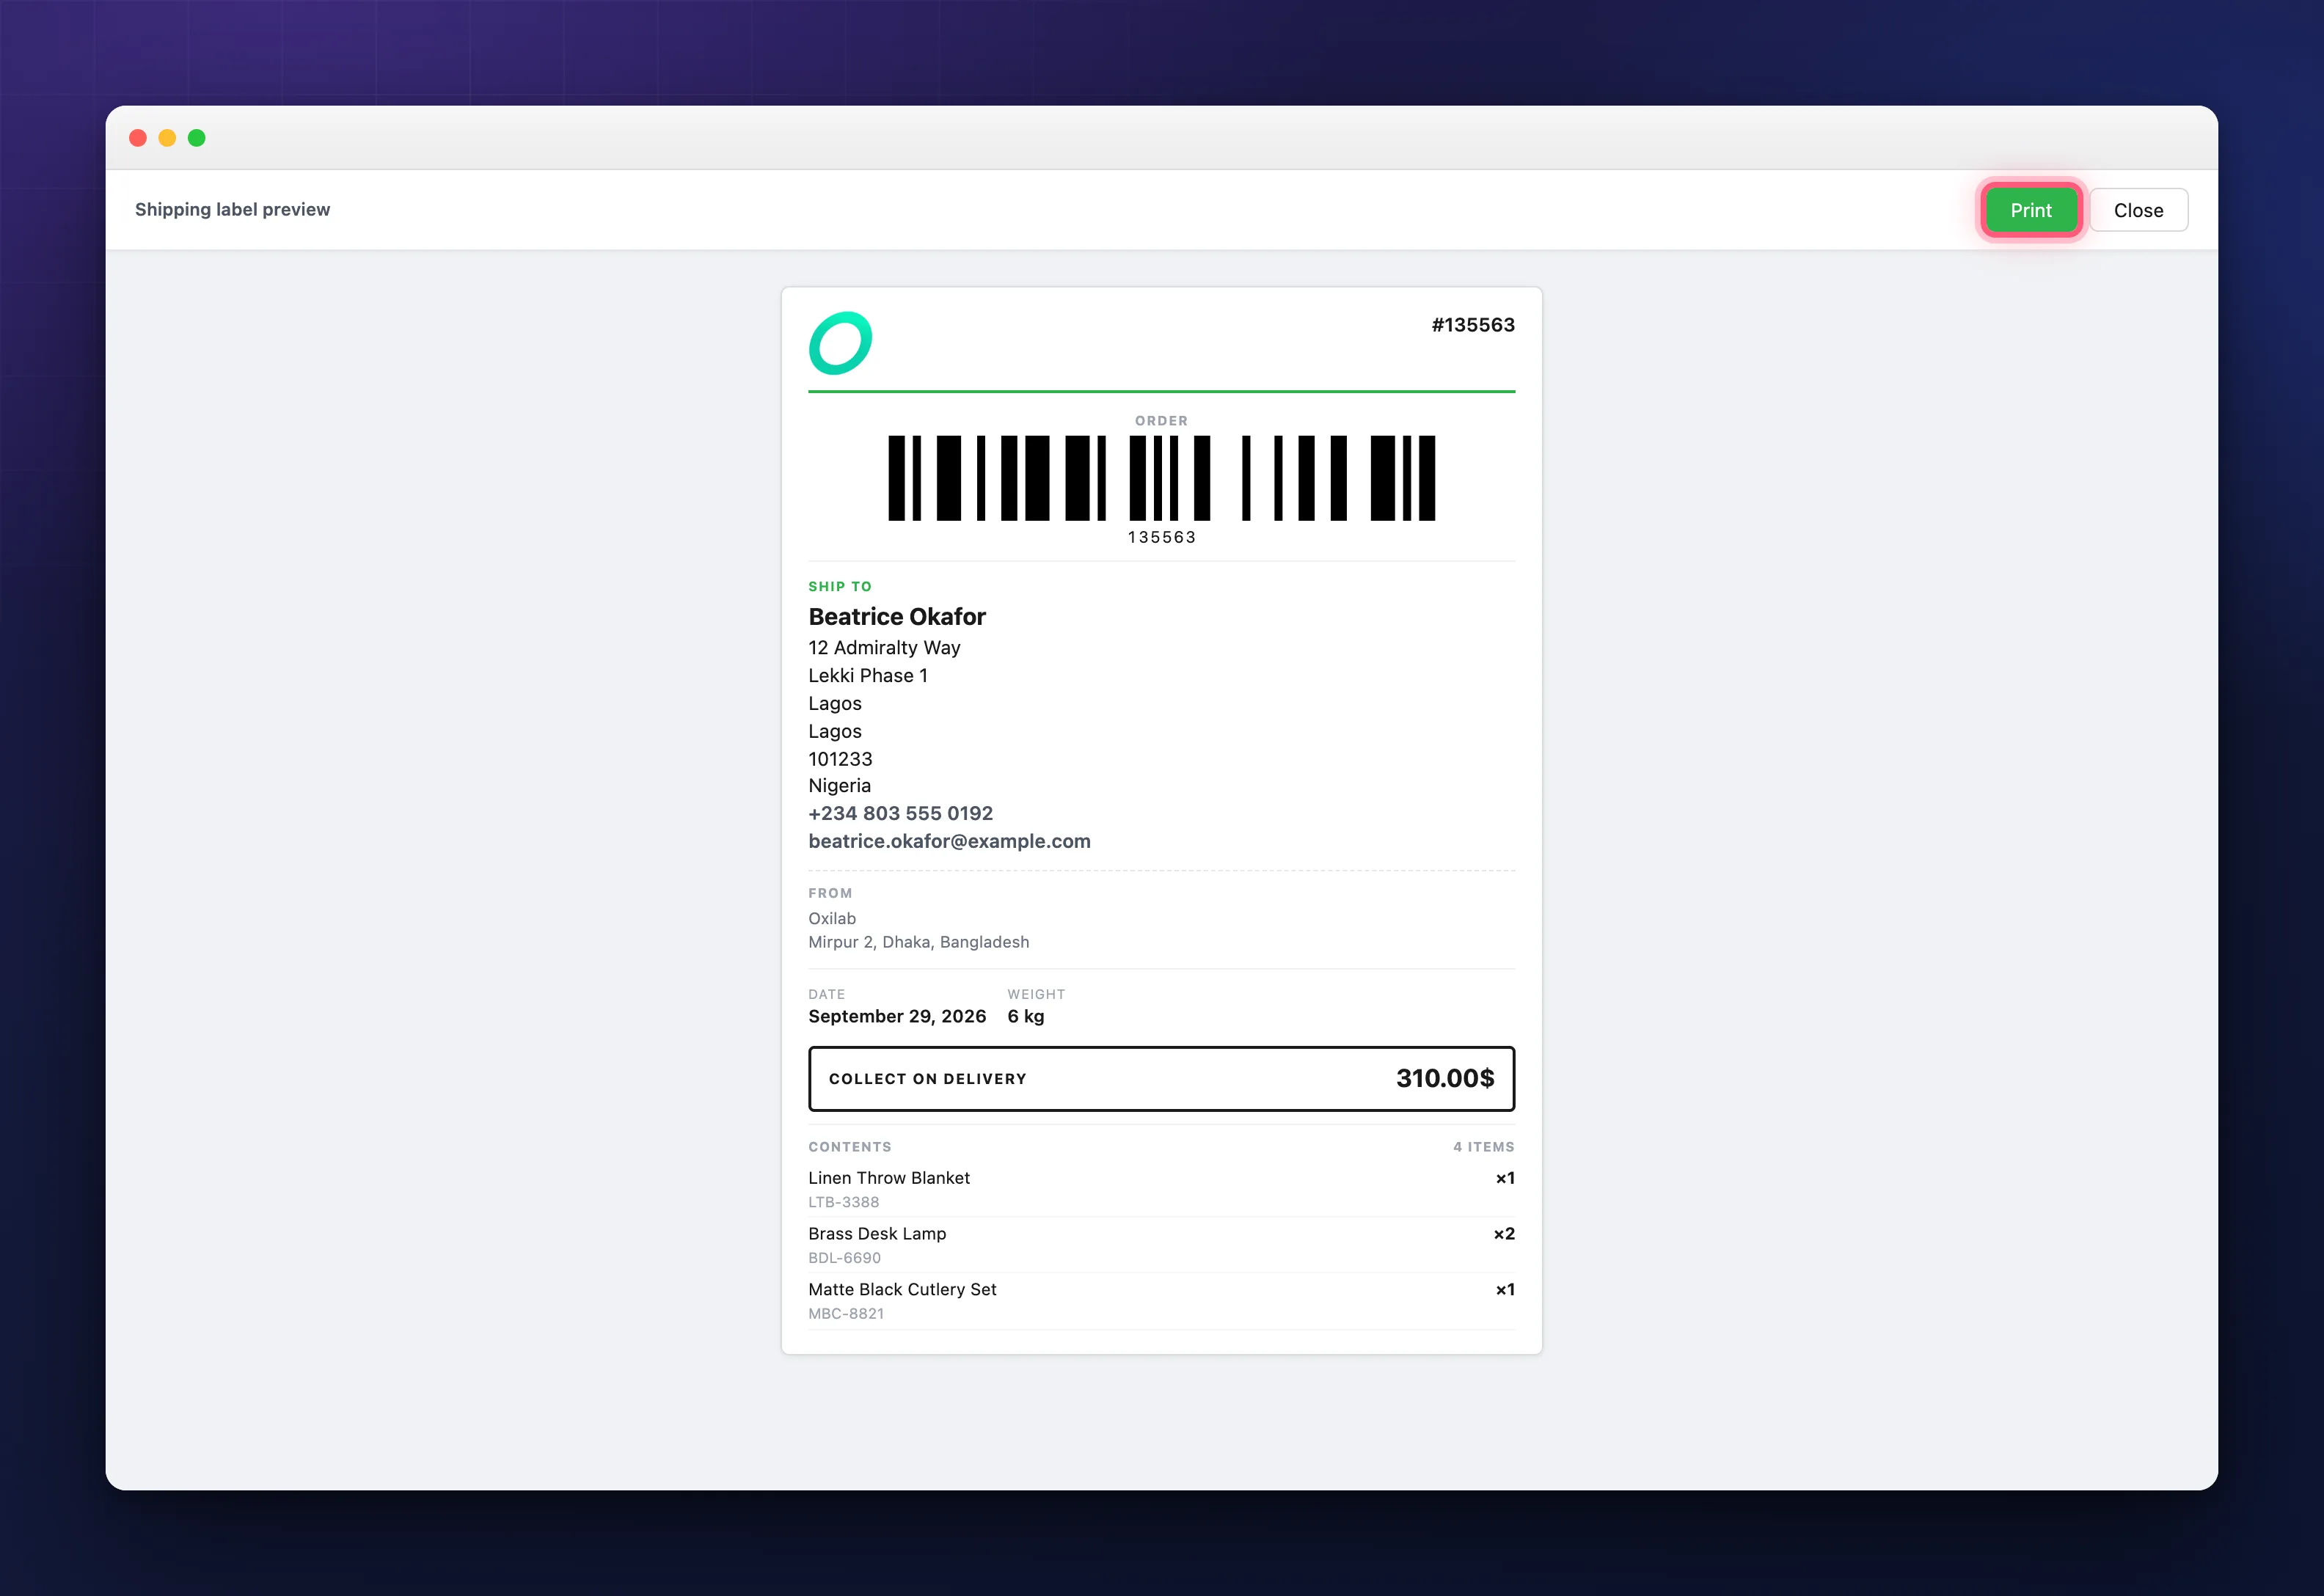
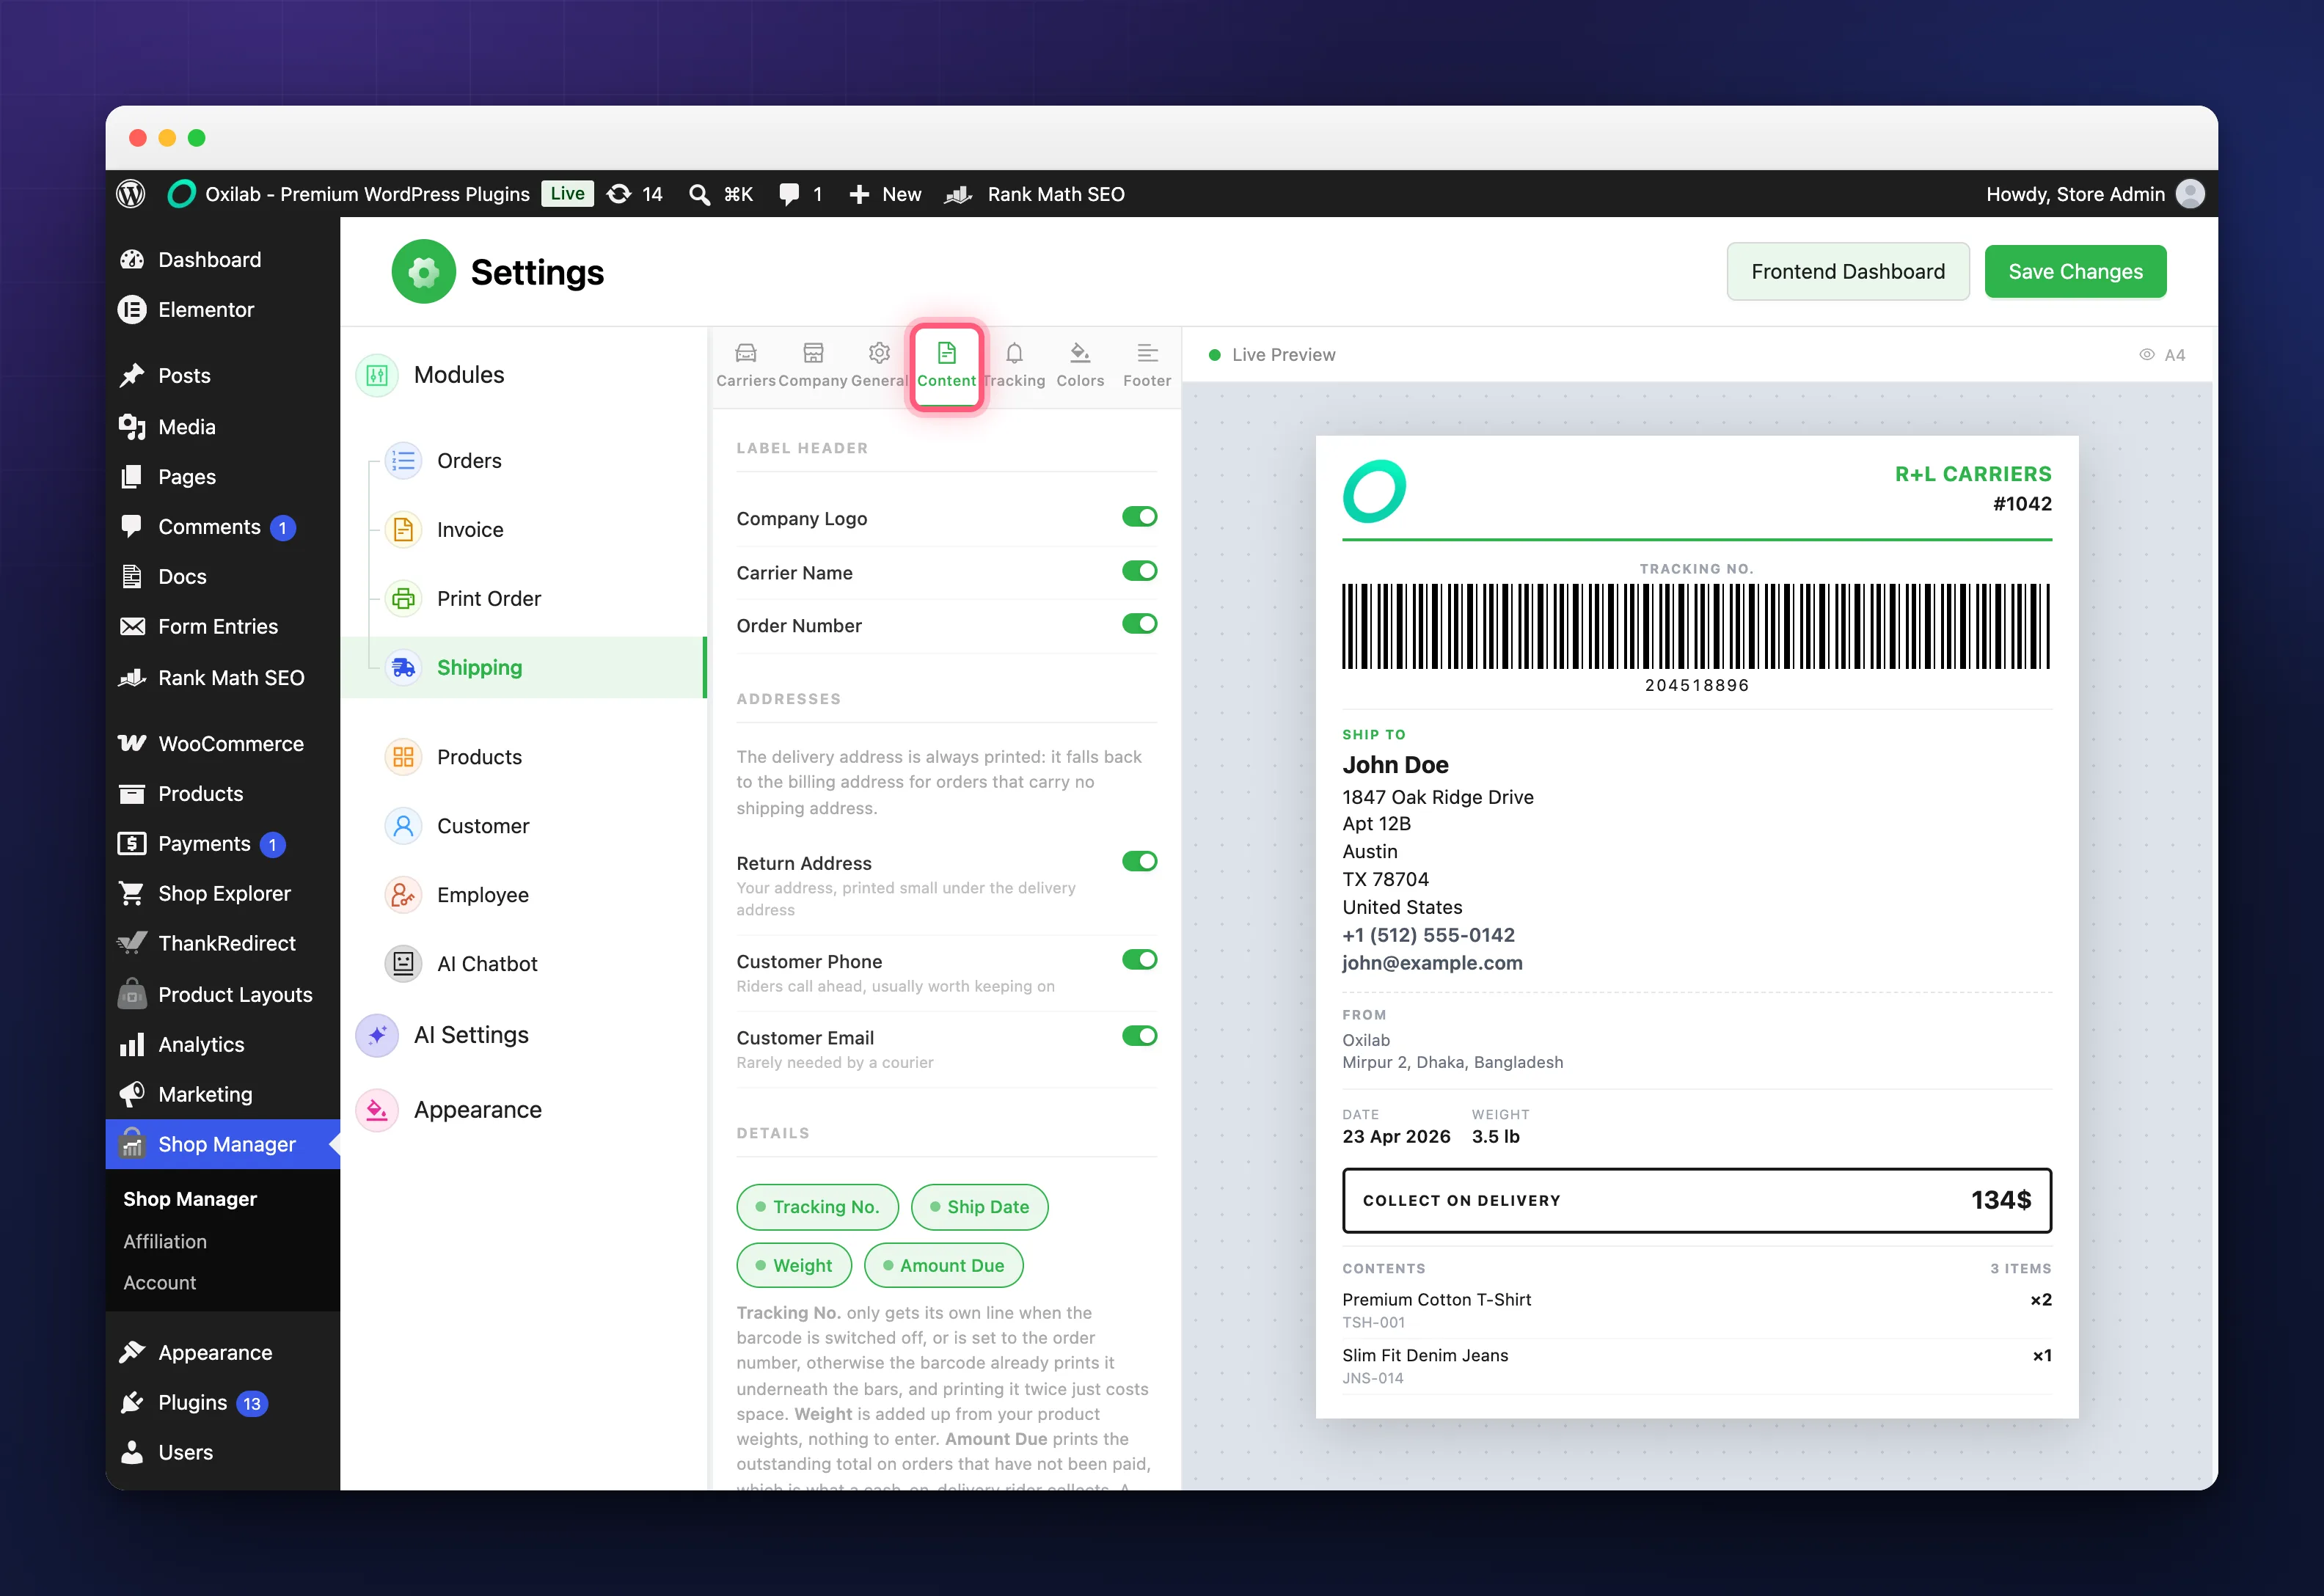
You don’t need a tracking number first. Most shops stick the label on the box before the courier arrives. If there is no tracking number yet, the label prints your order number as the barcode instead, as in the label above.
What’s on the WooCommerce Shipping Label
- Your logo and the courier’s name across the top, with the order number. With no logo set, your store name is printed instead.
- A barcode: a real Code 128 barcode, the same type couriers print themselves, stretched across the full width of the label so it is easy to scan.
- Ship to: the delivery address, with the customer’s name set large so a rider reads it first, and their phone number. Orders with no shipping address use the billing address.
- From: your return address, printed small underneath.
- Date and weight. The date is the ship date, or the order date if nothing has shipped yet. The weight is added up from your product weights, so there is nothing to type.
- Tracking number: only gets its own line when the barcode is not already showing it.
- Collect on delivery: a boxed amount showing what the rider must collect. More on this below.
- Contents: the items and quantities in the parcel, with SKUs, which turns the label into a packing check as well.
- Delivery note: whatever the customer wrote at checkout, like a gate code.
You switch each part on or off on the Content tab of the Shipping settings (see Making the Label Look Like Your Shop below). Weight, Delivery Note and Customer Email are off until you turn them on. The barcode itself has its own switch, Print Barcode, on the General tab.
The Cash-on-Delivery Amount
If an order still has money to collect, the WooCommerce shipping label prints the outstanding total inside a bold box marked COLLECT ON DELIVERY. In any cash-on-delivery market this is the single most important thing on a label: get it wrong and your rider collects nothing.
You don’t have to manage it:
- An order paid with Cash on delivery shows the amount until the order is Completed. A COD order sitting in Processing is correctly treated as still unpaid.
- An order paid any other way, for example by bank transfer, shows the amount until WooCommerce records the payment.
- Cancelled, Refunded and Failed orders never show it.
The amount is the order total minus anything already refunded. To leave it off your labels completely, switch off Amount Due on the Content tab.
Choosing Your WooCommerce Shipping Label Size
On the General tab, pick the Label Size that matches your printer. A4 is the default.
| Size | Use it when |
|---|---|
| A4 or A5 | You have an ordinary office printer and stick the label on with tape. |
| 4×6 in | You have a desktop label printer. This is the standard shipping label size. |
| 80 mm roll | You have one of the common, inexpensive thermal printers. This is what most small shops own. |
| 58 mm roll | You have a small receipt-style thermal printer. Tight, but everything still fits. |
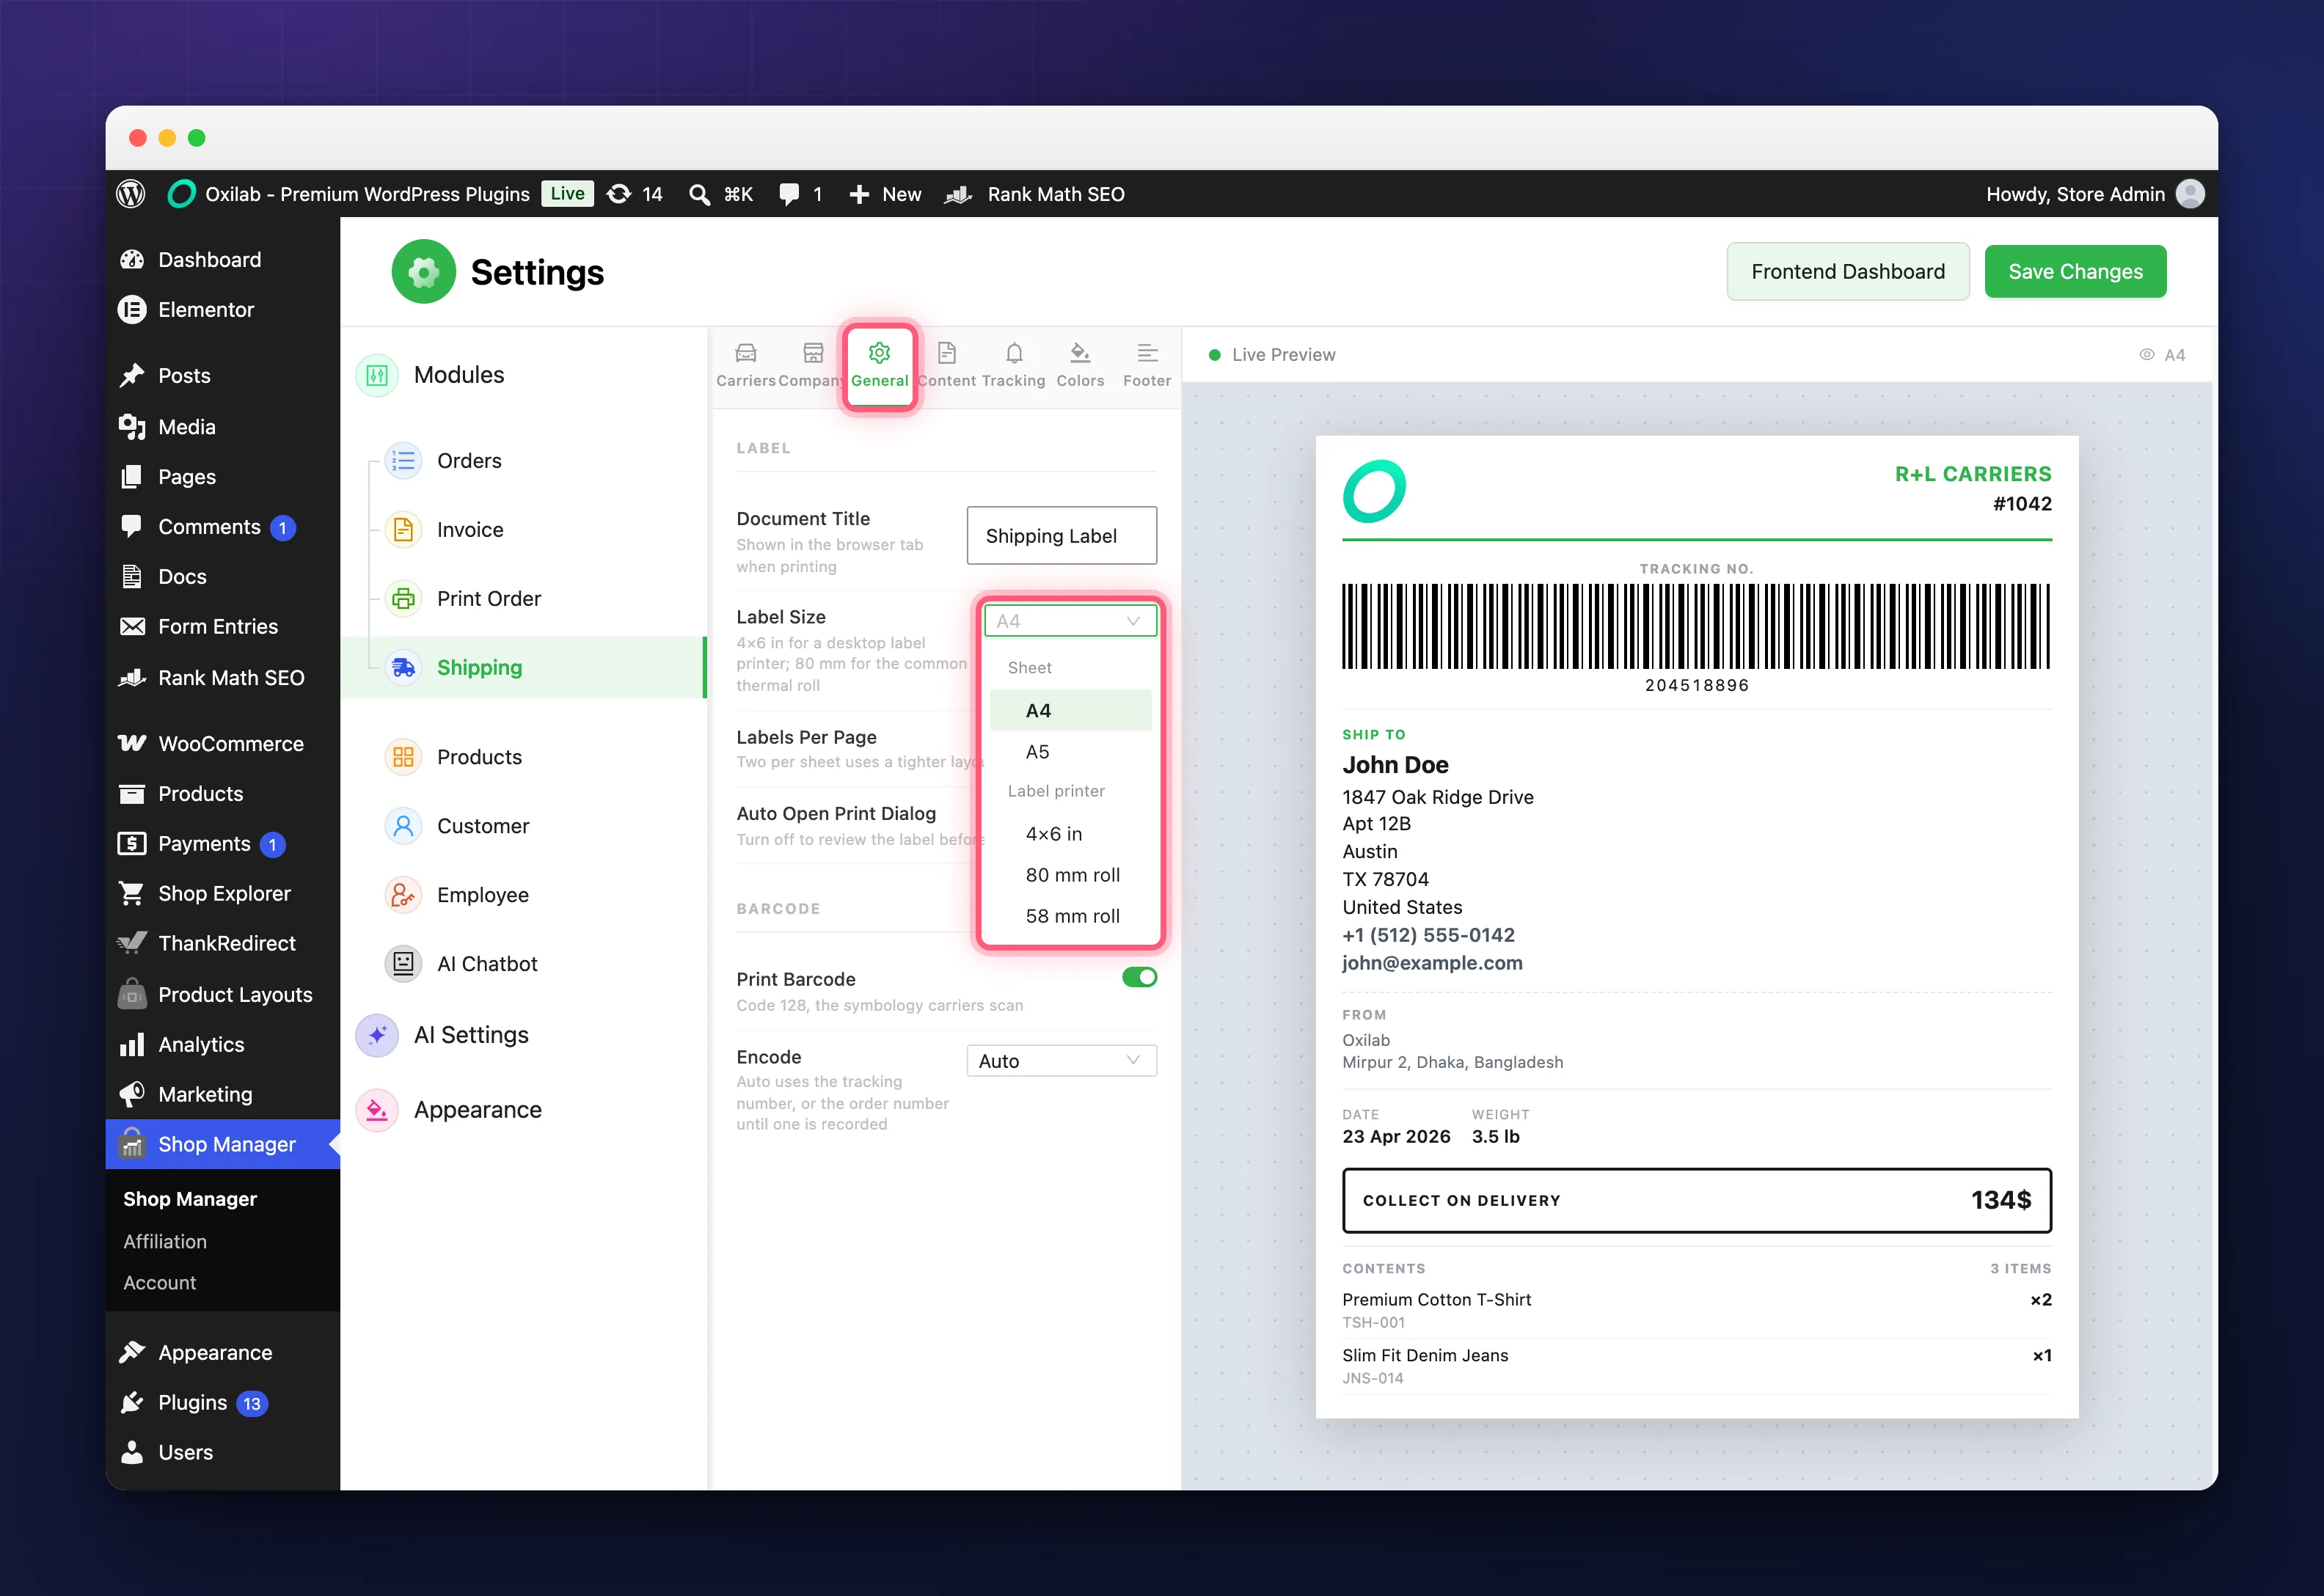
On A4 and A5 you can also set Labels Per Page to 2 to save paper. The other sizes are always one label each, so that option is locked there.
The layout adjusts itself for every size. On 4×6 and the rolls the text tightens up so a full order still fits, the barcode still stretches the full width, and on the rolls the delivery note is marked with a bold line down its side instead of a shaded background, because cheap thermal paper prints pale shading as nothing at all.
Which Printers Work With WooCommerce Shipping Labels
There is one simple rule: if the printer shows up in your computer’s normal printer list, it will work. Shop Manager prints your WooCommerce shipping label through your browser, so anything your browser can print to is fine.
- Desktop thermal label printers (4-inch): the best choice. Install the driver and choose 4×6 in.
- 80 mm and 58 mm thermal printers with a Windows or Mac driver: very common and inexpensive.
- Any ordinary inkjet or laser printer on A4 or A5.
- Not supported: pocket Bluetooth printers that only work through a phone app. These never appear as a computer printer, so no website can print to them.
The barcode is drawn by your browser as part of the page, so the printer does not need any barcode support of its own. What it does need is a Windows or Mac driver, and paper wide enough for the size you pick: a printer that tops out at 80 mm cannot print a 4×6 inch label, whatever software you use.
Getting the Print Dialog Right
The label already tells the browser its page size and margins. The first time you print a WooCommerce shipping label, check these in your browser’s print window. It usually remembers them afterwards:
- Destination: your label printer.
- Paper size, if your browser shows it: the size you chose in settings (for example 4×6 in, or 100×150 mm).
- Scale: 100%, so the label prints at its real size.
- Background graphics: on, for the nicest result.
Don’t worry about the barcode. It prints correctly even with Background graphics switched off. That setting only affects the light shading behind the delivery note.
Making the Label Look Like Your Shop
In WP Admin, go to Shop Manager and open the Shipping tab. A live preview of the label sits on the right and updates as you change things, so you can see the result before you waste any paper. The preview uses sample details, not a real order. Click Save Changes when you are done.
- Company: your label logo and return address. Leave a field empty and your WooCommerce store details are used, shown as the greyed-out value, so you only enter them once.
- General: Document Title, Label Size, Labels Per Page, Auto Open Print Dialog, and the barcode settings.
- Content: switch each part of the label on or off.
- Colors: eight ready-made palettes, or pick your own primary, accent and text colours.
- Footer: a line at the bottom of every label, like “Handle with care · Returns within 7 days”.
The Carriers and Tracking tabs on the same screen belong to order tracking.
Auto Open Print Dialog is on by default. Leave it on and the print window appears by itself; turn it off if you would rather check the label on screen first.
What the WooCommerce Shipping Label Barcode Contains
On the General tab, Encode sets what the barcode holds:
- Auto (the default): the tracking number if there is one, otherwise the order number.
- Tracking number: always the courier’s number. An order with no tracking number yet prints no barcode.
- Order number: always your own order number.
The courier scans the tracking number into their own system. The order number is the one you scan, to pull an order up instantly or move it to its next status.
Next step: With barcodes on your WooCommerce shipping labels, a USB barcode scanner turns packing into a quick job: scan a parcel to find its order or move it to a new status.