WooCommerce Order Tracking: Add Tracking Numbers
Once a parcel leaves your shop, your customer has one question: where is it? Shop Manager lets you record WooCommerce order tracking numbers against any order and shows them to your customer automatically. It comes with 151 couriers from 55 countries already built in, so the tracking link is filled in for you. This is a free feature: no API keys, no courier account, nothing to connect.
Before You Start
- Shop Manager is installed and active.
- The Shipping & Tracking module is switched on. It is on by default, see Shop Manager modules.
- Your role includes the Shipping & Tracking permission. Administrators, SM: Store Manager and SM: Fulfillment Staff have it already.
What WooCommerce Order Tracking Means Here
When you hand a parcel to a courier, they give you a number. Some couriers call it a tracking number, others call it an AWB (air waybill) or a consignment number. It is all the same thing: the reference that follows that one parcel.
You type that number into the order. Shop Manager then knows which courier is carrying it, builds the correct tracking link for that courier, and passes it on to your customer. You do not need to sign up for anything or connect any accounts.
Add WooCommerce Order Tracking to One Order
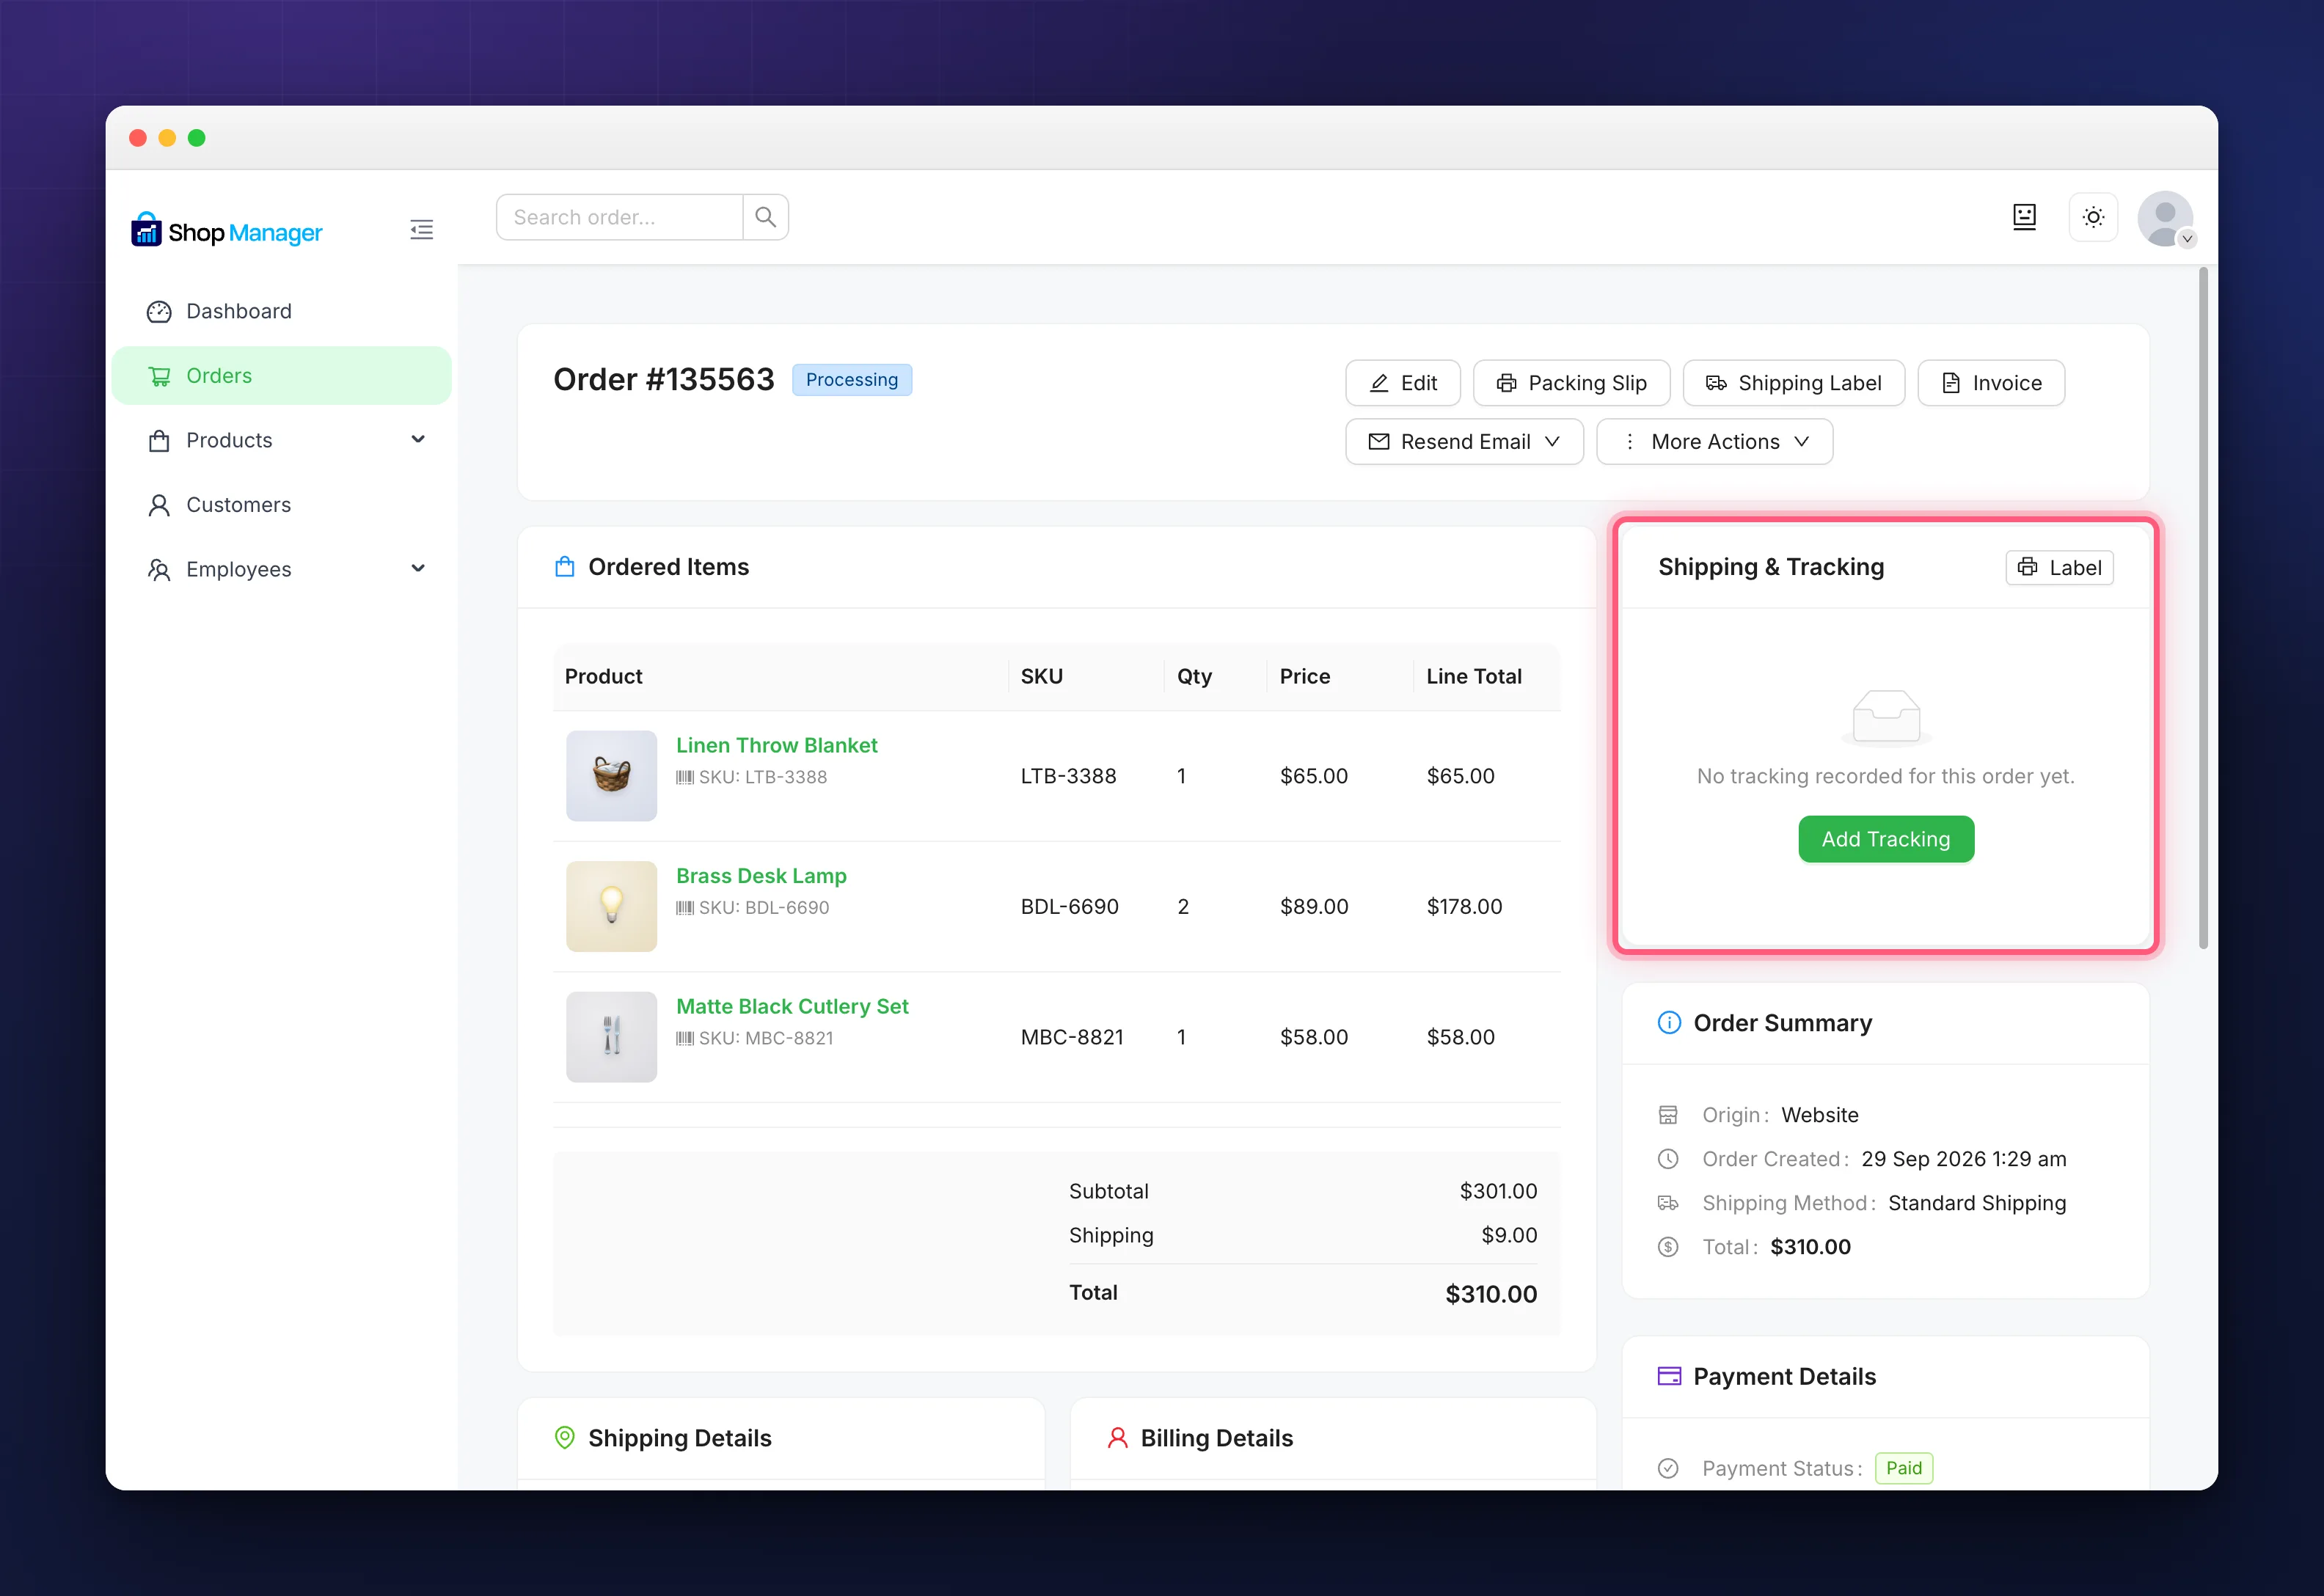
Every order has a Shipping & Tracking card in the right-hand column of its details page. Until you add a number, it says “No tracking recorded for this order yet.”
- Open the order to reach its Order Details page.
- On the right-hand side, find the Shipping & Tracking card.
- Click Add Tracking.
- Pick your Carrier from the list. Start typing its name to find it quickly.
- Type the Tracking / AWB number the courier gave you.
- Set the Ship date if you want. Leave it empty and today’s date is used.
- Click Save Tracking.
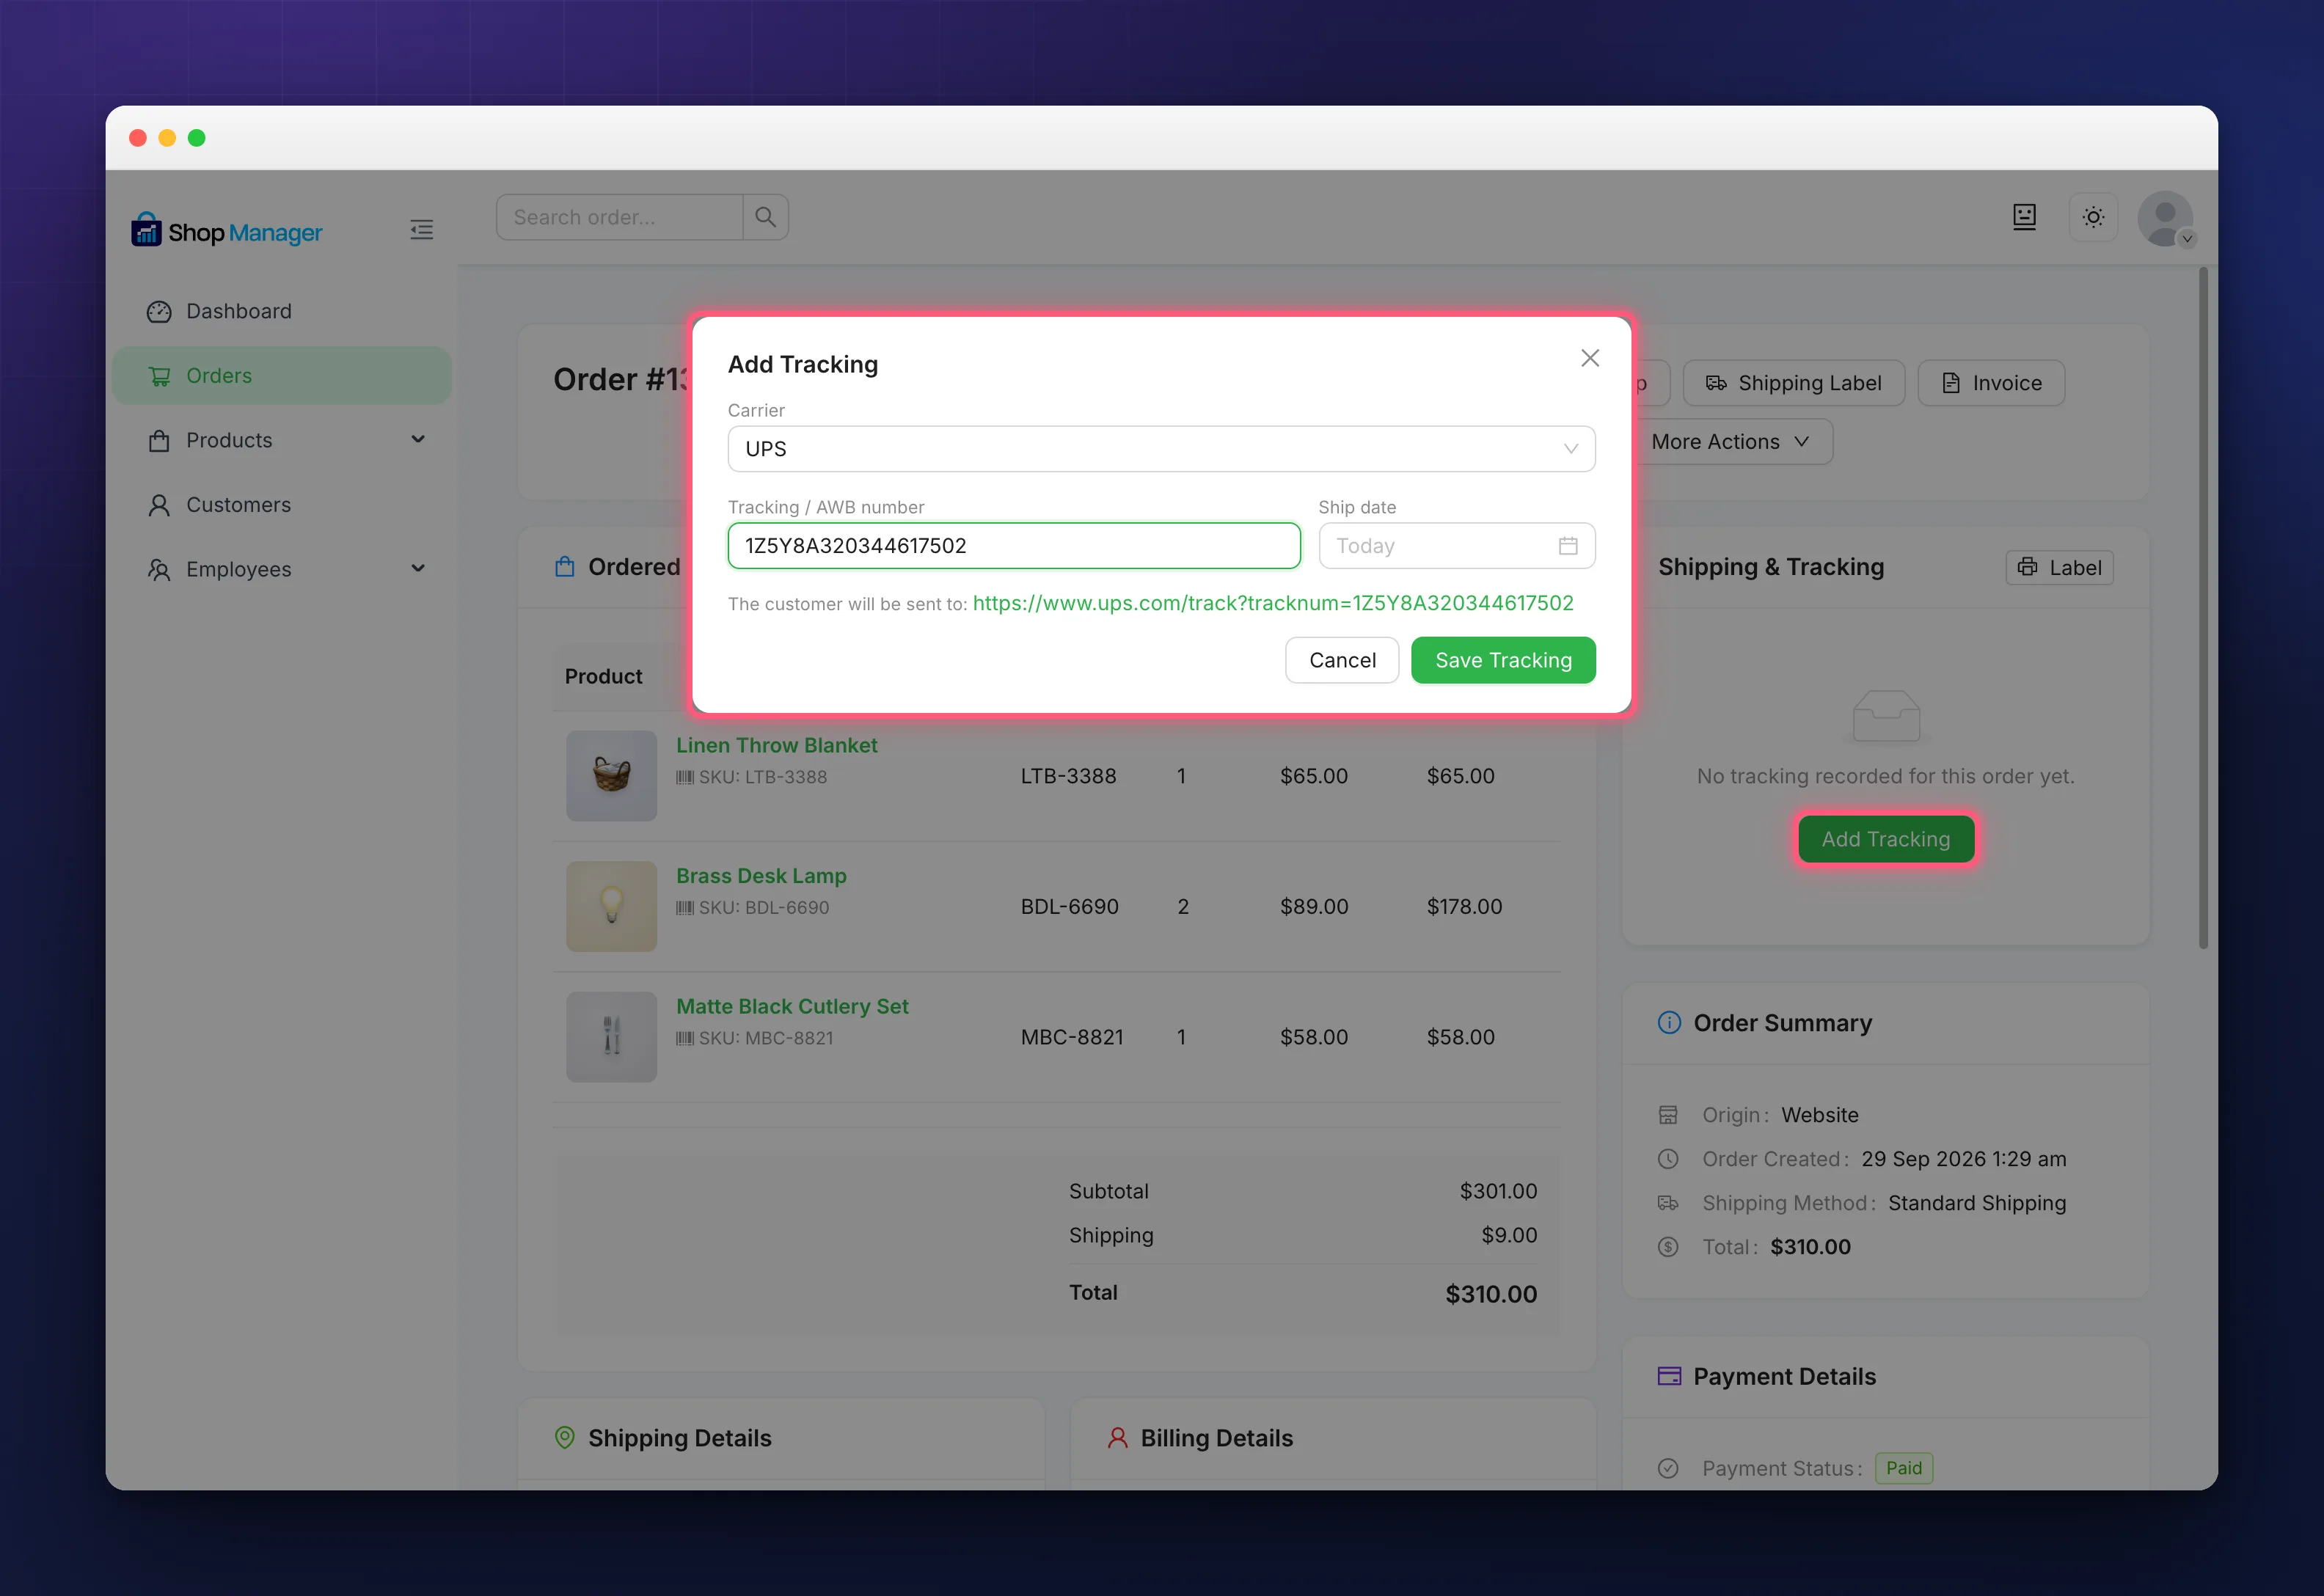
Tip: Before you save, look at the line that starts “The customer will be sent to”. That is the exact link your customer will receive. If it looks wrong, you have picked the wrong courier.
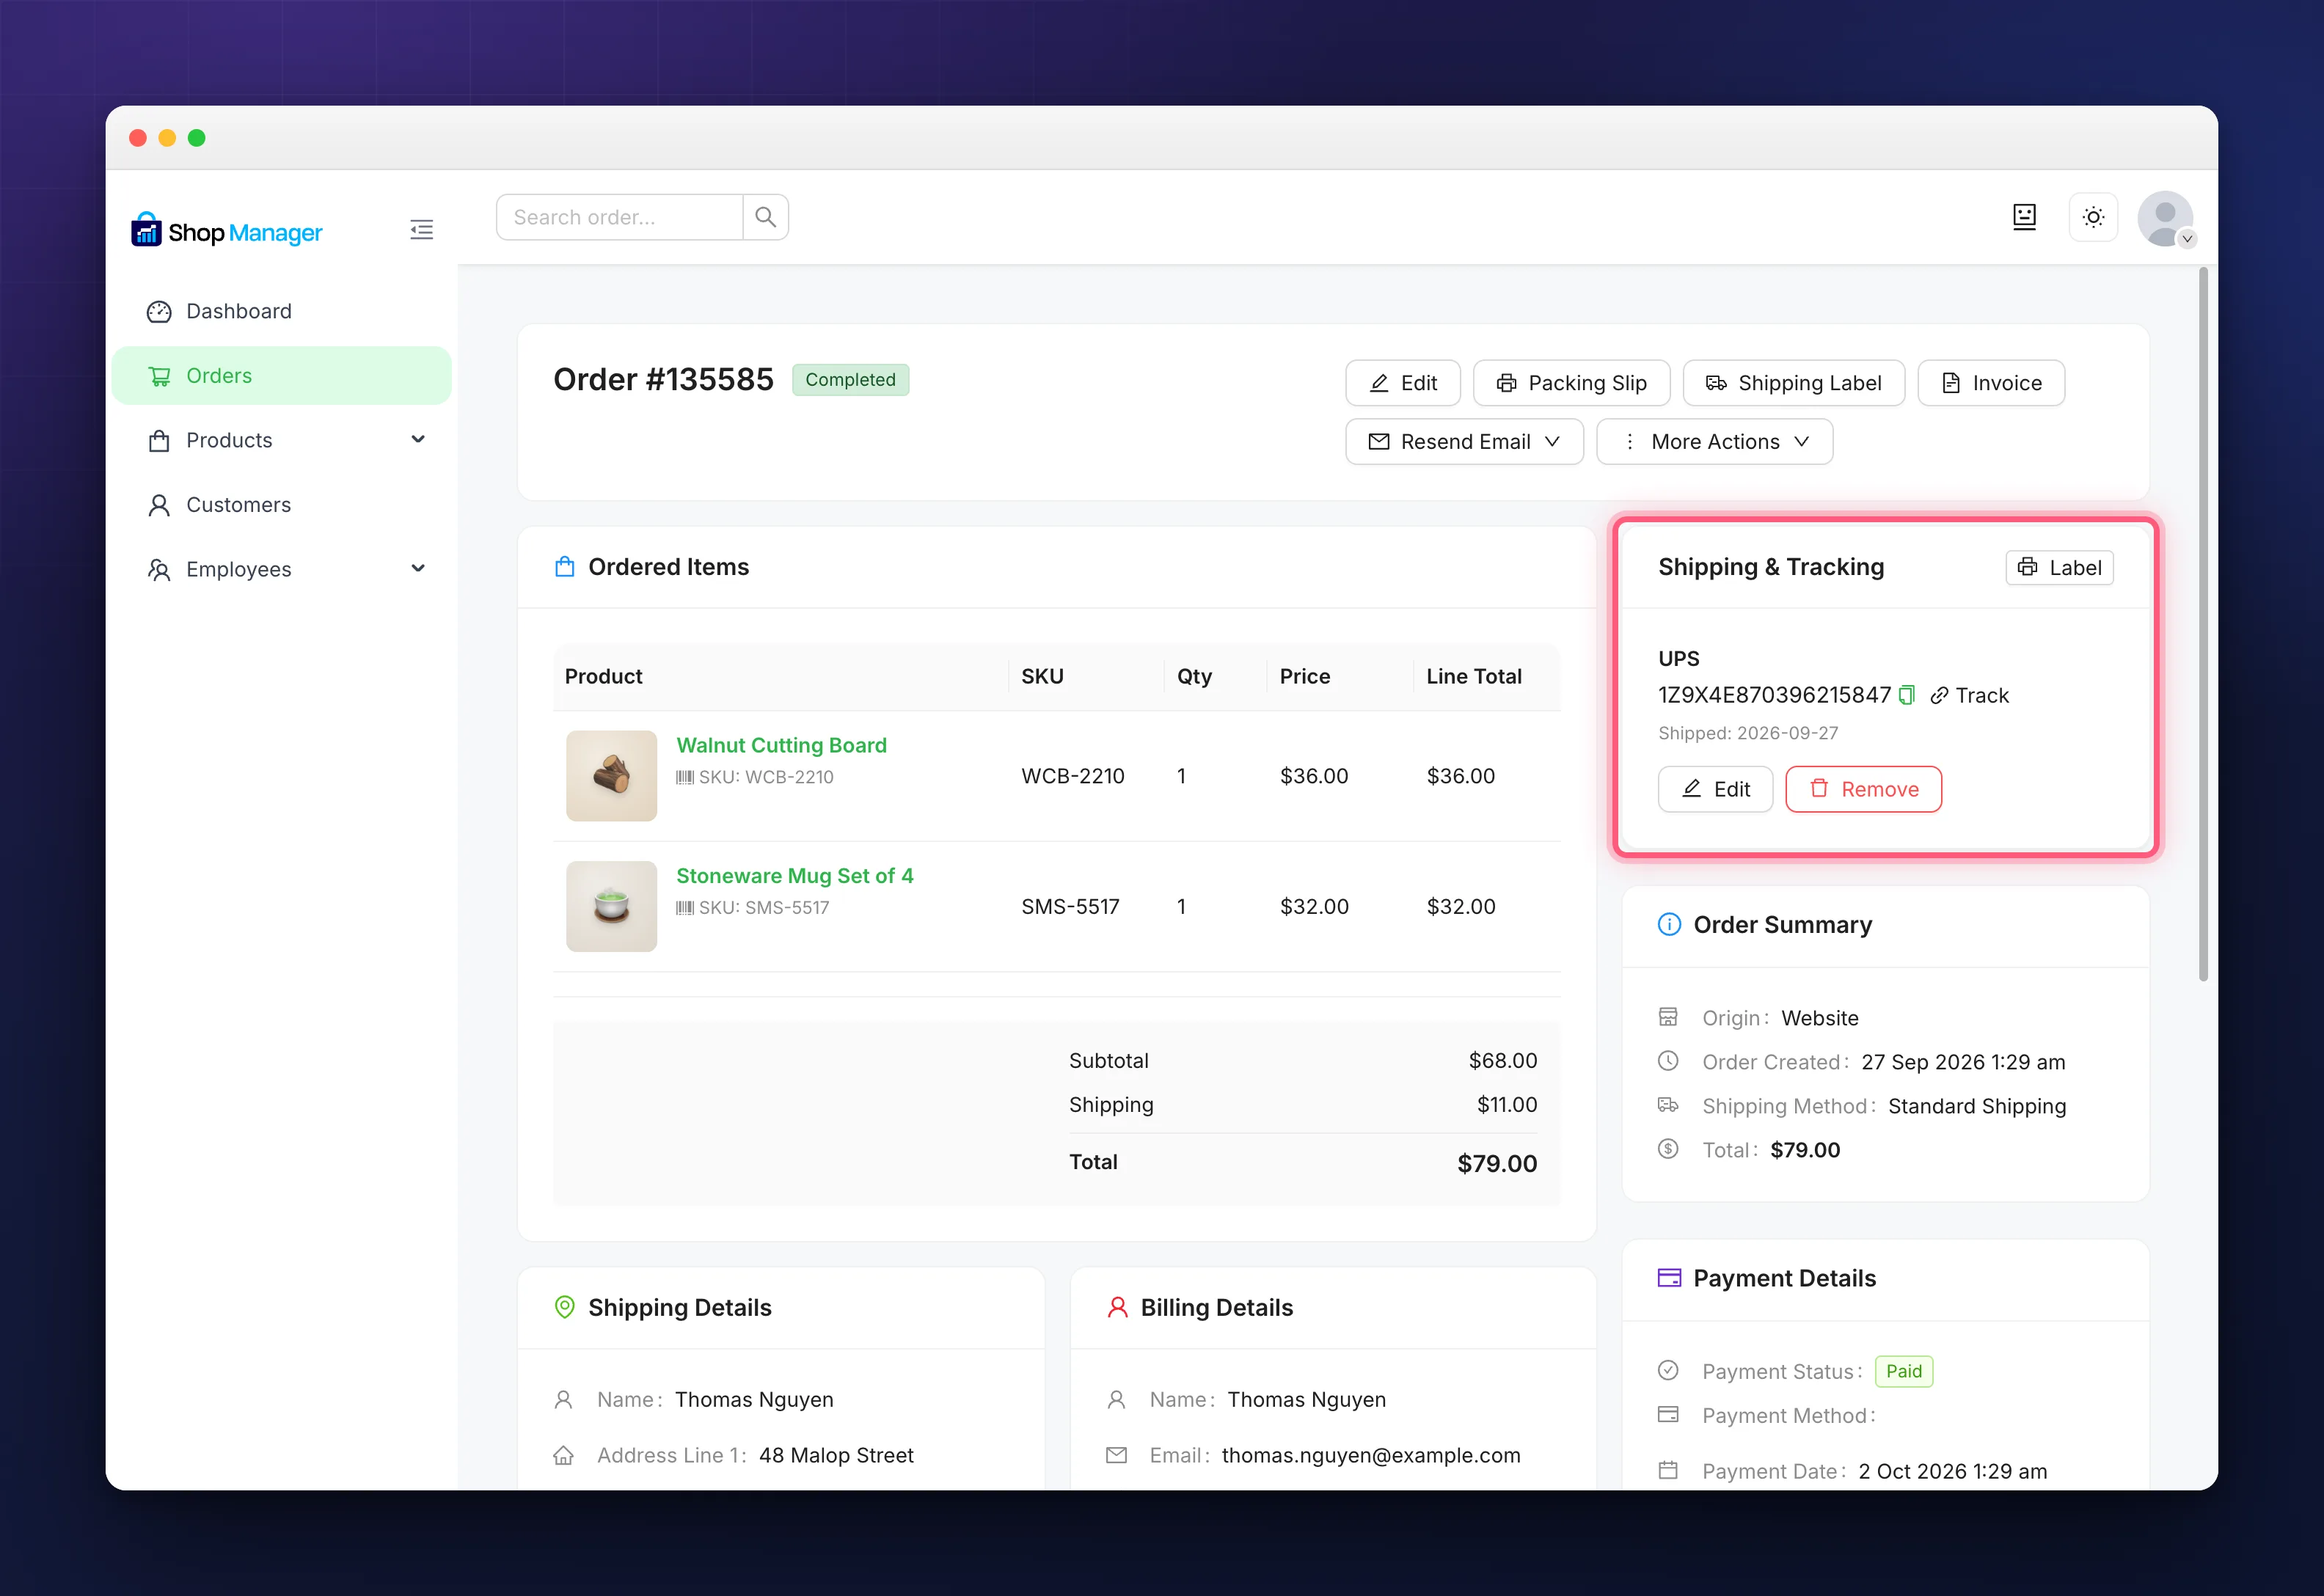
Once saved, the card shows the courier, the number with a copy button, the ship date, and a Track link that opens the courier’s own tracking page.
Does Saving Tracking Change the Order Status?
No, and that is deliberate. The form records three facts about the parcel: who is carrying it, its number, and the day it went out. It never moves the order to a different status on its own. So if you come back a week later to fix a typo in a tracking number, nothing else about the order changes underneath you.
You change an order’s status the way you always have: on the order page, or with the bulk actions on the Orders list. To update a whole trolley of parcels as they go out, the Scan panel changes each order’s status with one scan per box.
Add Tracking to Many Orders at Once
Bulk WooCommerce order tracking is built for the way a real shop works. Your courier collects the day’s parcels and hands you back a sheet of numbers. Instead of opening thirty orders one by one:
- On the Orders list, tick the orders you are shipping.
- In the bar that appears above the list, click Add Tracking.
- Choose the Carrier and Ship date once, at the top. They apply to every row.
- Type or paste each tracking number next to its order.
- Click Save. The button counts the rows that will be saved, for example Save 2 Orders.
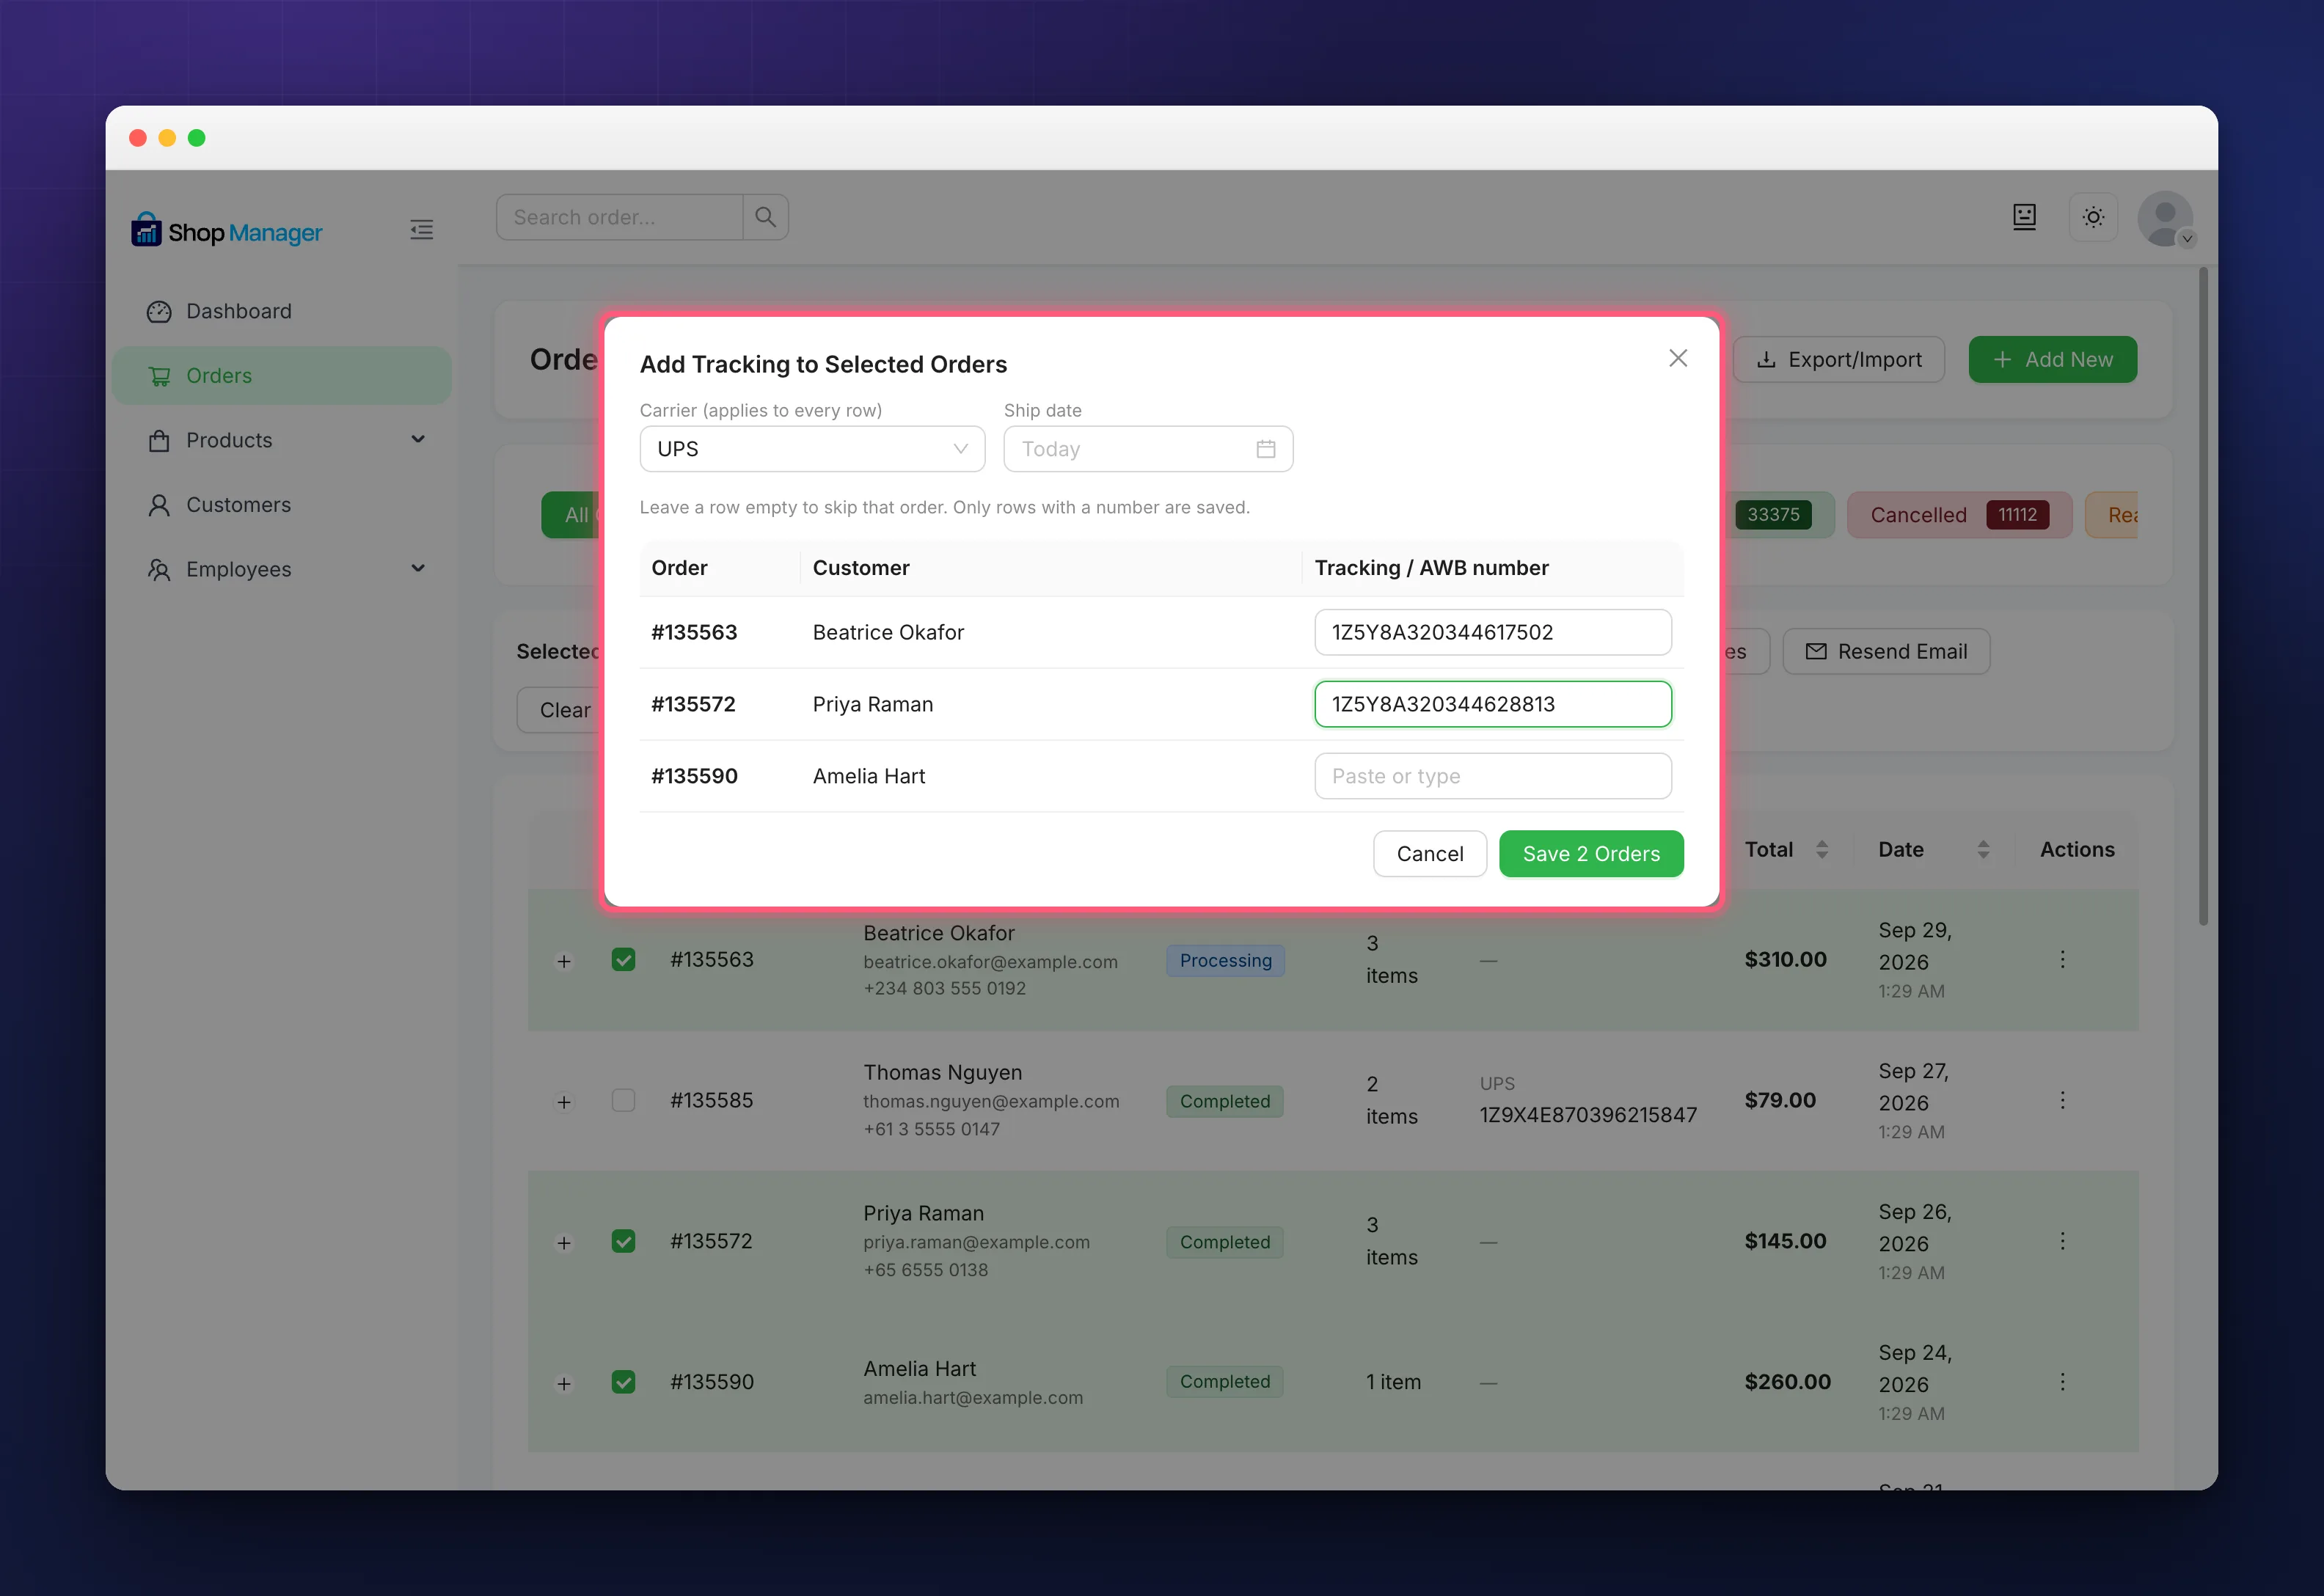
Leave a row empty to skip that order. Each row is saved on its own, so if one number is rejected, the rest still save. The form stays open with a “Some orders were not updated” list, so you can fix just the rows that failed.
Choose Which Couriers You Use
151 couriers is a lot to scroll through when your shop only uses two or three. So you can narrow the list down:
- In WP Admin, go to Shop Manager and open the Shipping tab.
- On the Carriers tab, search for the couriers you actually use and click each one.
- Click Save Changes.
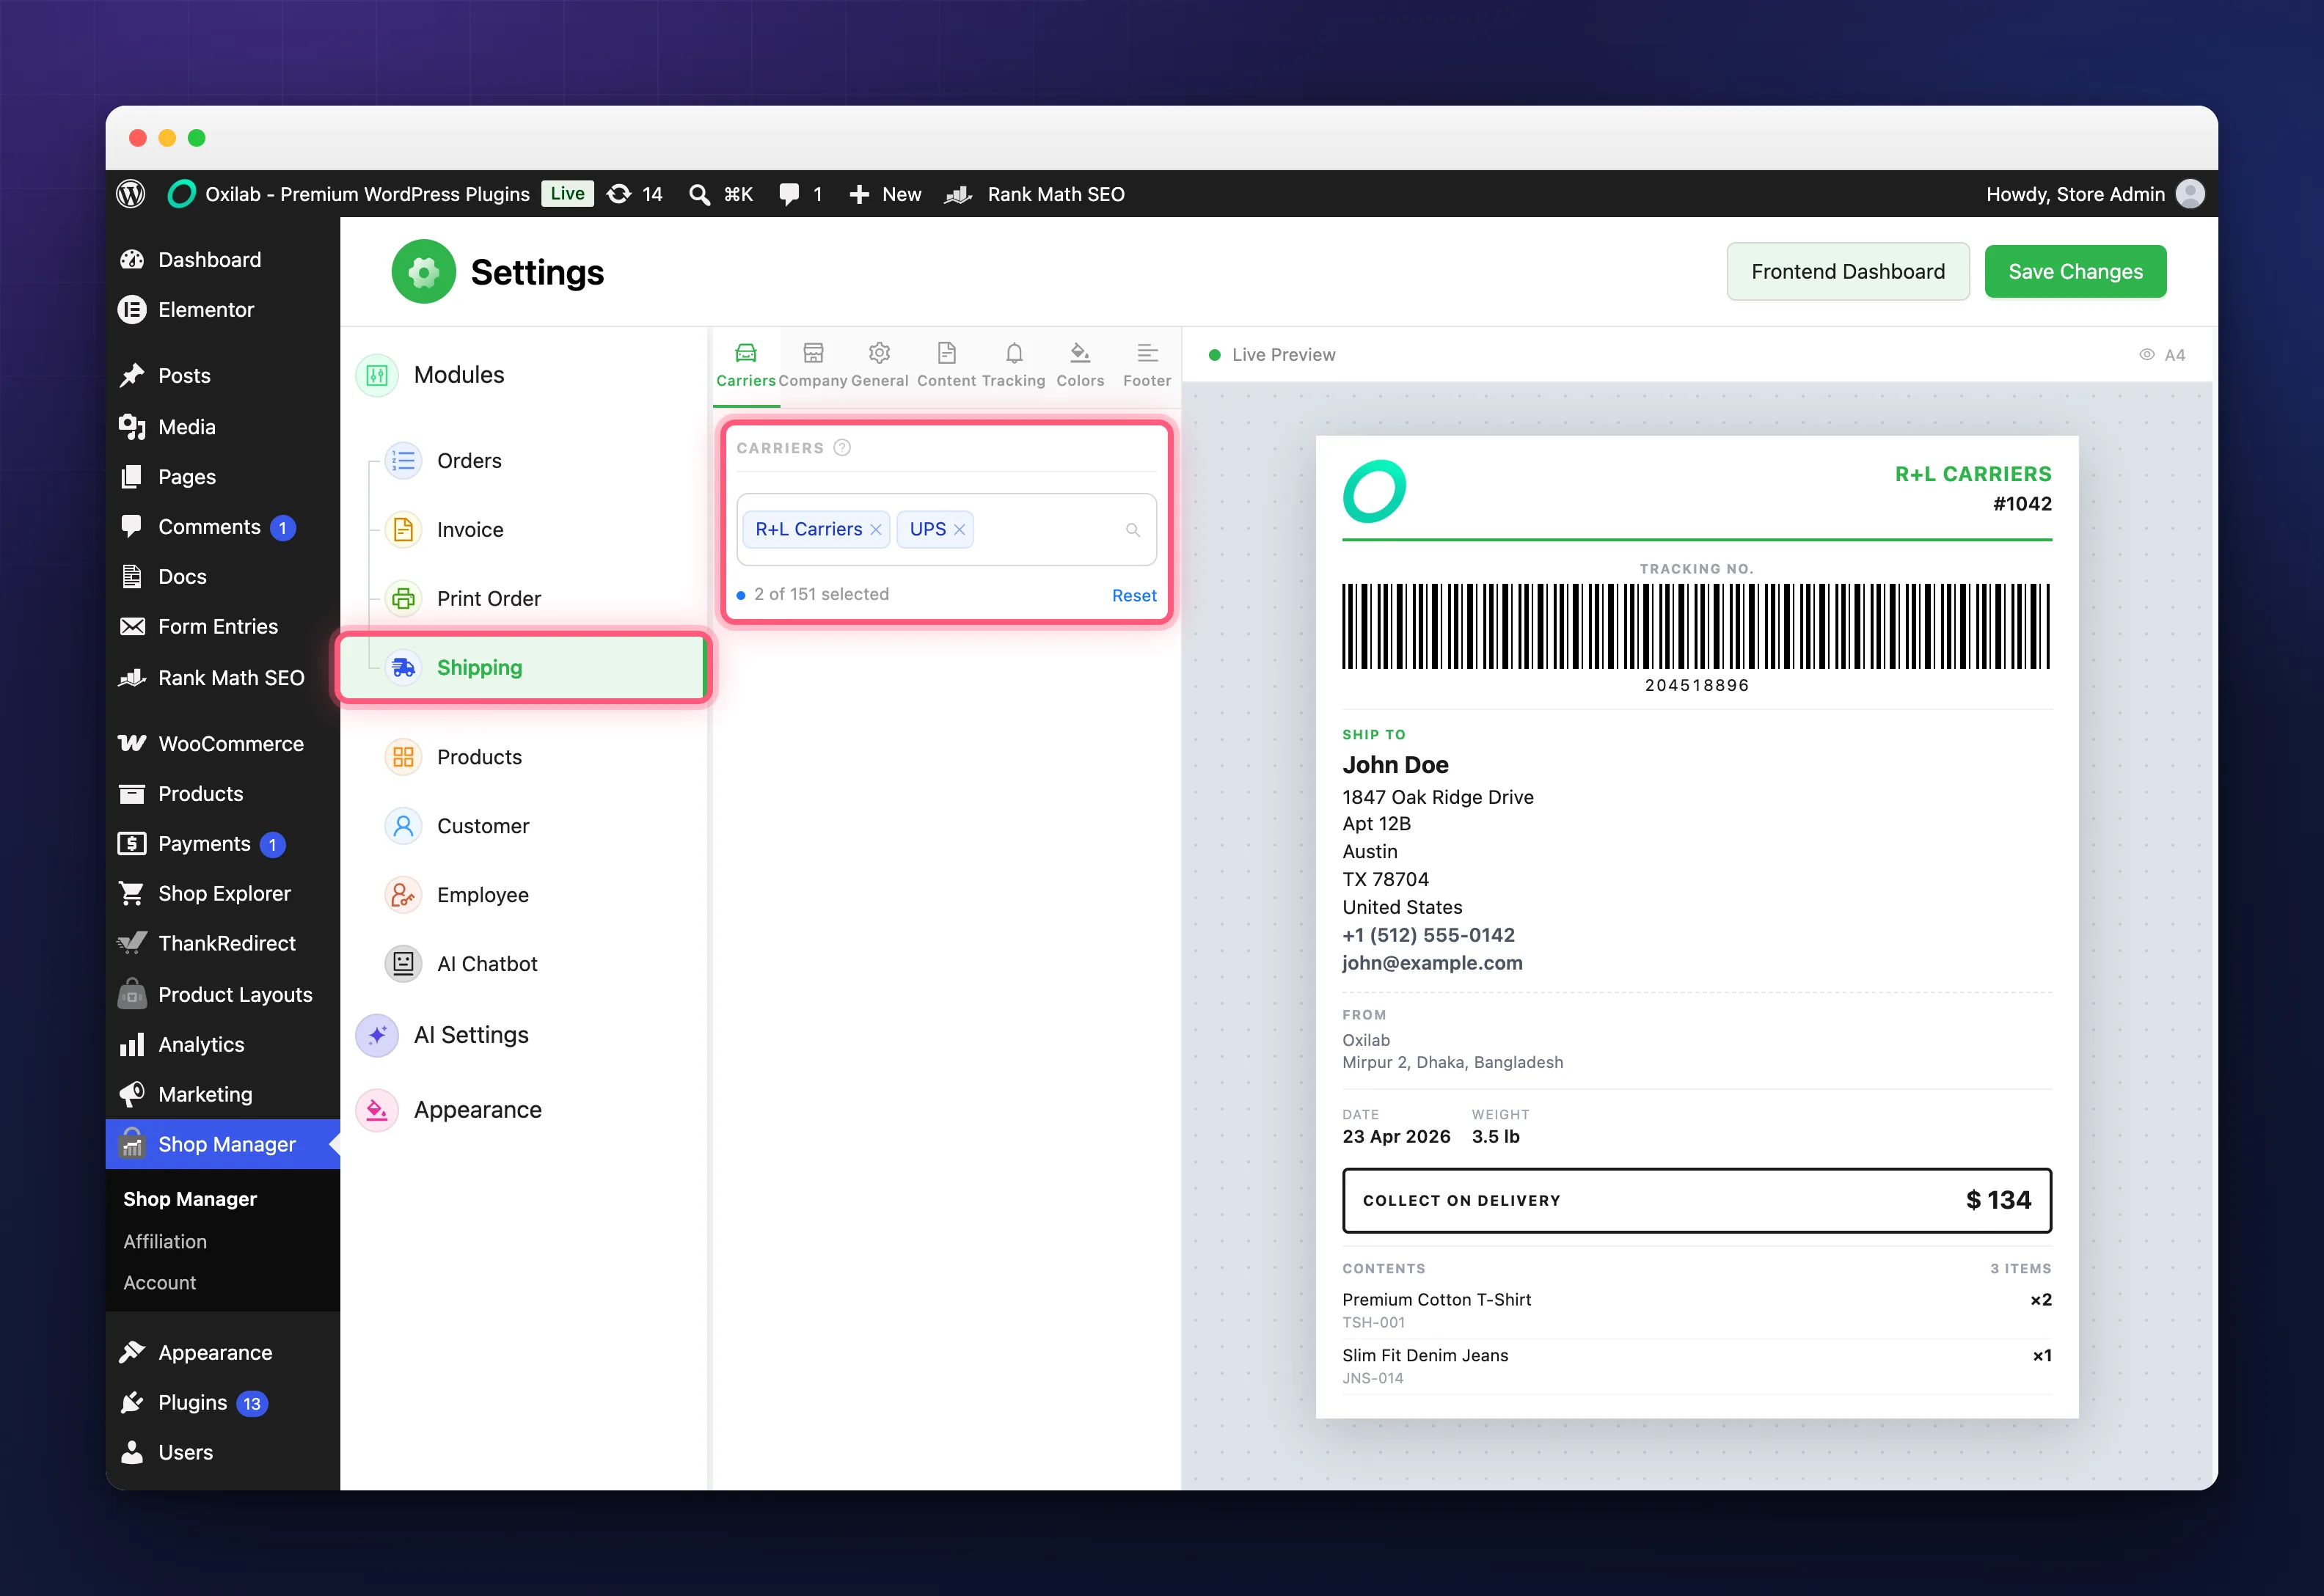
From then on, your staff see only those couriers when they add tracking. The line under the picker shows how many you have chosen, for example “2 of 151 selected”, and Reset clears your choice so every courier shows again.
Good to know: Leave this empty and all 151 couriers stay available, so you never have to set it up. And if you remove a courier later, orders that already use it keep it and can still be edited. Nothing breaks.
Using a Courier That Isn’t on the List
Local delivery? A friend with a van? Someone too small to be in any list? Choose Custom carrier… at the top of the courier dropdown, then fill in:
- Carrier name: the name you want shown to your customer.
- Tracking / AWB number: the number.
- Tracking link (optional): their tracking page, if they have one. Leave it blank if they don’t.
Custom carrier is always in the list, even after you have narrowed your couriers. In the bulk form it asks for the name only, so add a tracking link from the order page if you need one.
What Your Customer Sees
Once a tracking number is saved, it is shown to the customer in two places automatically:
- WooCommerce order emails sent to the customer: a heading (“Track your shipment” unless you change it), your message, and a Track your parcel link. The copy sent to the store admin does not include it.
- The My Account order page: the courier, the tracking number as a clickable link, and the order’s current status.
You control this in WP Admin under Shop Manager, Shipping tab, then the Tracking tab. Switch In Order Emails or On My Account off to hide either one, and change the Heading and Message. The default message is “Your order has shipped with {carrier}. Tracking number: {tracking_number}”. These placeholders are swapped for the real details:
- {carrier}: the courier’s name
- {tracking_number}: the number
- {tracking_url}: the tracking link
- {ship_date}: the date you shipped
- {status}: the order’s current status, written the way you named it
Seeing Tracking at a Glance
The Orders list has a Tracking column showing the courier and number for each order, and a dash for orders that still need one. That dash is the useful part: it tells your team at a glance what is still waiting to go out.
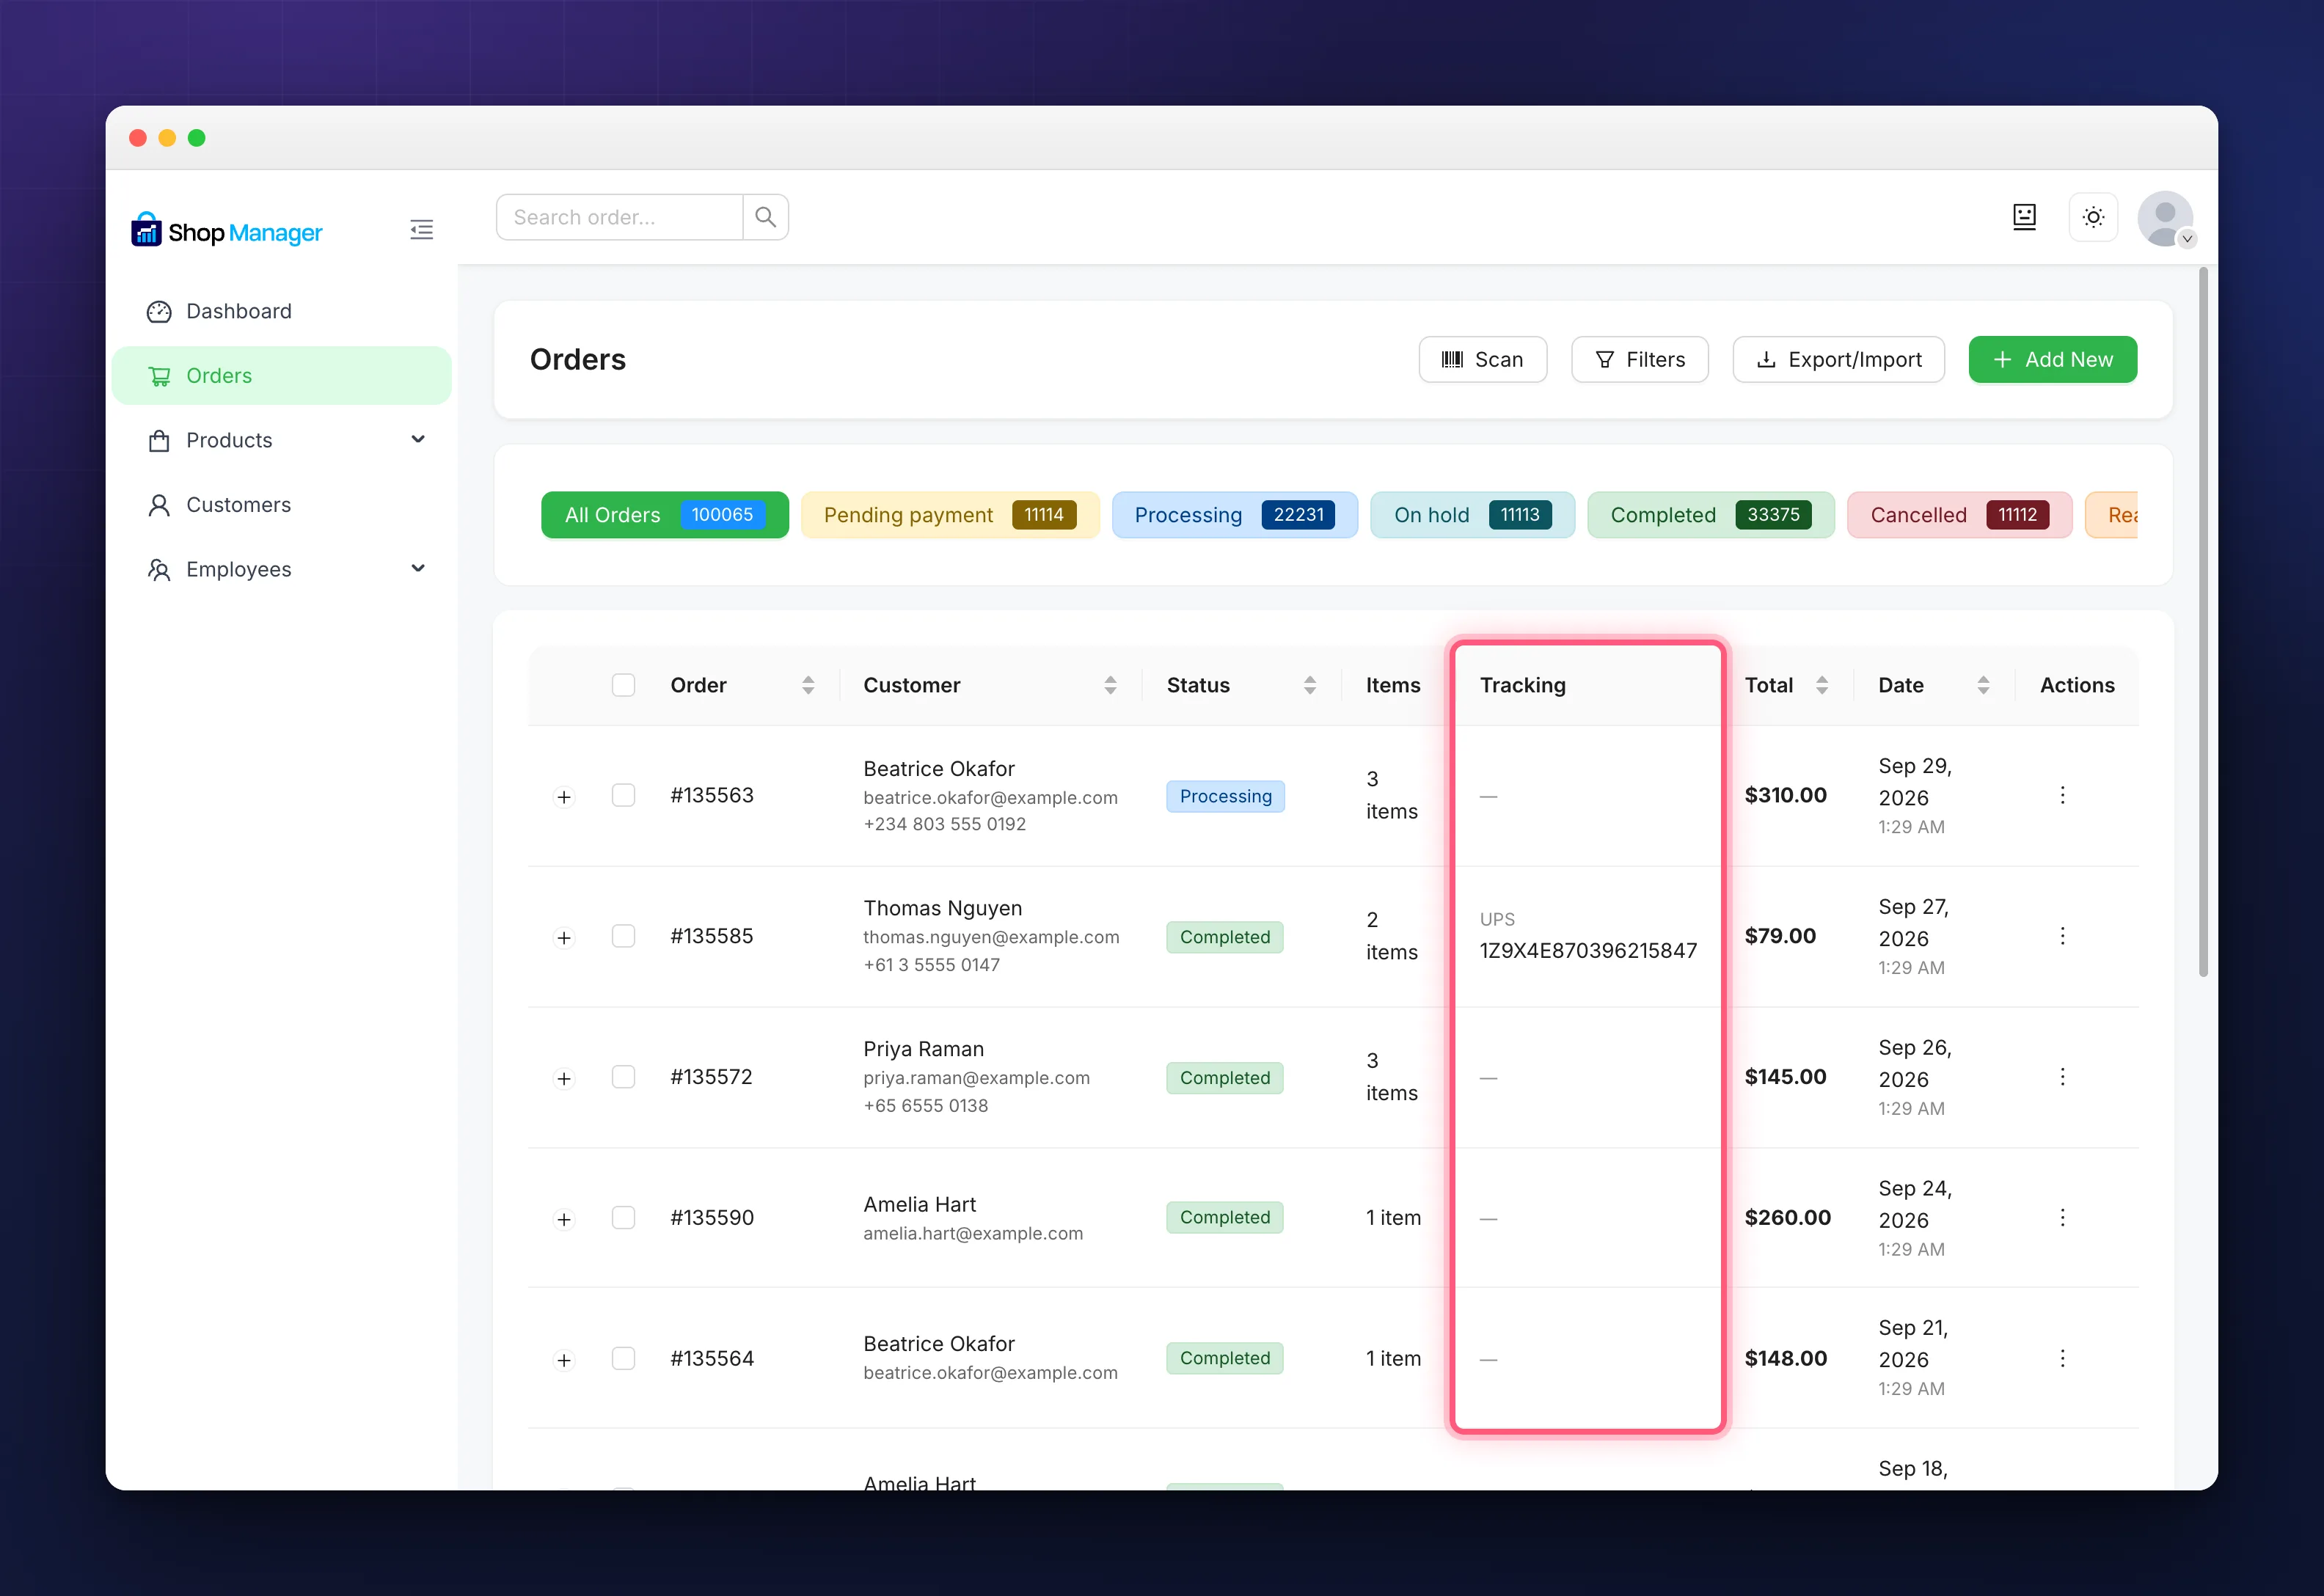
You can also search by tracking number. Paste the number a customer quotes on the phone into the Search order box at the top of the dashboard and their order comes straight up. Type at least four characters.
Editing or Removing WooCommerce Order Tracking
On the order’s Shipping & Tracking card, click Edit to correct the courier, the number or the ship date, and Remove to delete it. Removing asks you to confirm first with Yes, remove, because the customer stops seeing the tracking as soon as it is gone.
Already Using Advanced Shipment Tracking?
If you already run the Advanced Shipment Tracking plugin, Shop Manager notices and steps aside. It stops adding its own tracking block to emails and My Account, and passes the tracking numbers you enter straight to that plugin instead. Your customers are never told twice, and you keep entering tracking in one place.
If you don’t use it, Shop Manager handles everything itself. Nothing extra to install.
Who Can Add WooCommerce Order Tracking
Adding, editing and removing tracking needs the Shipping & Tracking permission, which you’ll find under Employees, Roles & Access. This lets you give warehouse staff everything they need to fulfil orders without giving them access to invoices, customer records or anything else.
Next step: Now that your orders carry WooCommerce order tracking numbers, you can print shipping labels with a scannable barcode straight from your browser, and scan those labels to move parcels through your workflow.