WooCommerce Customer Management & CRM Guide
The Customers screen is a light CRM sitting on top of your store. WooCommerce customer management here means one list of everyone with an account, what they have spent, and a profile for each person holding their addresses, order history, private notes and tags. Everything you change is real WooCommerce data.
Opening the Customer List
In the dashboard sidebar, click Customers.
Reading the List
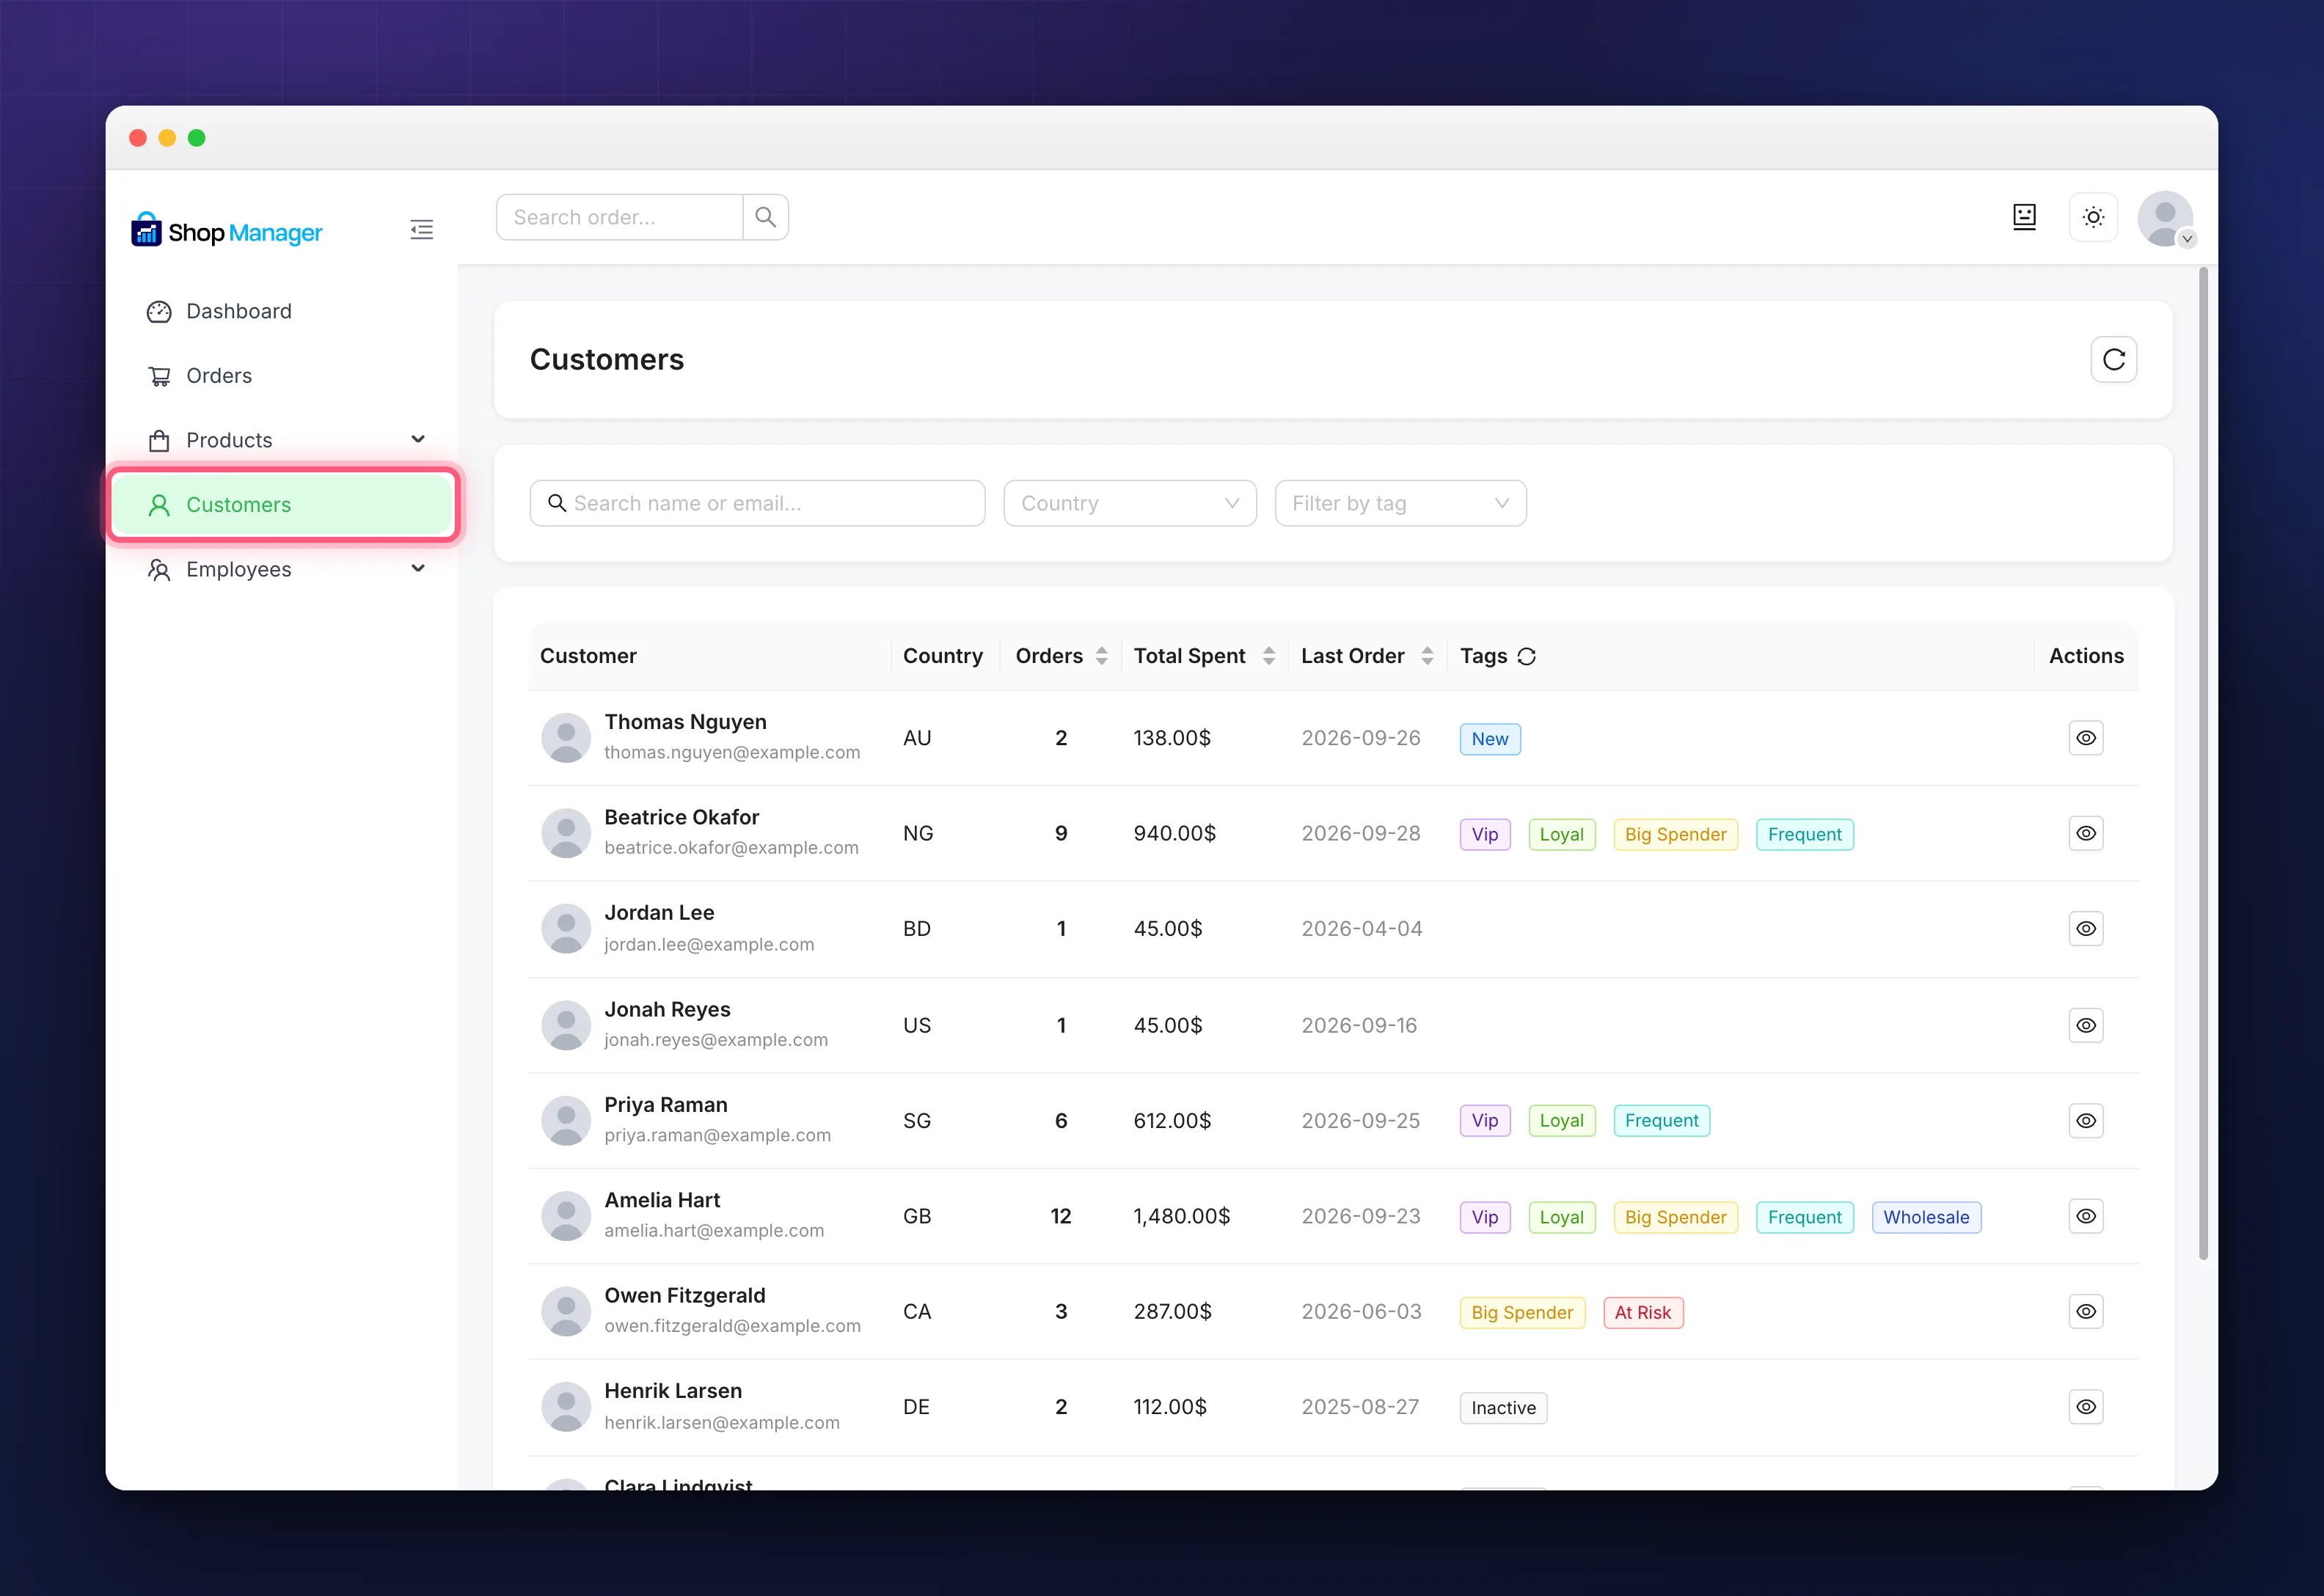
Each row gives you the customer with their avatar and email, their country, how many orders they have placed, their lifetime spend, the date of their last order, their tags, and a View Profile button. Clicking anywhere on the row opens the profile too. Orders, Total Spent and Last Order are sortable, so sorting by spend is the quickest way to find your best customers.
One thing to know about those two numbers: Orders counts every order in any status, while Total Spent counts only Completed and Processing orders. A customer with cancelled or refunded orders will show a higher order count than their spend suggests.
Above the table you can search by name or email, filter by Country, or filter by tag.
Who Appears in the List
WooCommerce customer management builds its list from your WordPress user accounts, not from your orders. Staff roles such as administrator, editor and shop manager are left out, and you can exclude more roles in the settings.
So someone who checked out as a guest and never created an account will not appear. If a guest order uses the same billing email as an existing account, though, it does count toward that account’s order total and spend.
Inside a Customer Profile
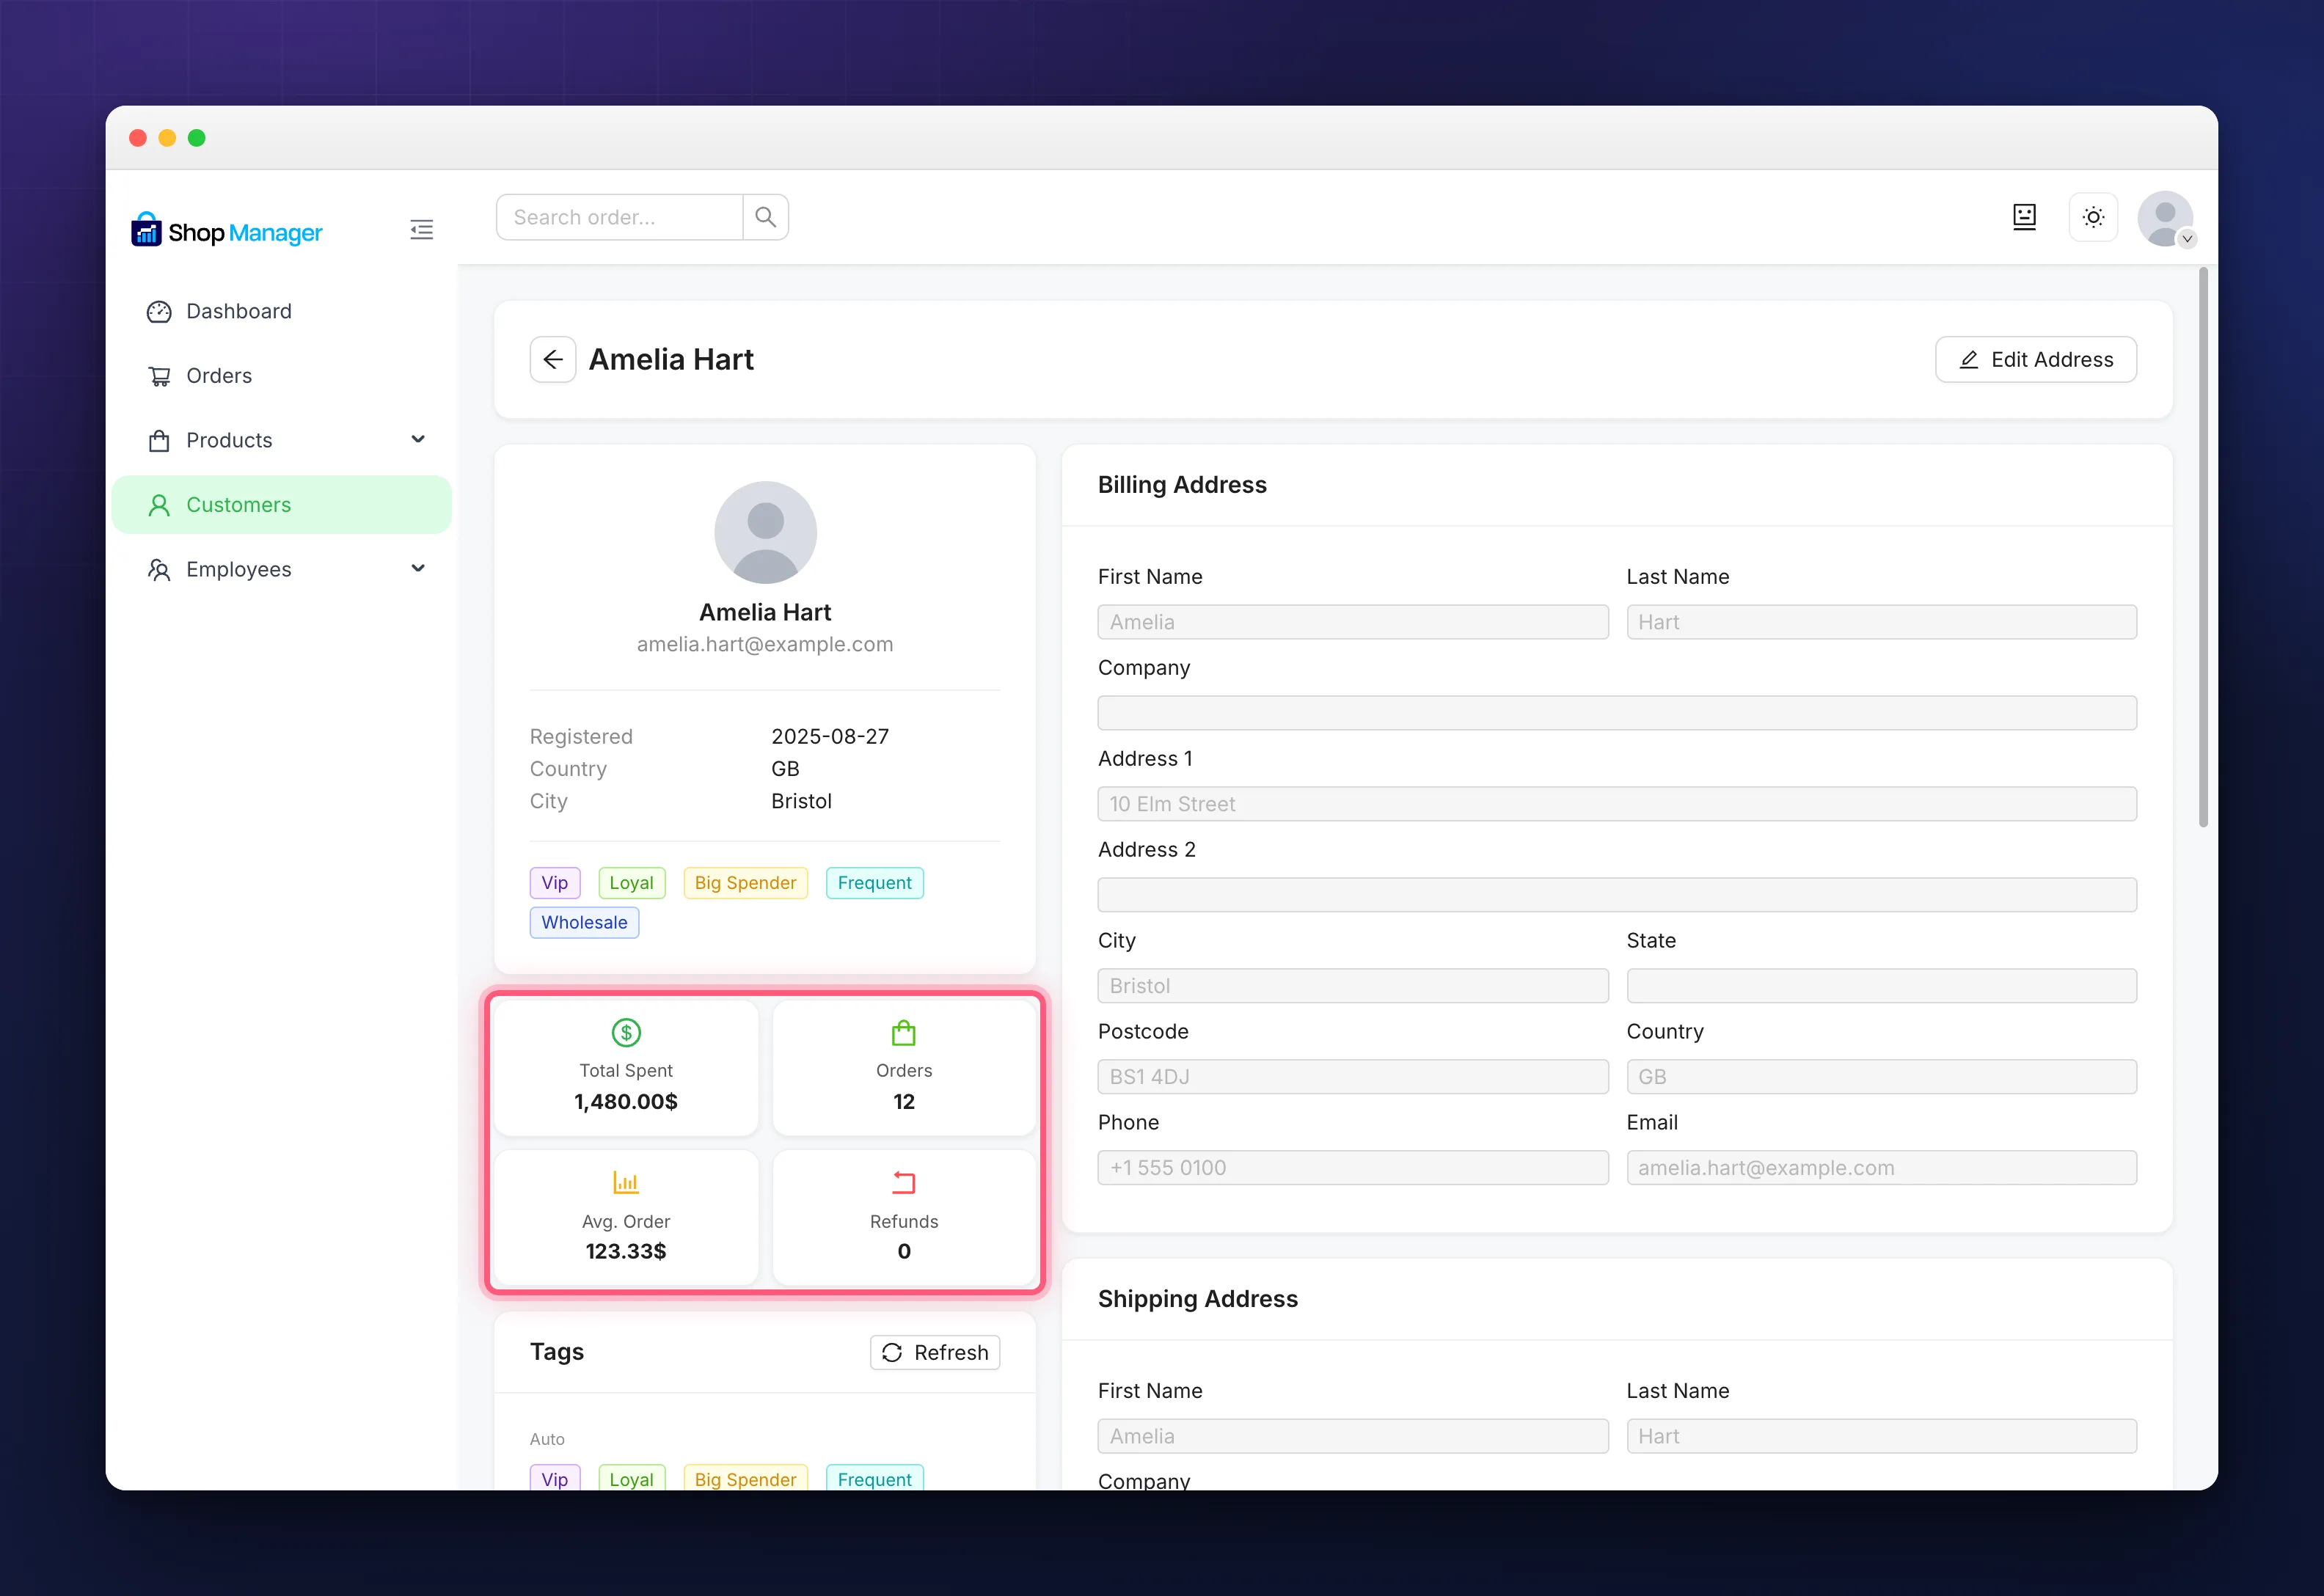
The profile is where most WooCommerce customer management actually happens, because it is the only place you can change a person’s details. Down the left you get four figures: Total Spent, Orders, Avg. Order and Refunds, followed by the tag panel and private notes. On the right are the billing address, the shipping address, and the ten most recent orders with a link through to each one.
Editing Addresses, Notes and Tags
- To change an address, click Edit Address at the top, make your changes, and click Save. One Save writes both the billing and the shipping block, so you can correct them together.
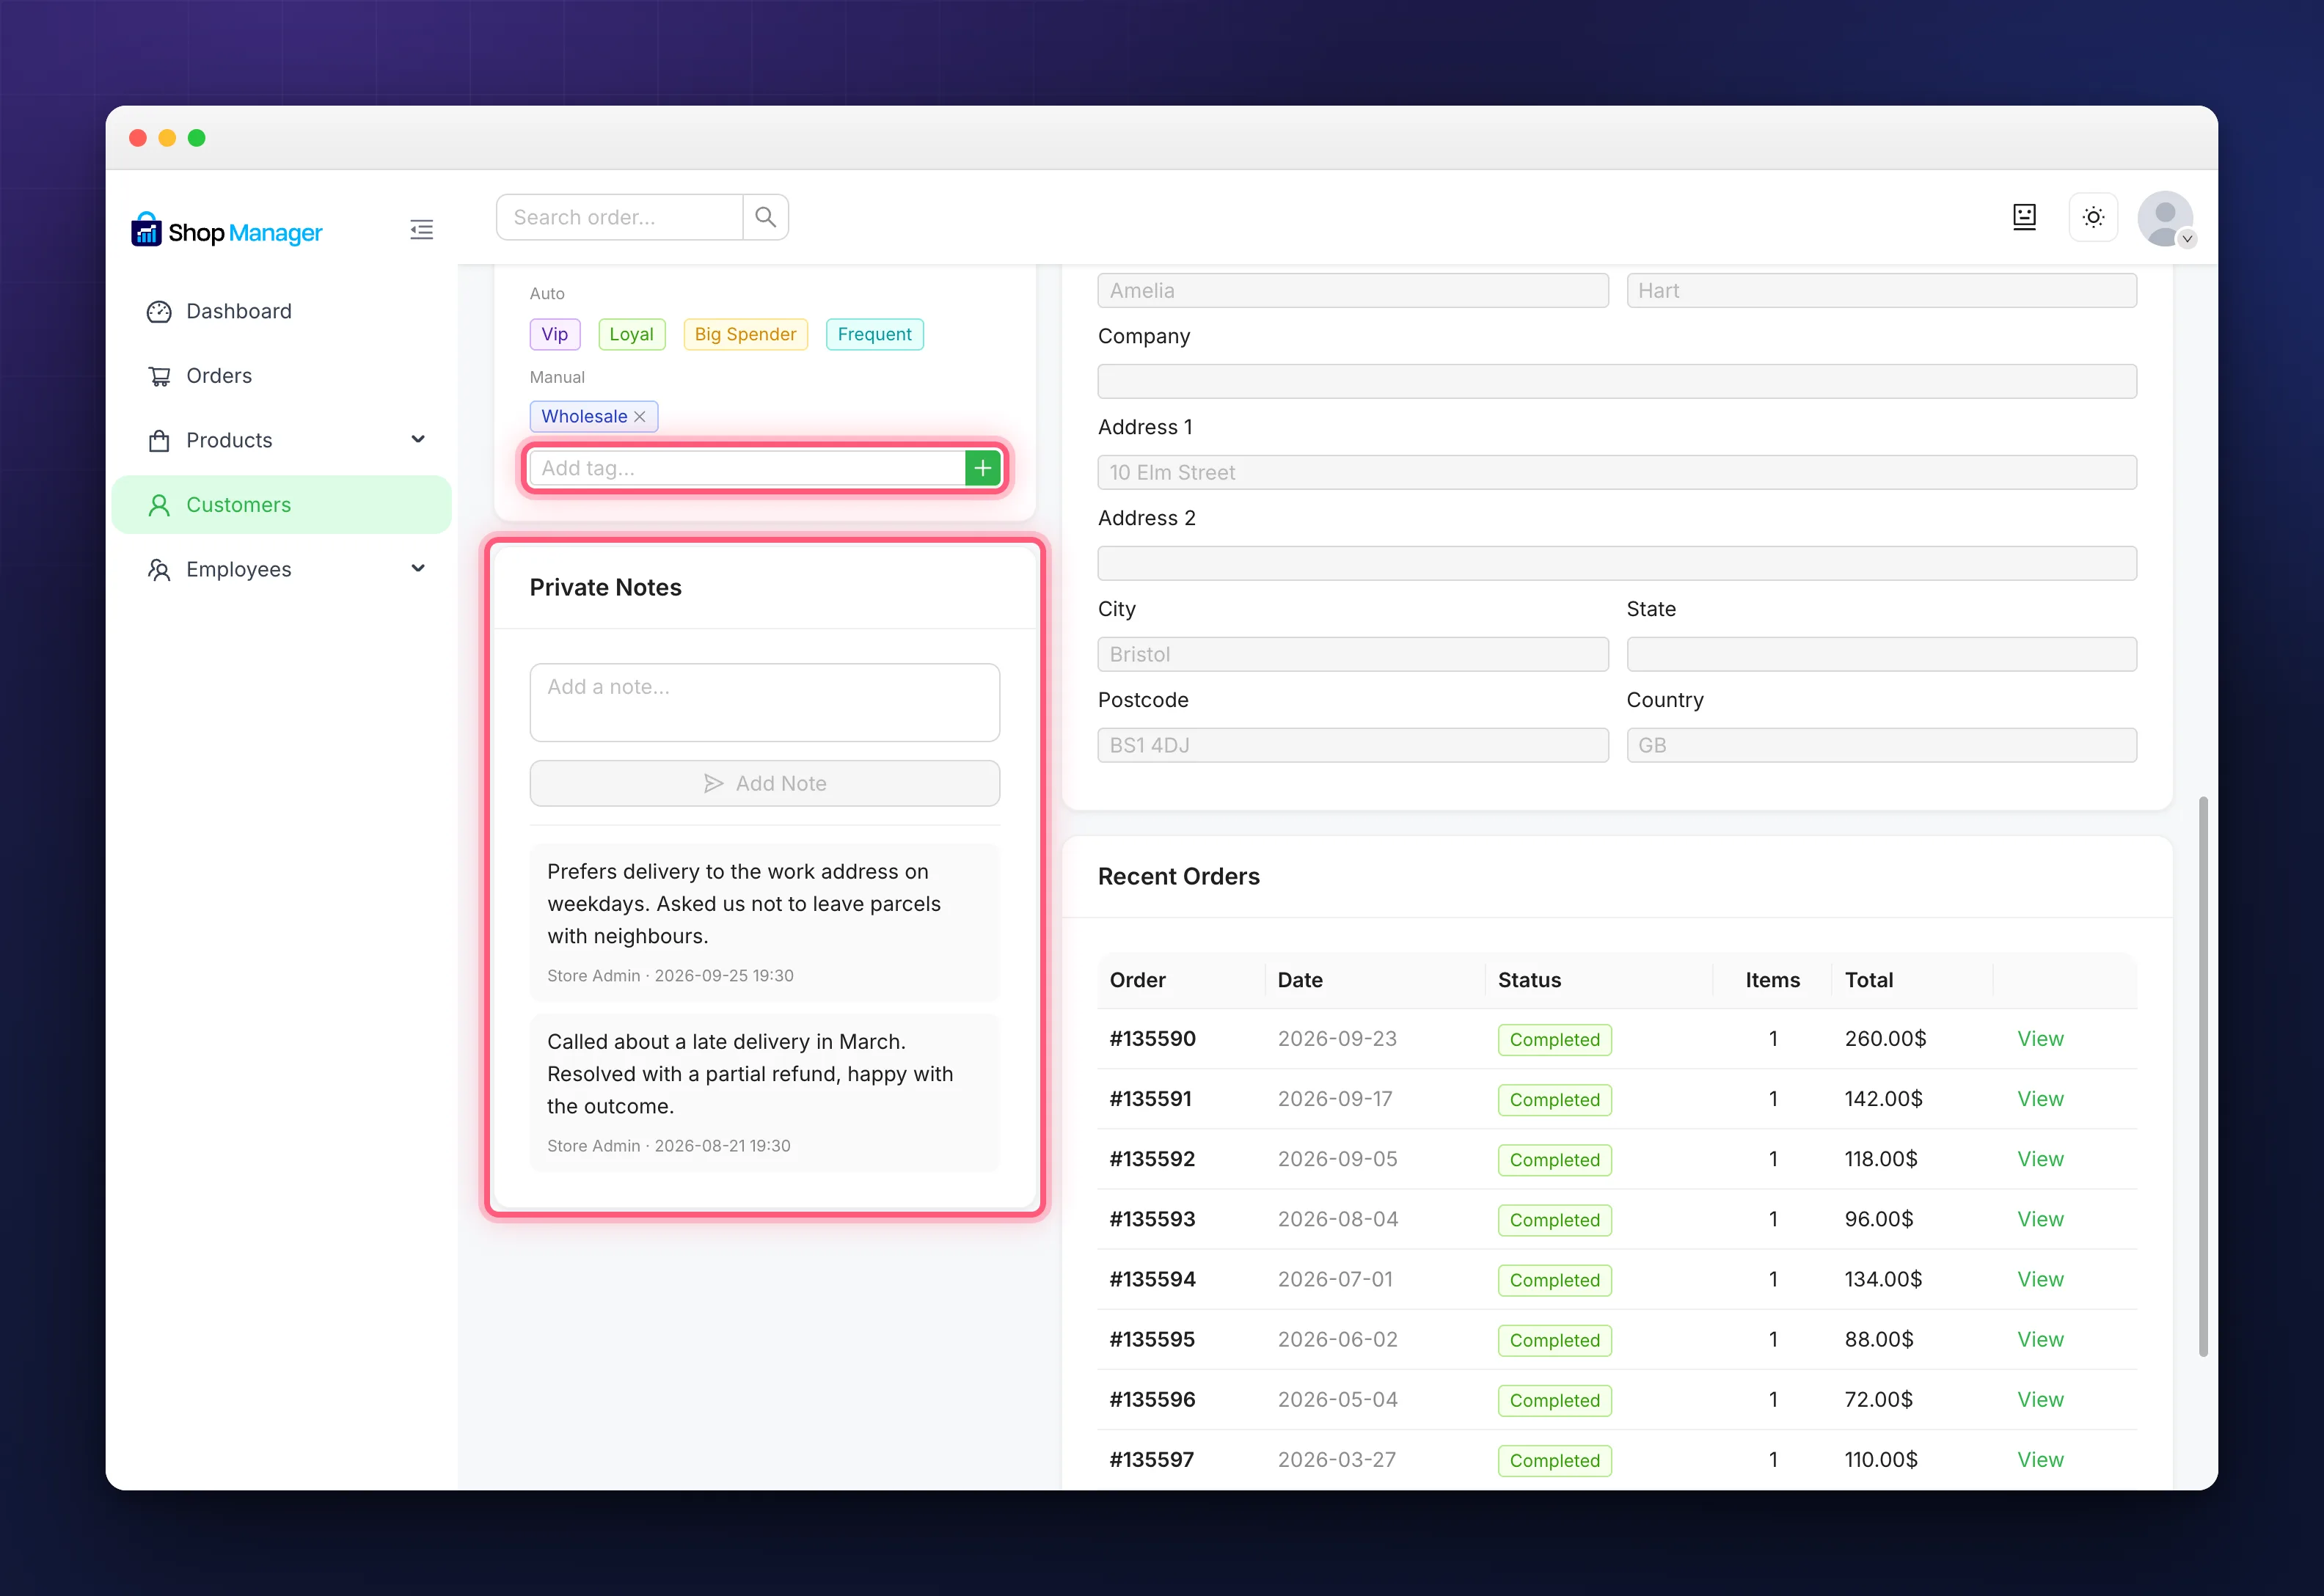
- To leave a note, type it in the Private Notes box and click Add Note, or press Ctrl and Enter. The note is stamped with your name and the time. Notes are internal and the customer never sees them, so use them freely for context like “called about a late delivery”.
- To tag someone by hand, type into the Manual box in the Tags card and press Enter. Tags are lowercased and spaces become underscores, so “repeat buyer” is stored as repeat_buyer. Remove one with the small cross on the tag.
The automatic tags above the manual ones cannot be edited by hand, because they are recalculated from order behaviour. To change who gets them, adjust the thresholds in Automatic Customer Segmentation.
Troubleshooting
A customer is missing from the list.
Check whether they have an account at all: guests who never registered are not listed, however many orders they have placed. Otherwise clear the search and filters, and check the excluded roles in your settings.
Tags are blank or a banner says customers are still being analyzed.
Tag analysis runs in the background as you browse. Wait a moment, or click the refresh icon in the Tags column heading to recalculate everyone at once.
There is no Customers item in the sidebar.
WooCommerce customer management can be switched off in the module settings. If you are signed in under a Shop Manager employee role, note that only SM: Store Manager has customer access out of the box; an administrator can grant it to the others.
The address fields will not let me type.
They stay locked until you click Edit Address. If the button is missing, your role has view access but not edit access.
Related Documentation
- Automatic Customer Segmentation for WooCommerce: how the VIP, Loyal and At Risk tags are decided.
- WooCommerce Order Management from the Frontend: the orders behind each customer.
- Role Based Access Control for Your Store: who on your team can open this screen.