How to Create WooCommerce Orders Manually
Phone orders, manual sales and corrections all need an order built by hand. Shop Manager lets you do that from the dashboard: add products, apply a coupon or a discount, set a shipping charge, type the customer’s details, pick a payment method and a status, and save.
1. Open the Create Order Screen
Click Orders in the sidebar, then Add New at the top right.
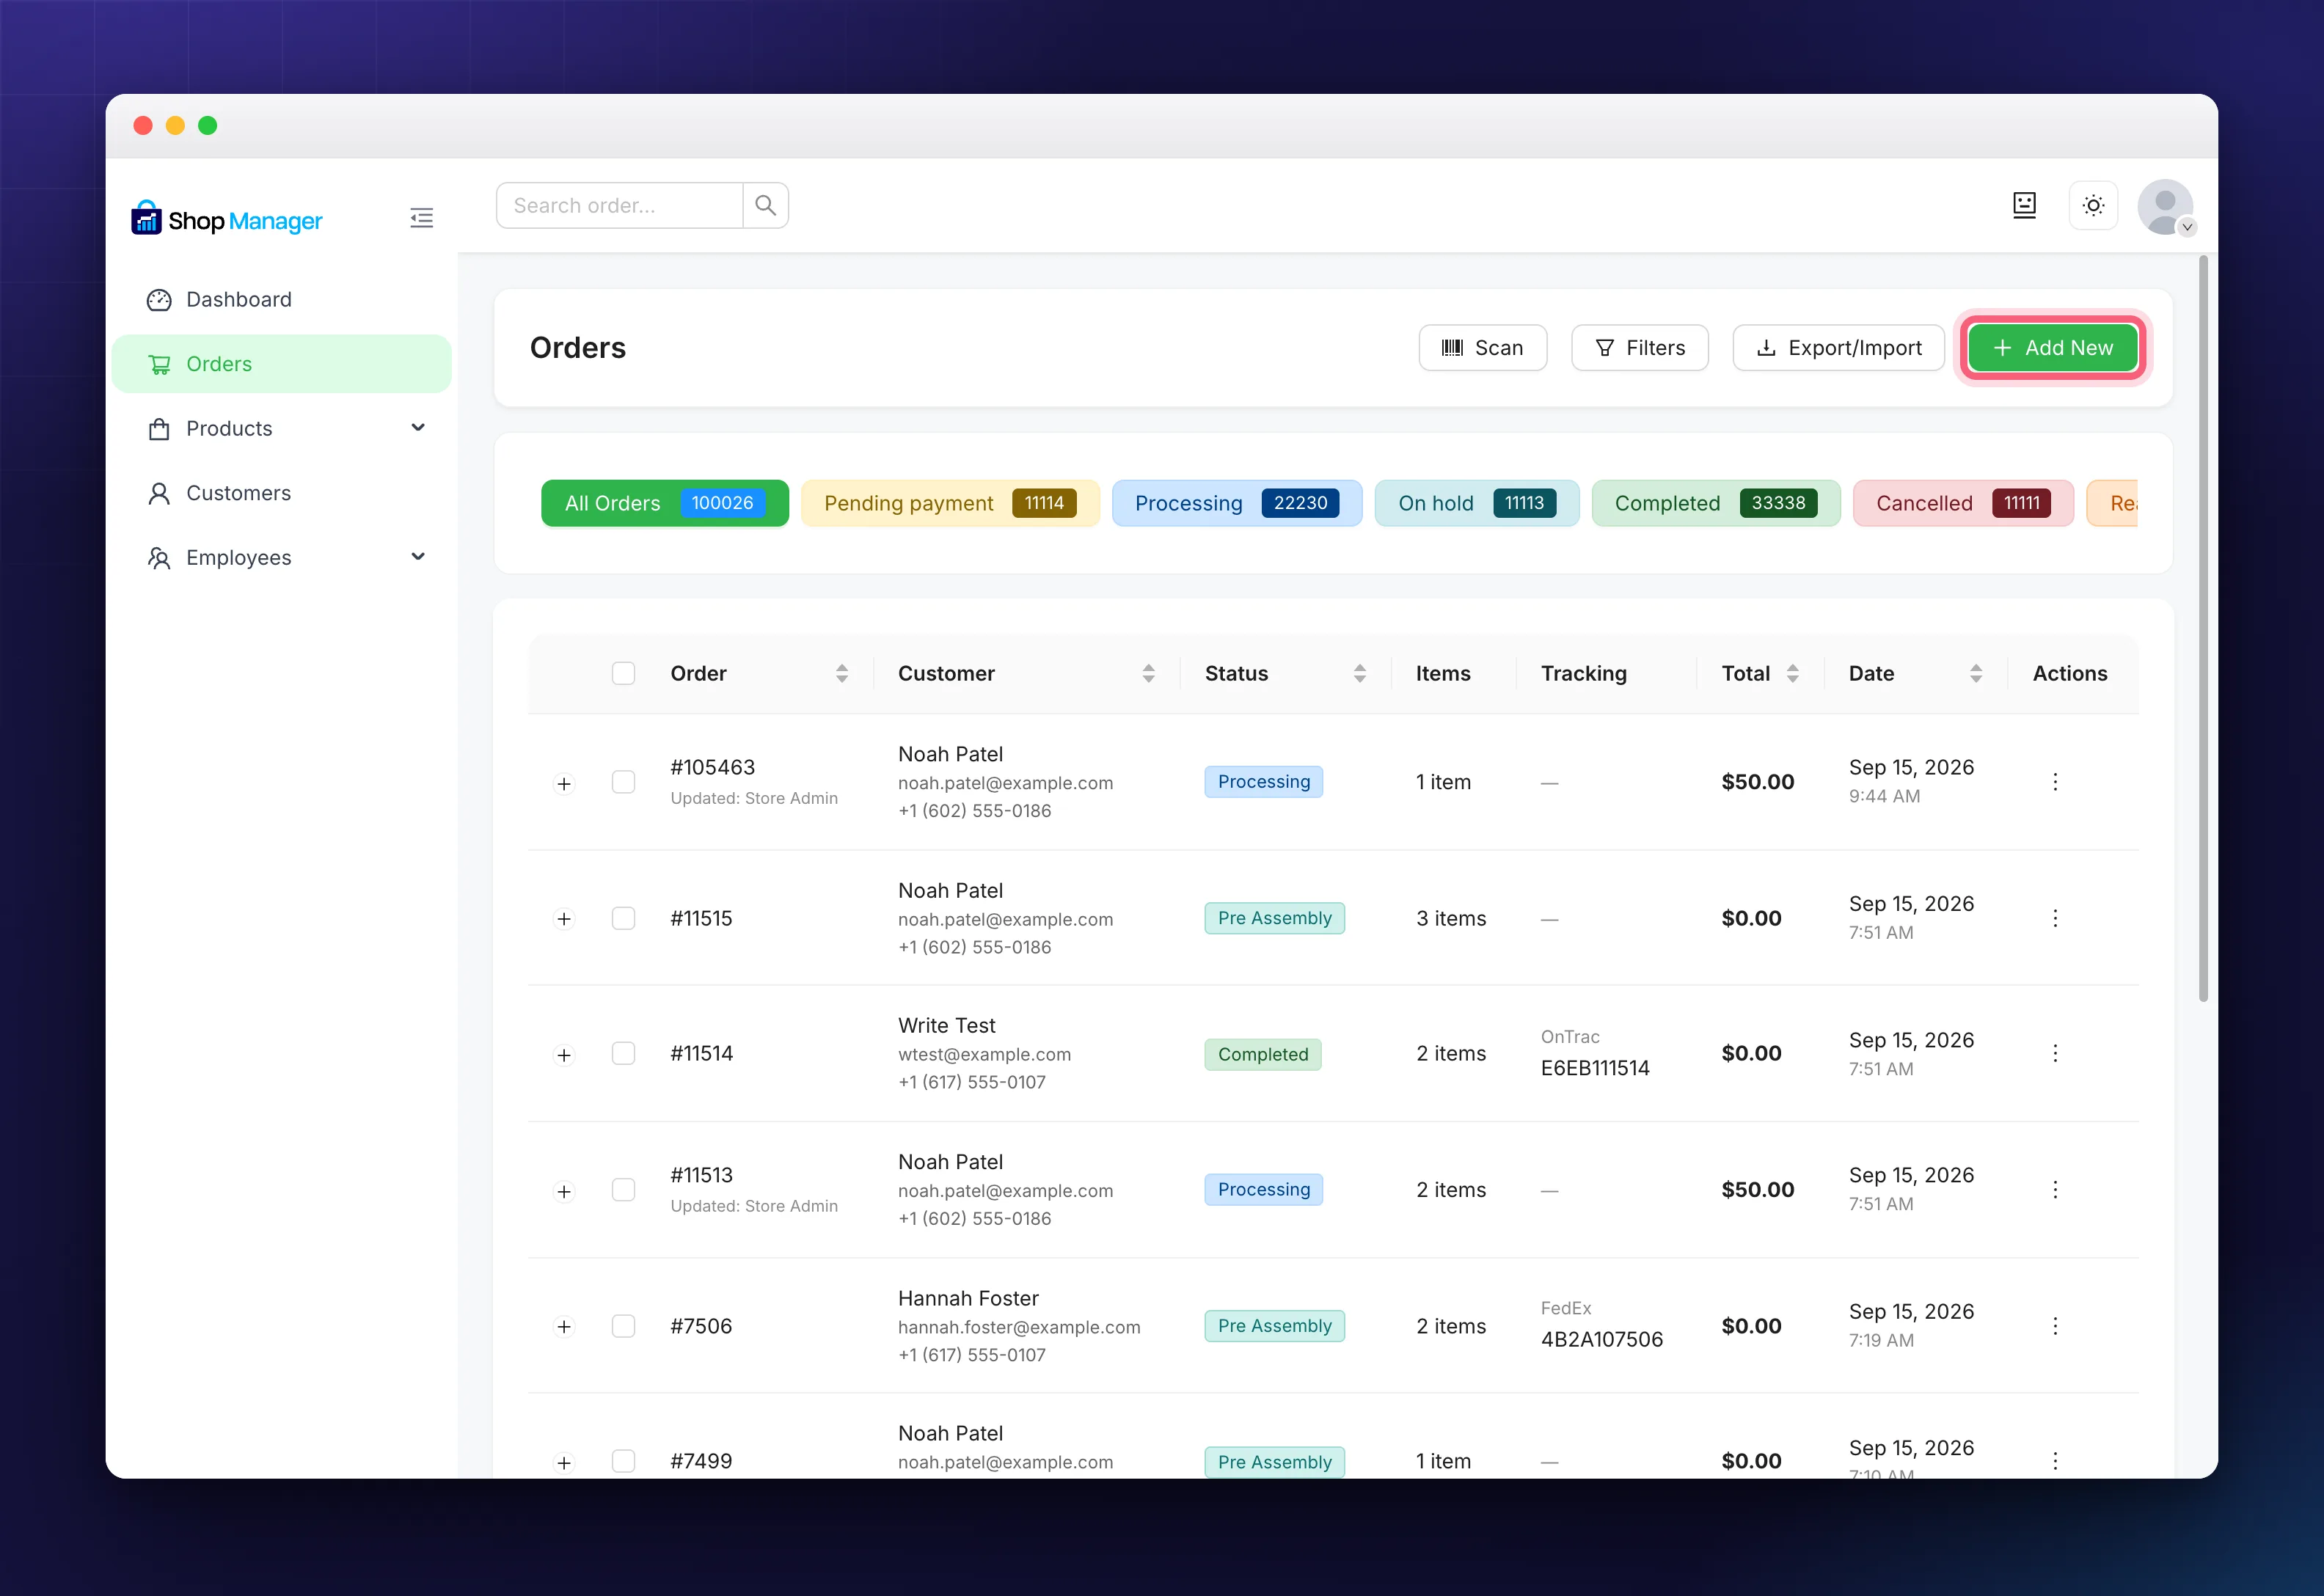
The button is highlighted above. If it is not there, your role is missing the Create Orders permission, which administrators and store managers have already.
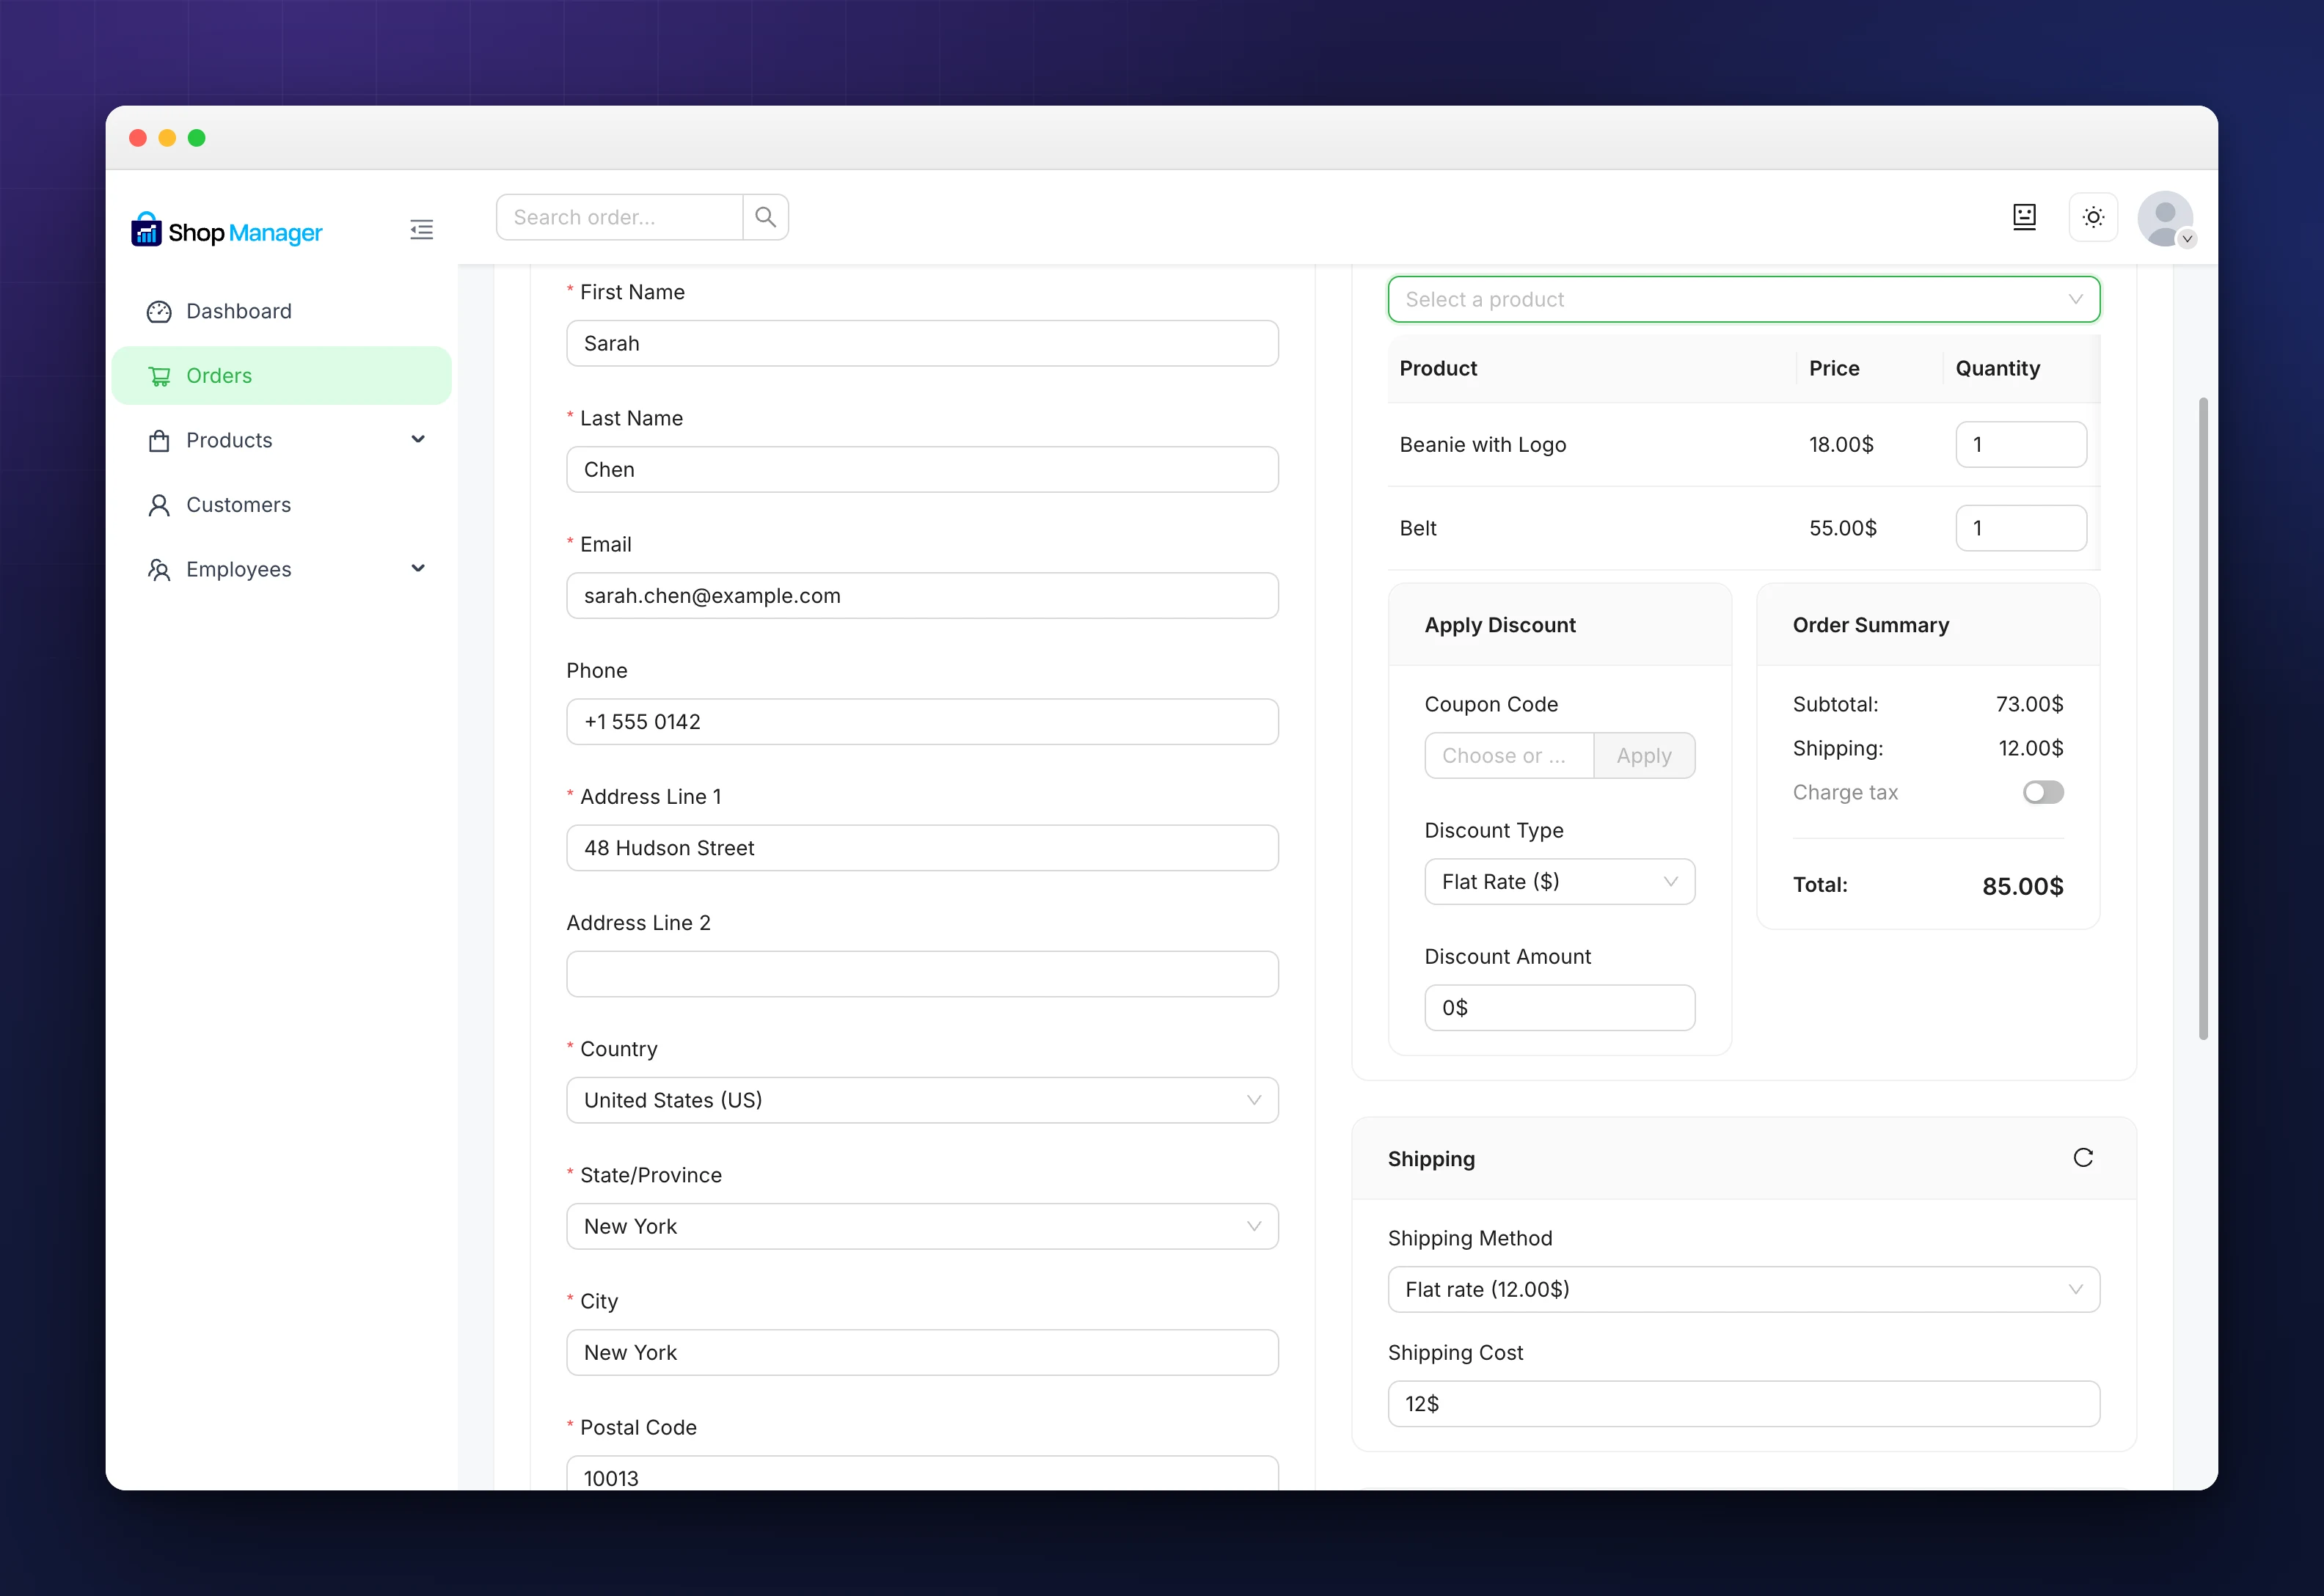
The screen is in two columns: the customer’s Billing Address on the left, and Order Items, Shipping and Payment Details on the right. Fields marked with a red asterisk are required.
2. Add the Products
Use Select a product to search by name and click a result to add it as a line. Variable products open a picker first, so choose the variation you want. Then set the quantity on each line, and repeat for as many products as the order needs.
Once a line exists, Apply Discount and Order Summary appear underneath. Before that the screen says so, because there is nothing to price yet.
Coupon codes
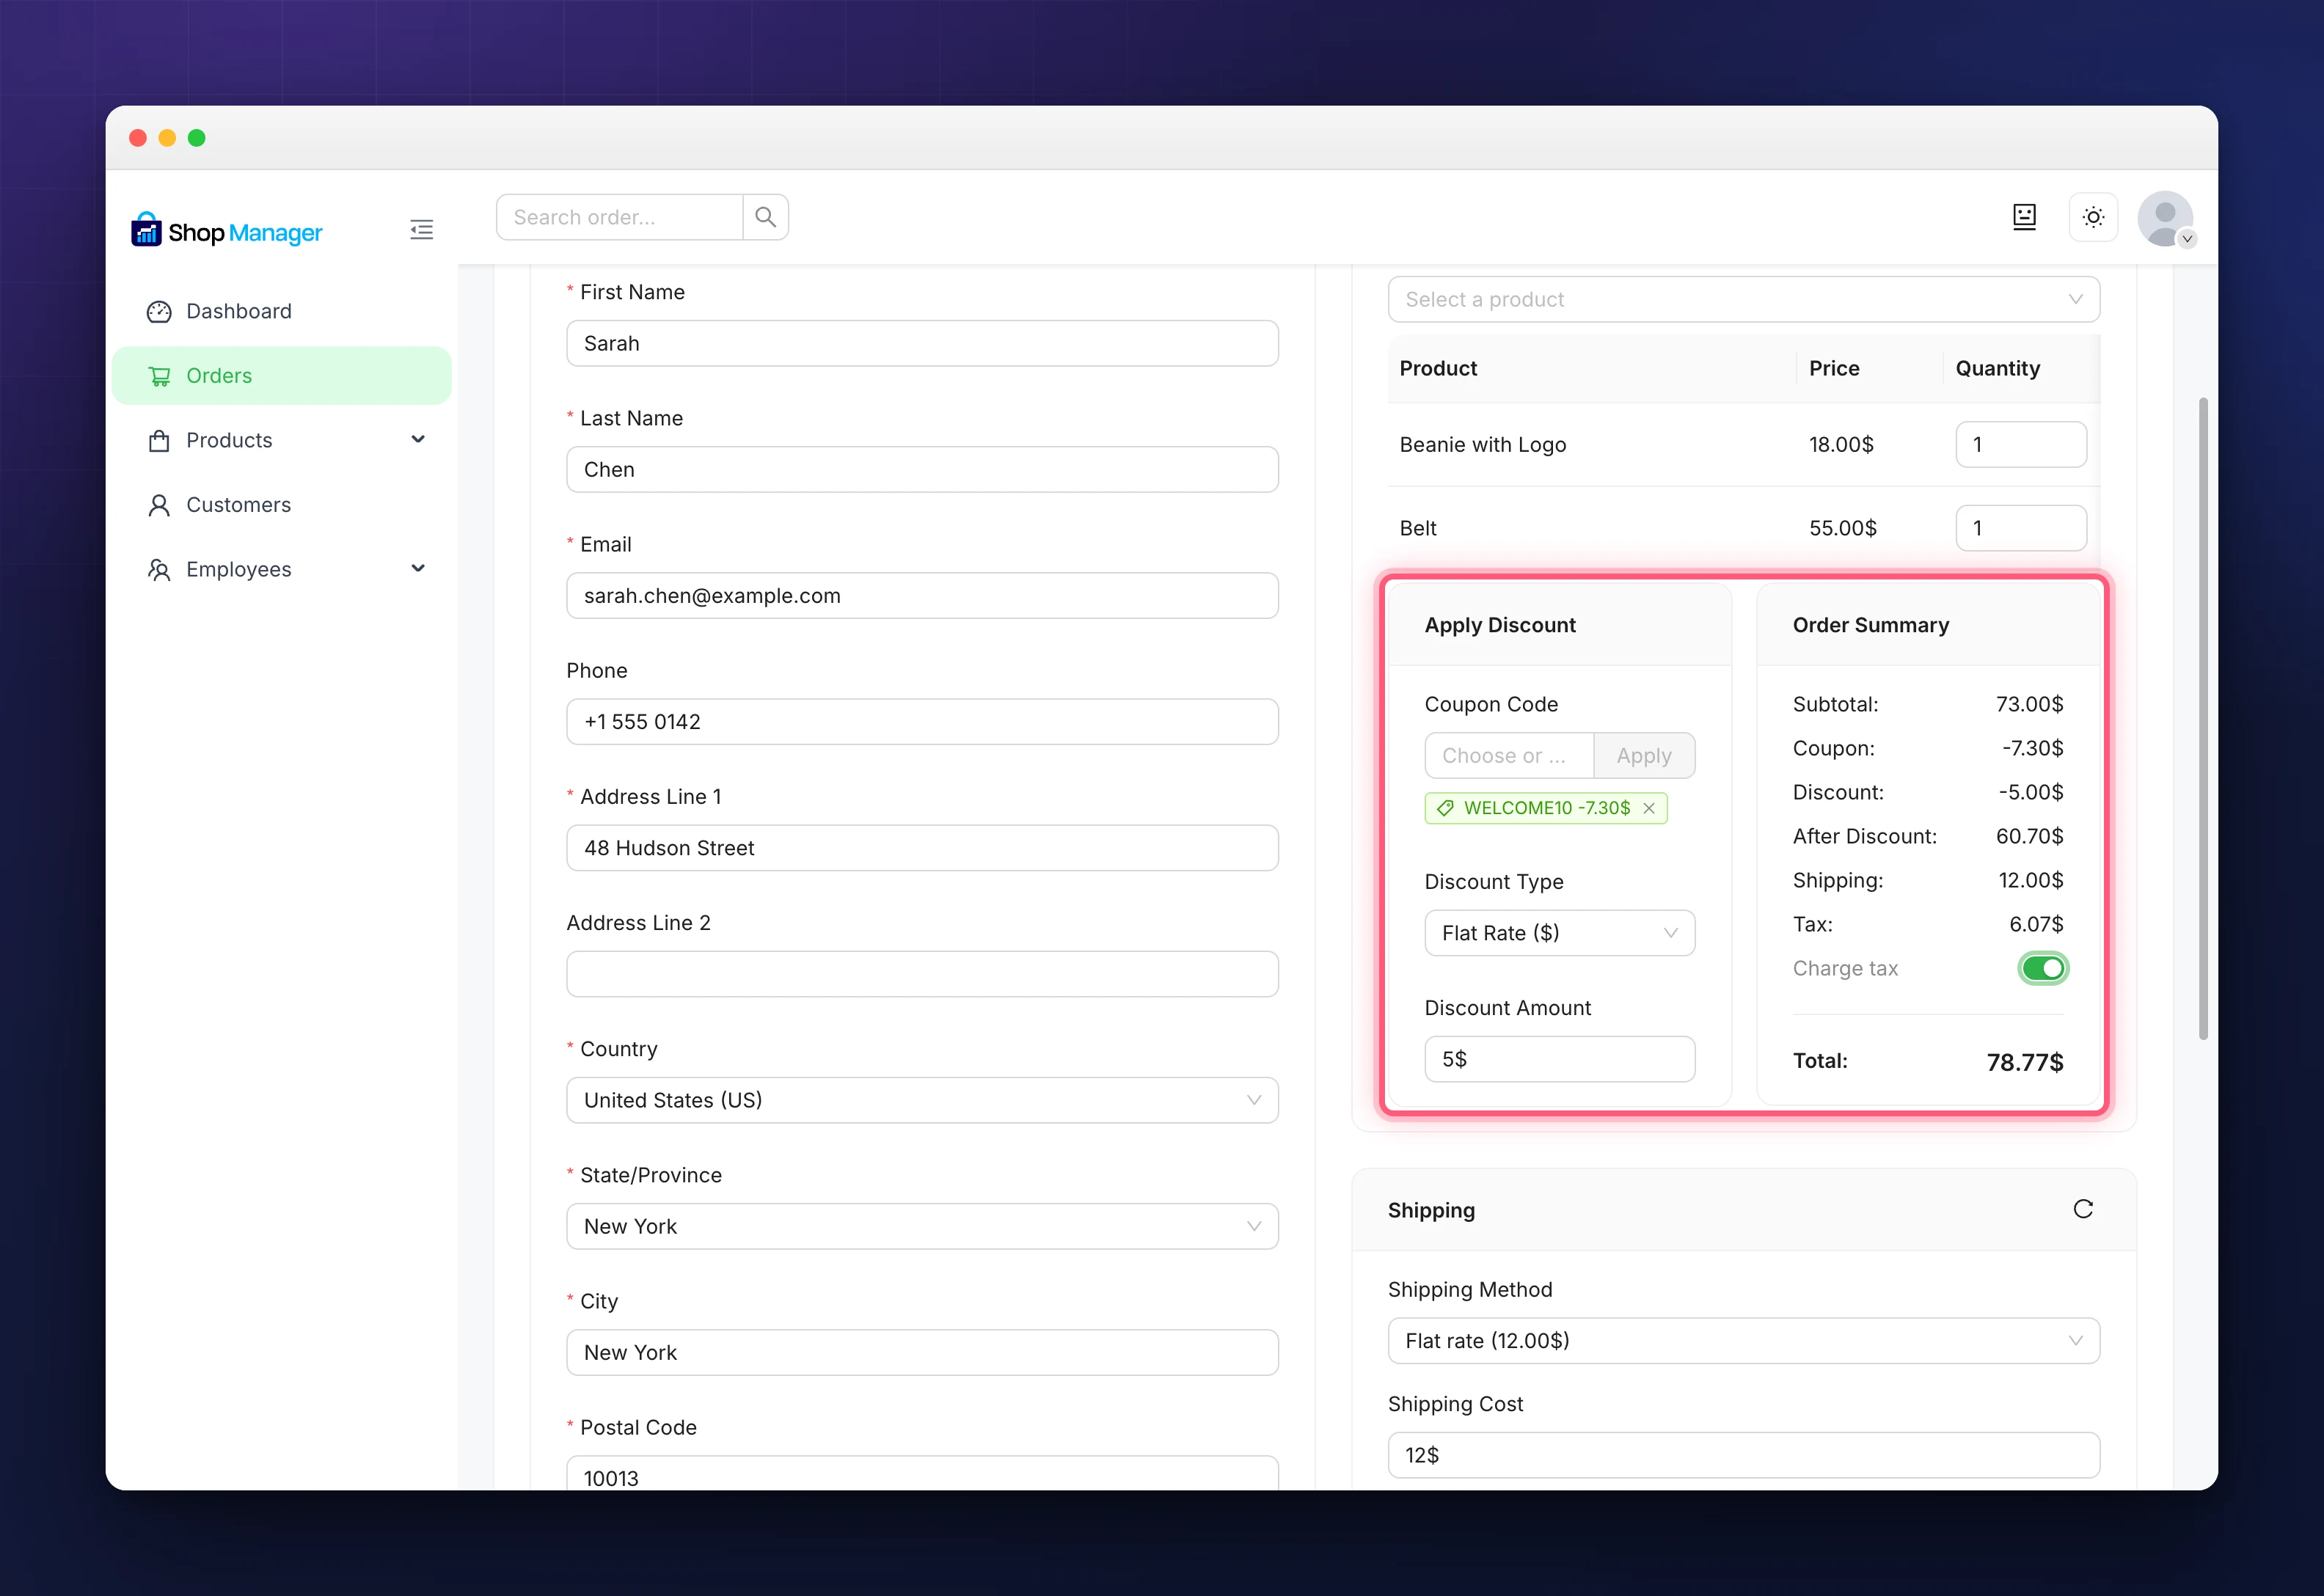
If your customer quoted a coupon, put it in Coupon Code at the top of the Apply Discount card. Click the box and your store’s coupons are listed, each with what it is worth and any minimum spend, so nobody has to remember codes. You can type one in instead, which is what you want for a code that came from another plugin or one made since the list was loaded.
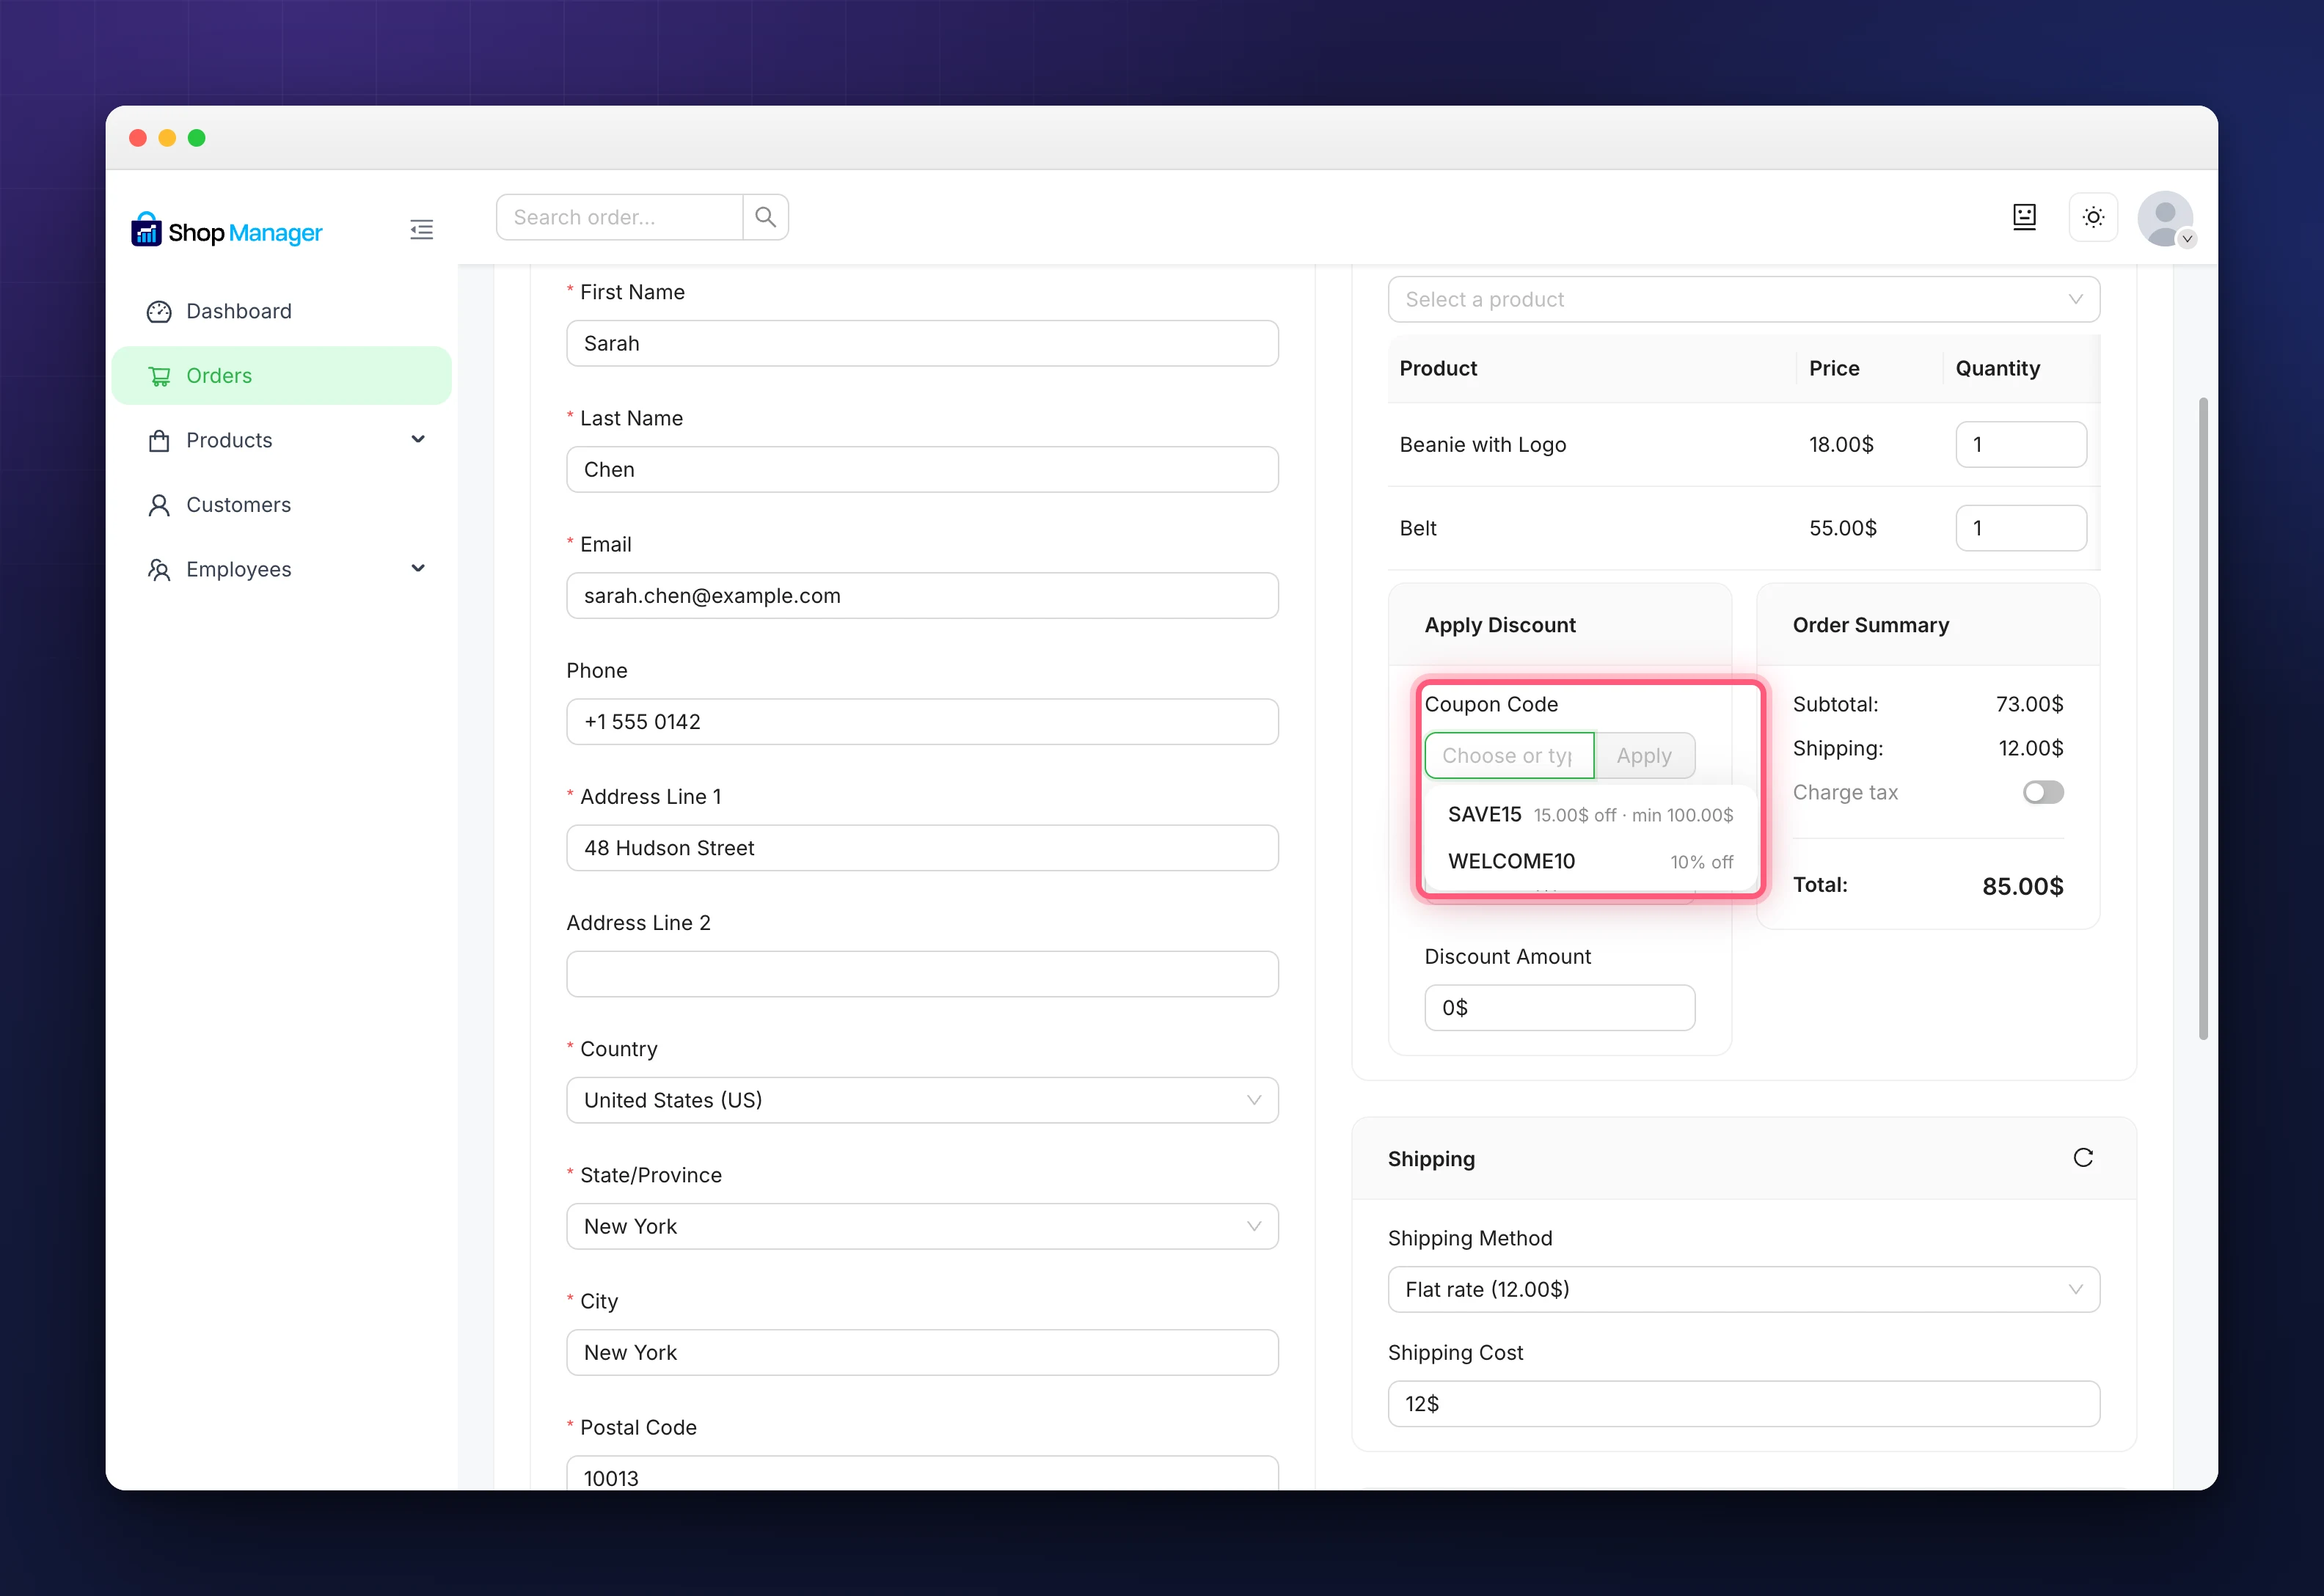
Click Apply and the code is checked against the order you are building. If it cannot be used you are told why in WooCommerce’s own words, such as a minimum spend the order has not reached, and you are told there and then rather than when you press Create Order. An accepted coupon appears as a tag showing what it took off, and a Coupon row appears in the Order Summary.
The order is saved with a real WooCommerce coupon on it, so the coupon’s usage count moves and your coupon reports stay right. Expired coupons and ones that have run out of uses are left out of the list, since they could only be refused.
A manual discount
For a one-off reduction with no coupon behind it, use Discount Type and Discount Amount. The type can be Flat Rate in your store currency or a Percentage, and it comes off as you type.
This is a plain adjustment: it has no rules, no expiry, and it does not touch any coupon’s usage count. You can use it alongside a coupon, and the summary lists the two separately so you can see which produced which figure.
Tax
Charge tax sits at the bottom of the Order Summary. Turn it on and the tax is worked out from the delivery address, each product’s tax class and your WooCommerce tax rates, and it appears in the summary before you save. The figure is calculated by WooCommerce, and the order is priced again by the same code when you save, so what you see is what the order gets.
Charge tax is off by default, on purpose. Orders raised on this screen have never been taxed, and switching that on by itself would change what your customers are billed. Turn it on per order. The switch is hidden altogether if taxes are turned off in WooCommerce.
3. Enter the Customer
There is no customer dropdown. This form is built for phone and manual orders, so the customer is identified by what you type into Billing Address: name, email, address and contact details. Pick the country first, because a State/Province field appears for countries that have them, and it is required.
Two note fields sit at the bottom of the same card:
- Customer Note: goes onto the order as the customer’s own note, the same one WooCommerce shows them.
- CMS Note: stored on the order for your team. The customer never sees it.
4. Set the Shipping Address
Same as billing address is on by default, so there is nothing to do for most orders. Turn it off when the parcel goes somewhere else, and fill in the separate address including country and state.
5. Add a Shipping Charge
The Shipping panel offers the rates you have already set up in WooCommerce for the delivery address you typed. Pick one from Shipping Method and the cost fills in. It stays editable, because an order raised by hand often needs something other than the book rate, and Custom charge lets you name the charge yourself and type any amount.
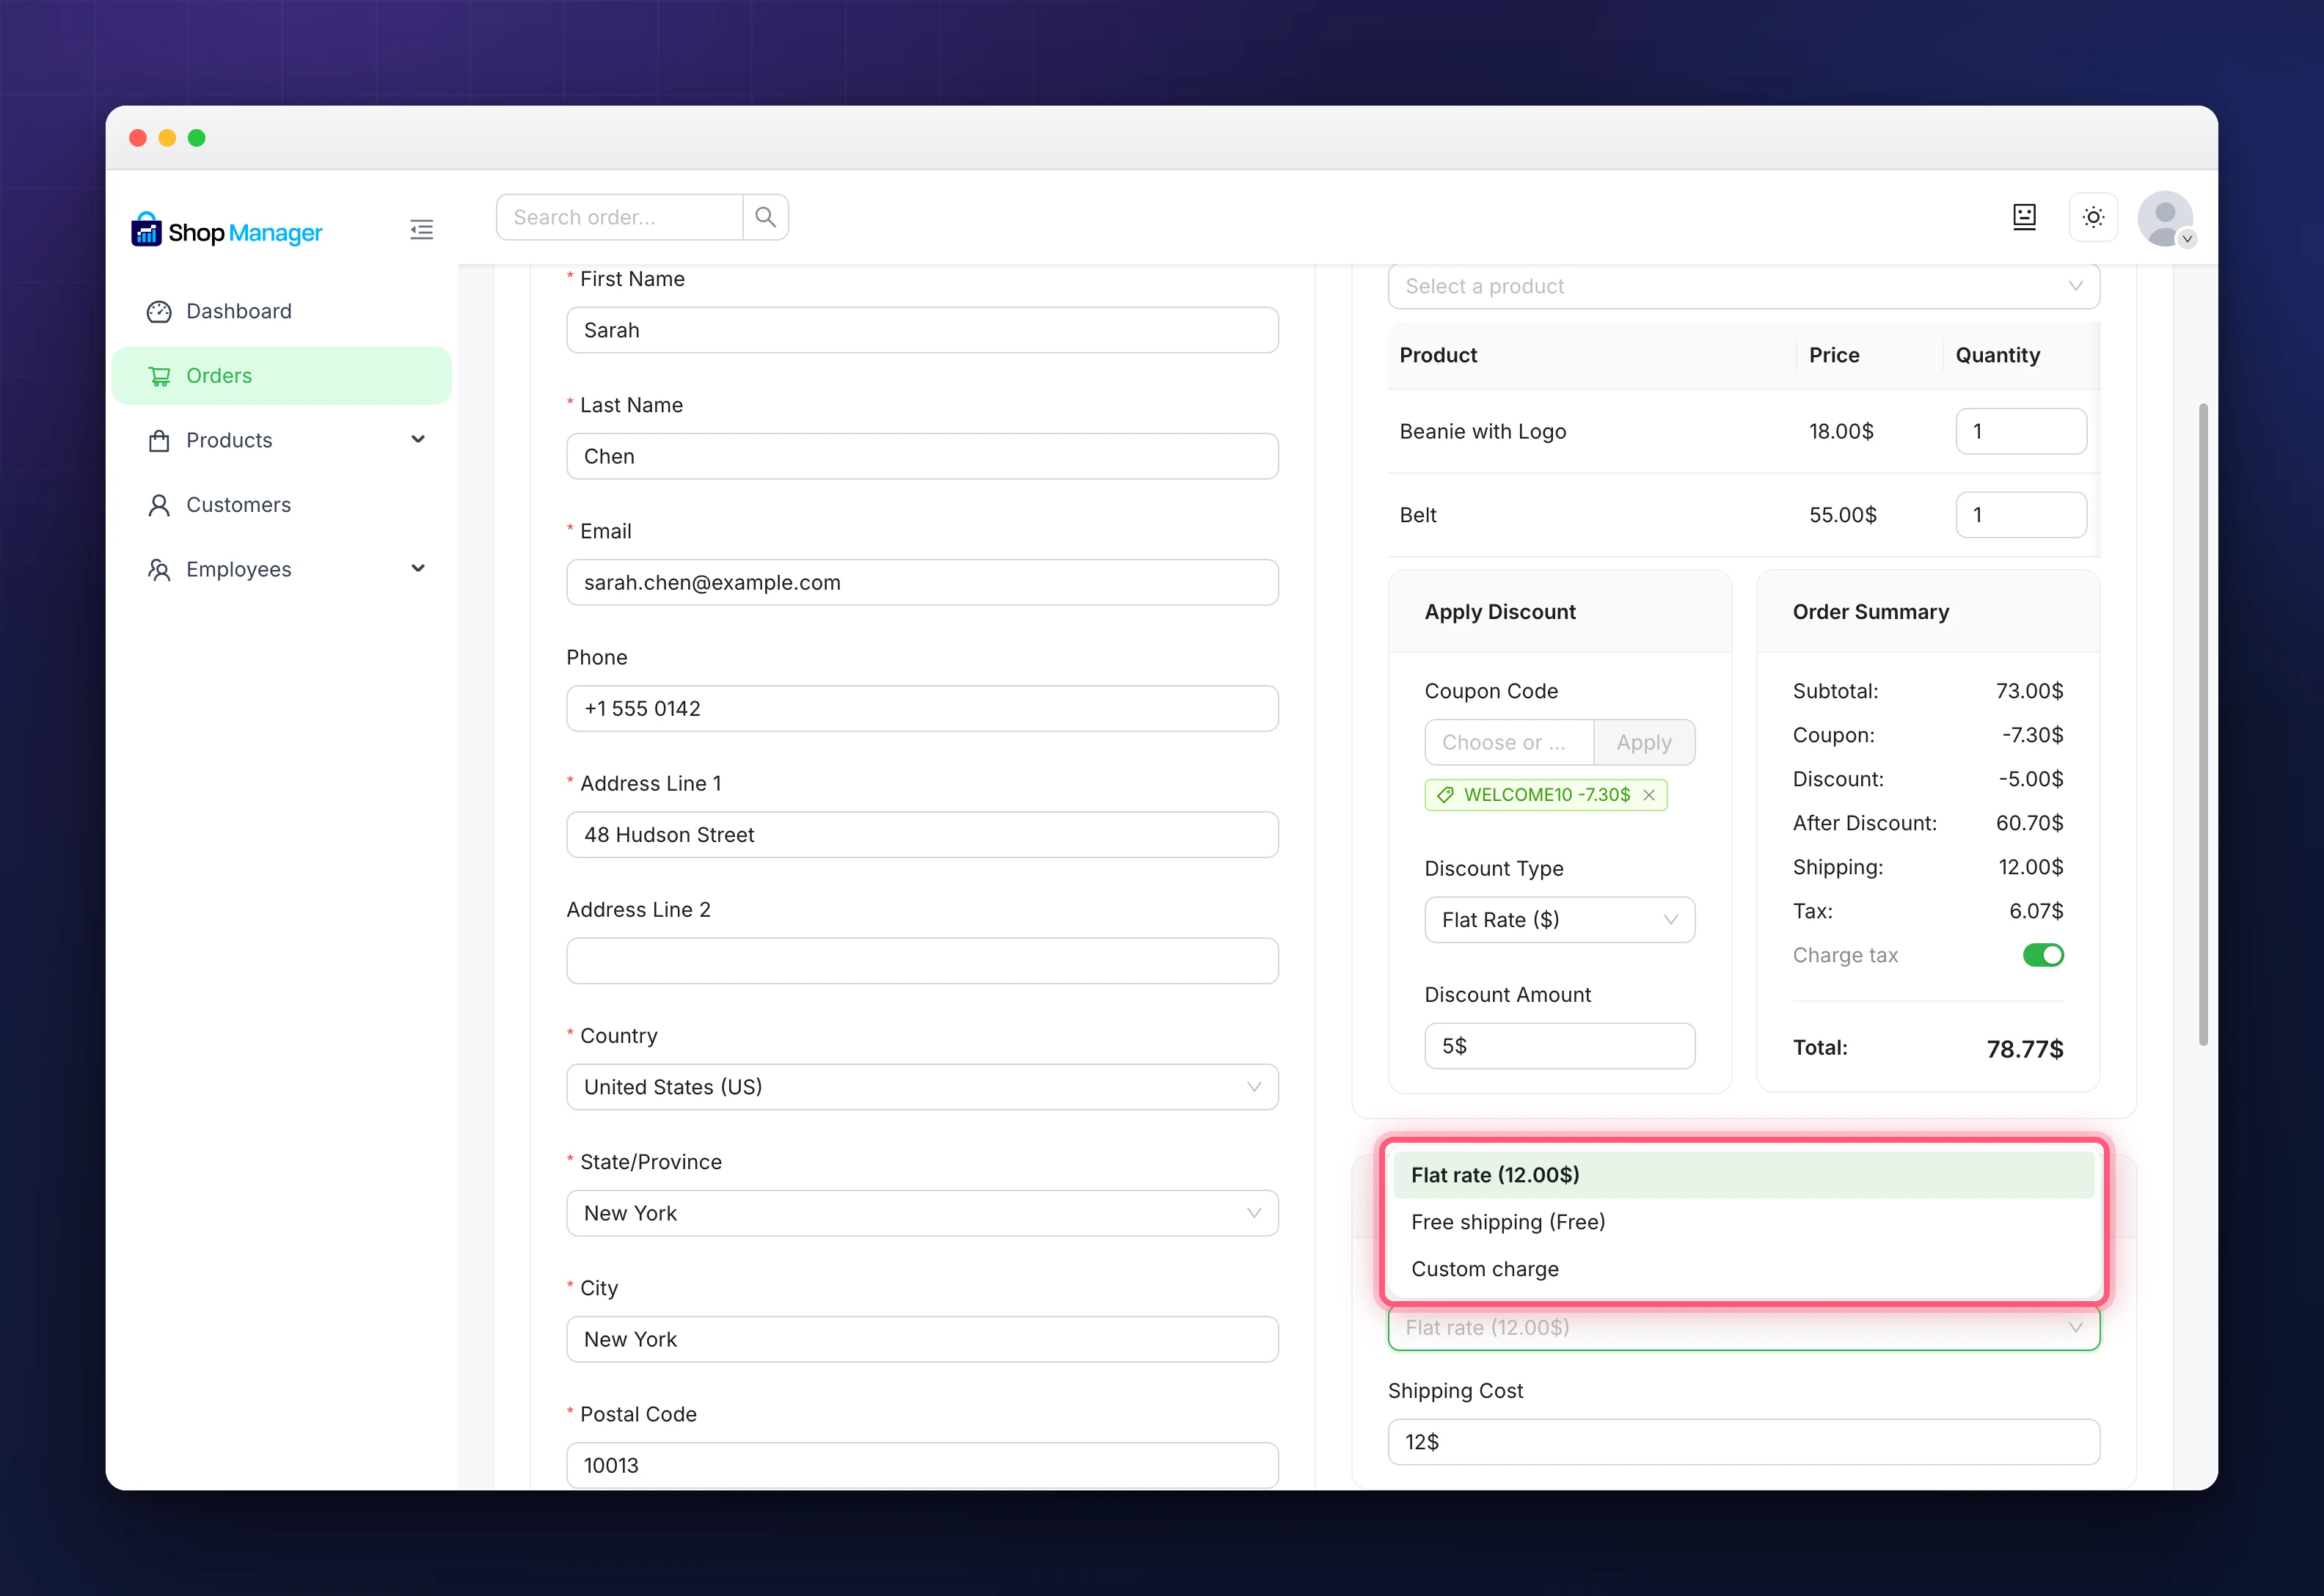
A rate is a calculation, not a fixed number. A flat rate can be charged per item and free shipping has a minimum spend, so the list refreshes as you add products and change the address. That is also why nothing is offered until the order has at least one product and a delivery country: there is nothing to price before that. The reload button in the panel’s corner fetches the rates again.
The charge appears as a Shipping row in the Order Summary and is written to the order as a real WooCommerce shipping line, so your packing slips, invoices, labels and reports all read it correctly. Leave the panel alone if the order needs no shipping and nothing is added.
6. Choose Payment and Status
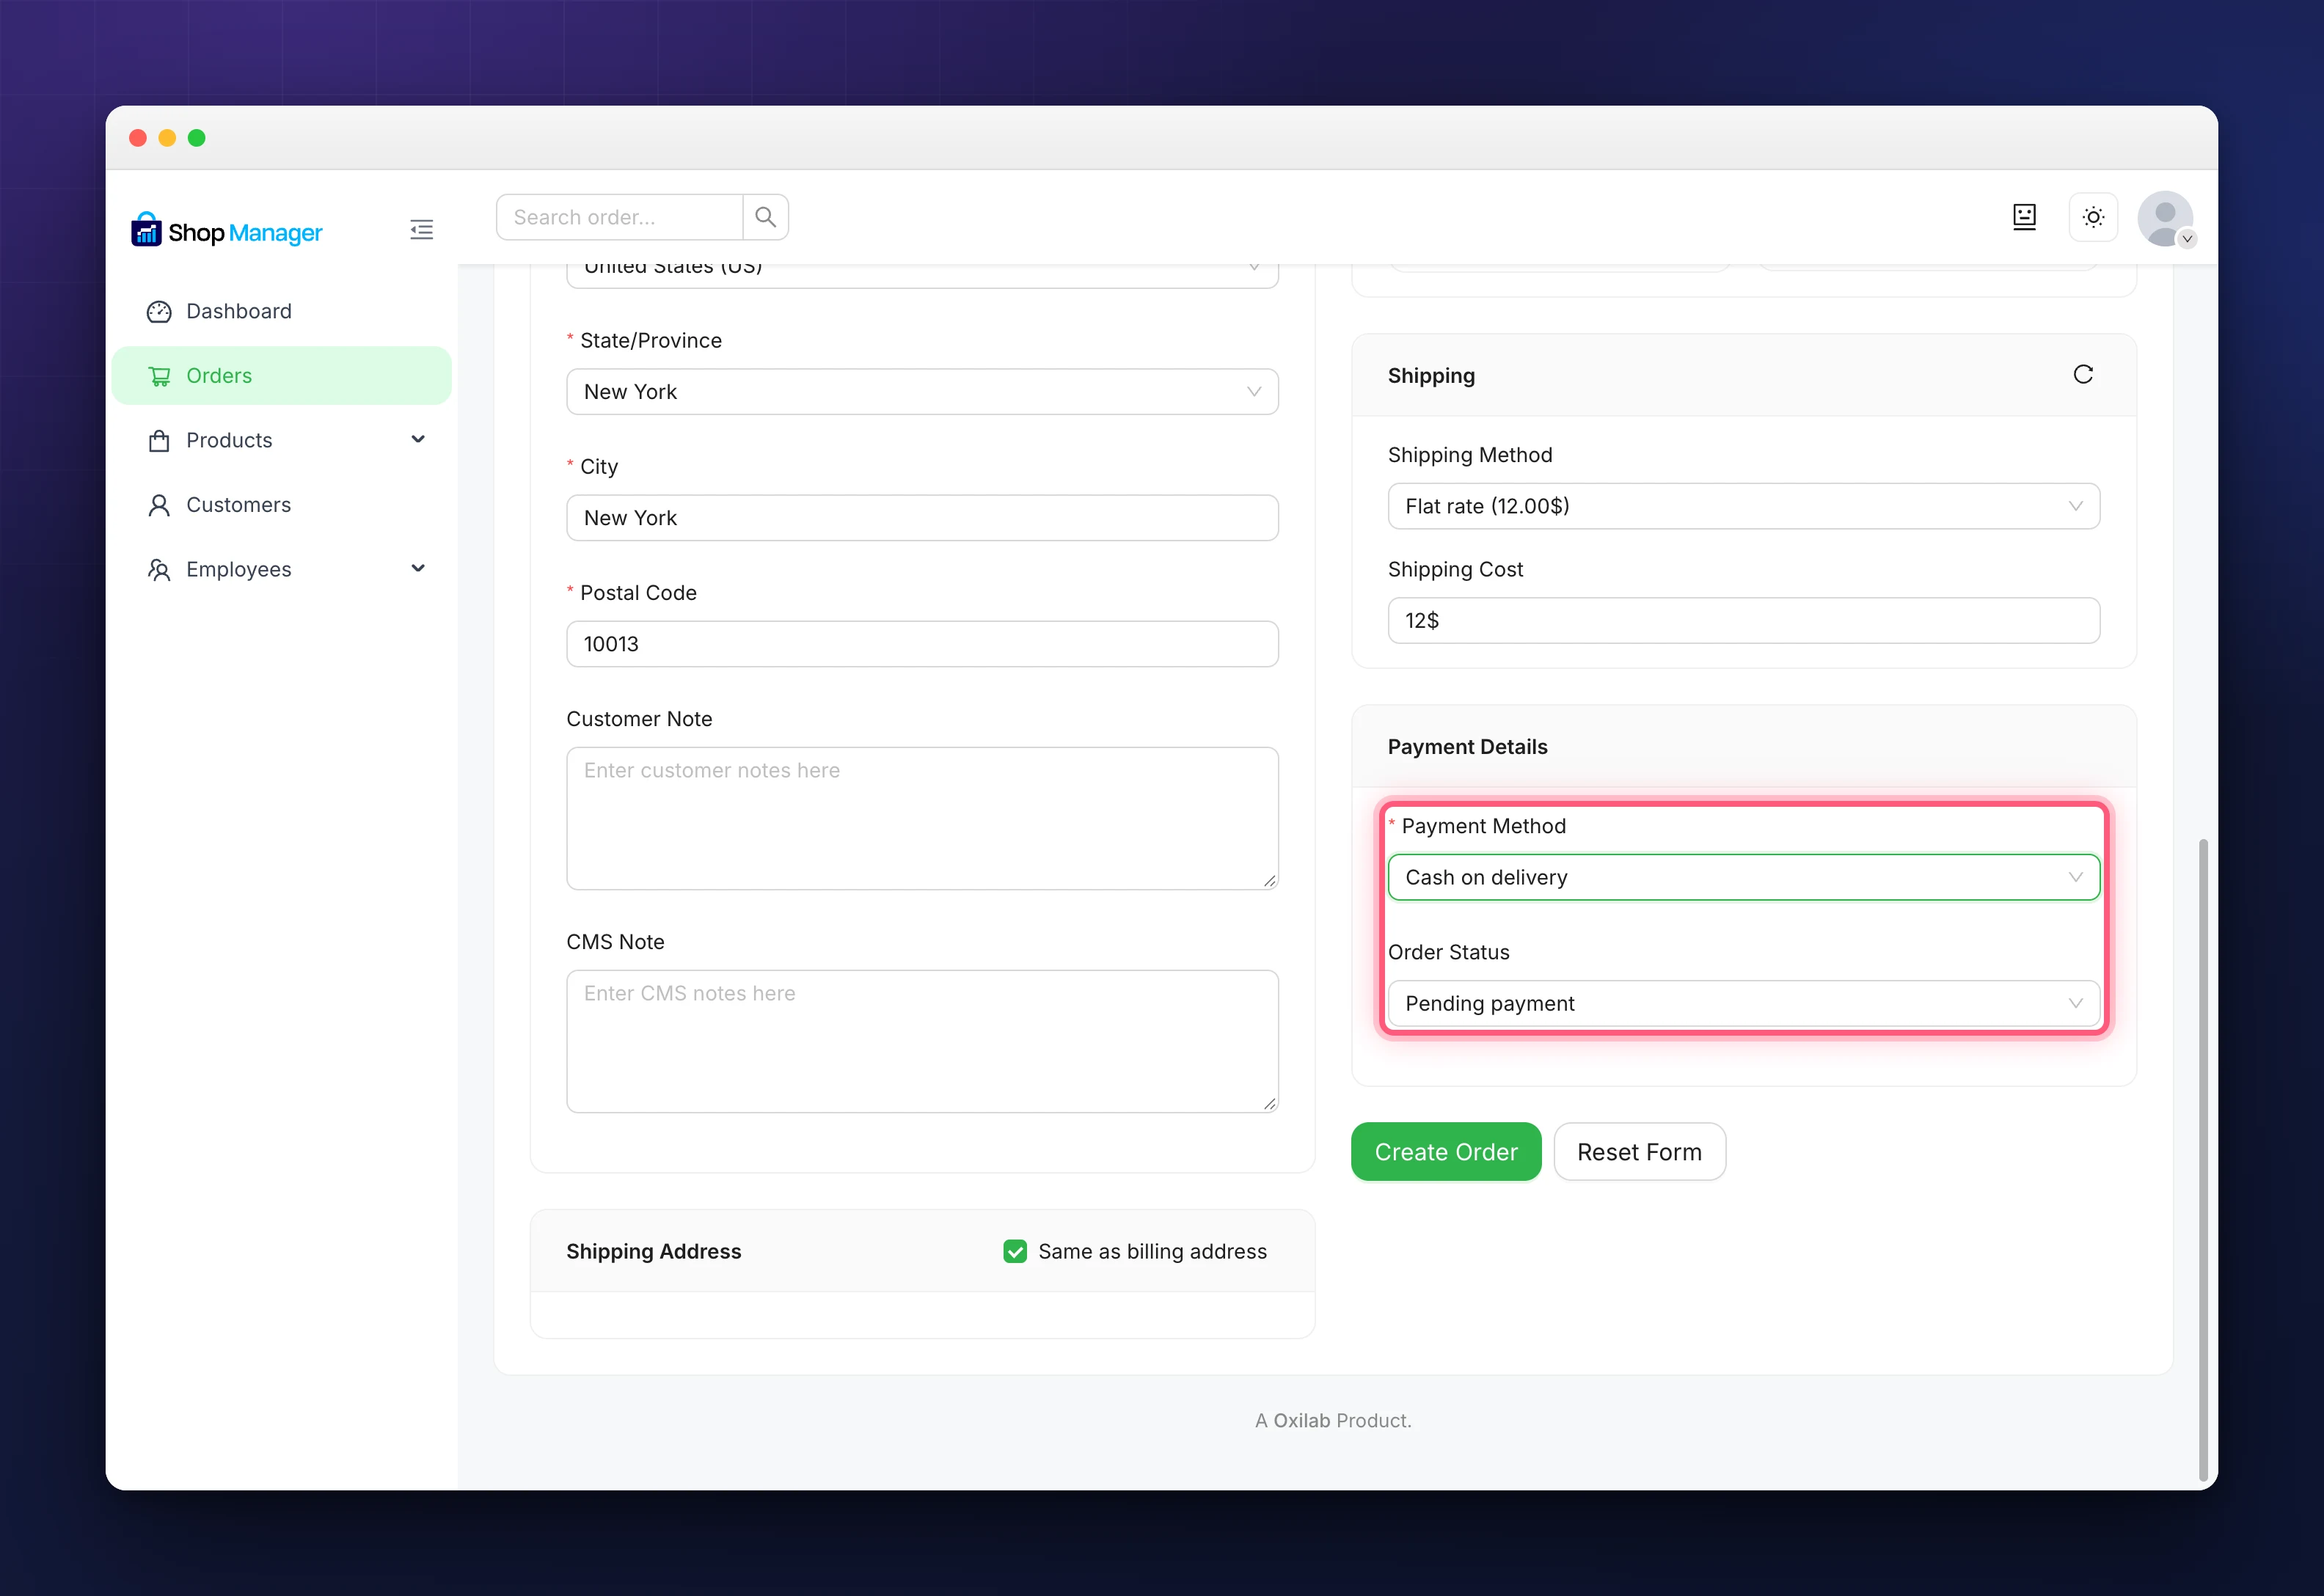
- Payment Method is required. The list is your store’s own enabled WooCommerce payment methods.
- Order Status starts at Pending payment. If the money is already in, change it to Processing or Completed now rather than editing the order afterwards.
Taking the payment
Card details are not typed in here, and cannot be. The number would pass through your own server, which is a place no payment gateway wants it and no merchant wants the compliance that comes with it. WooCommerce’s own order screen has no card fields either, for the same reason.
To let the customer pay, leave the order at Pending payment and save it, then open it and use Payment Link to copy the link they pay on. Send it however you reach them. They enter their card on your own checkout, through your own gateway, with 3D Secure and your fraud checks running as they do for any other order, and the order moves on by itself once the payment clears.
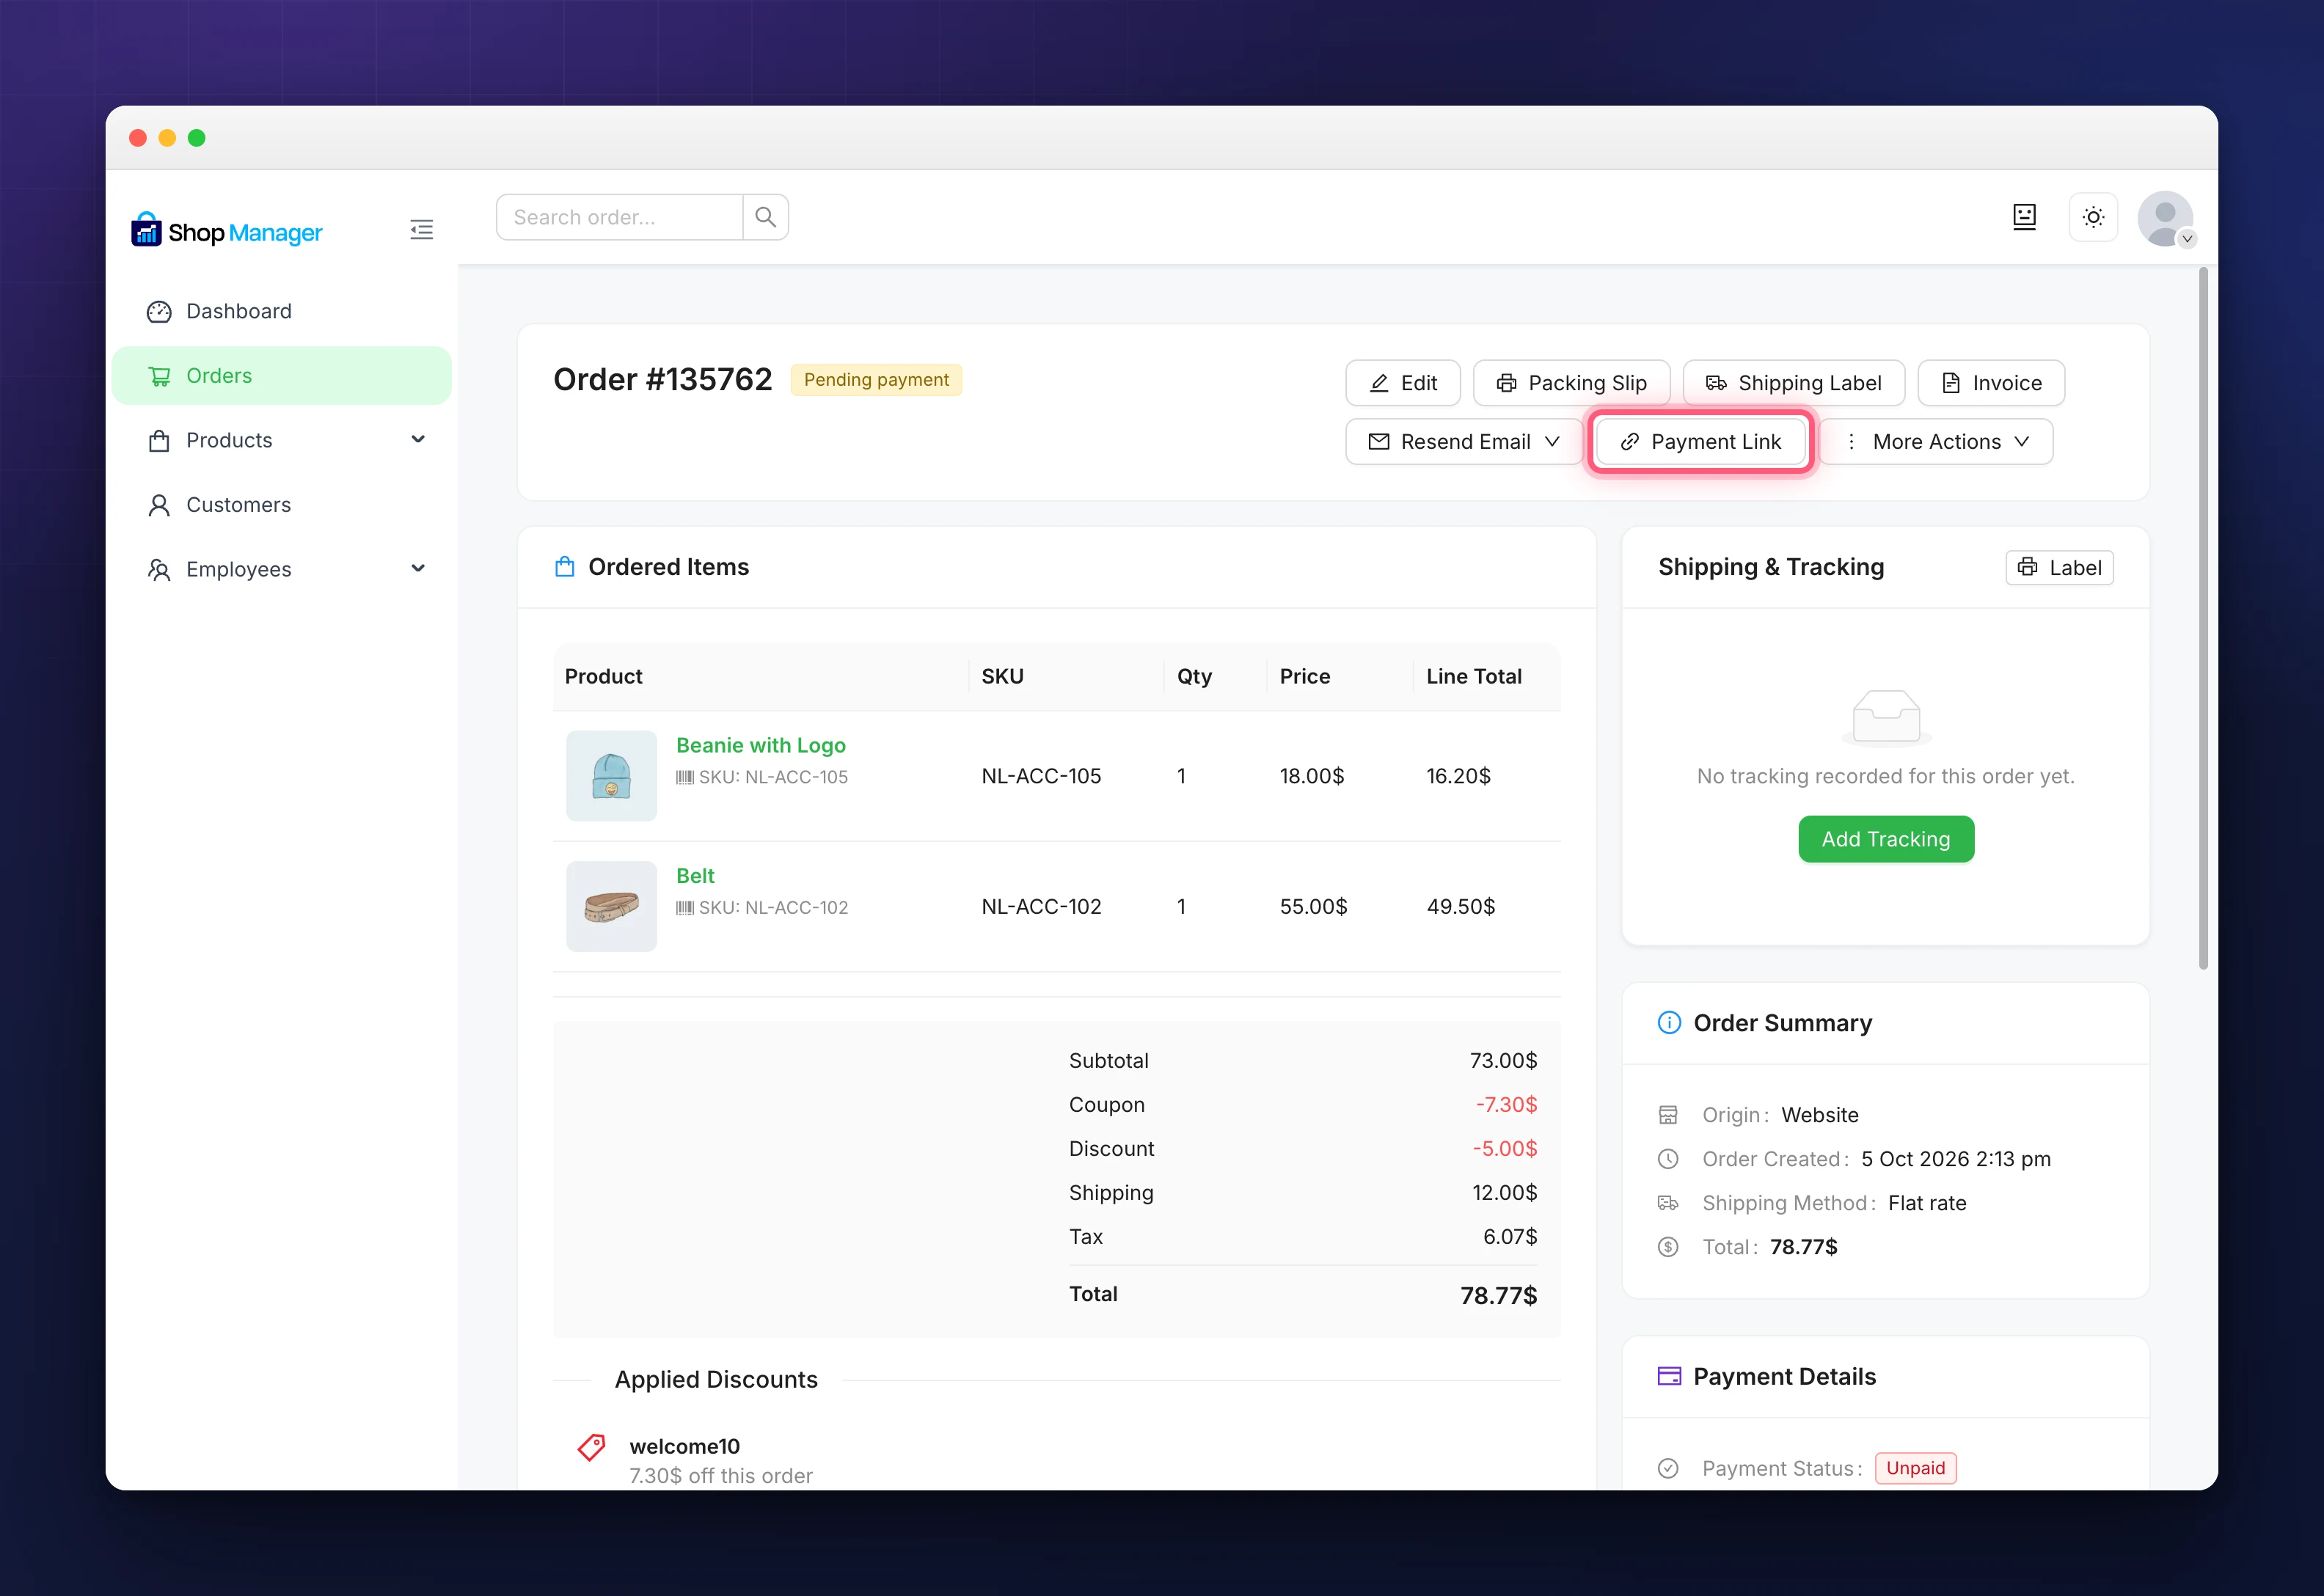
The button appears only on orders WooCommerce will actually take money for, which is Pending payment and Failed. An order on hold has no payment page to send anyone to. You can also use Resend Email and pick Invoice / Order Details, which emails the customer the same link.
7. Save It
Click Create Order. You get a success message, the order appears in your order list, and the form clears itself so you can type the next one straight away. Reset Form beside it clears everything without saving.
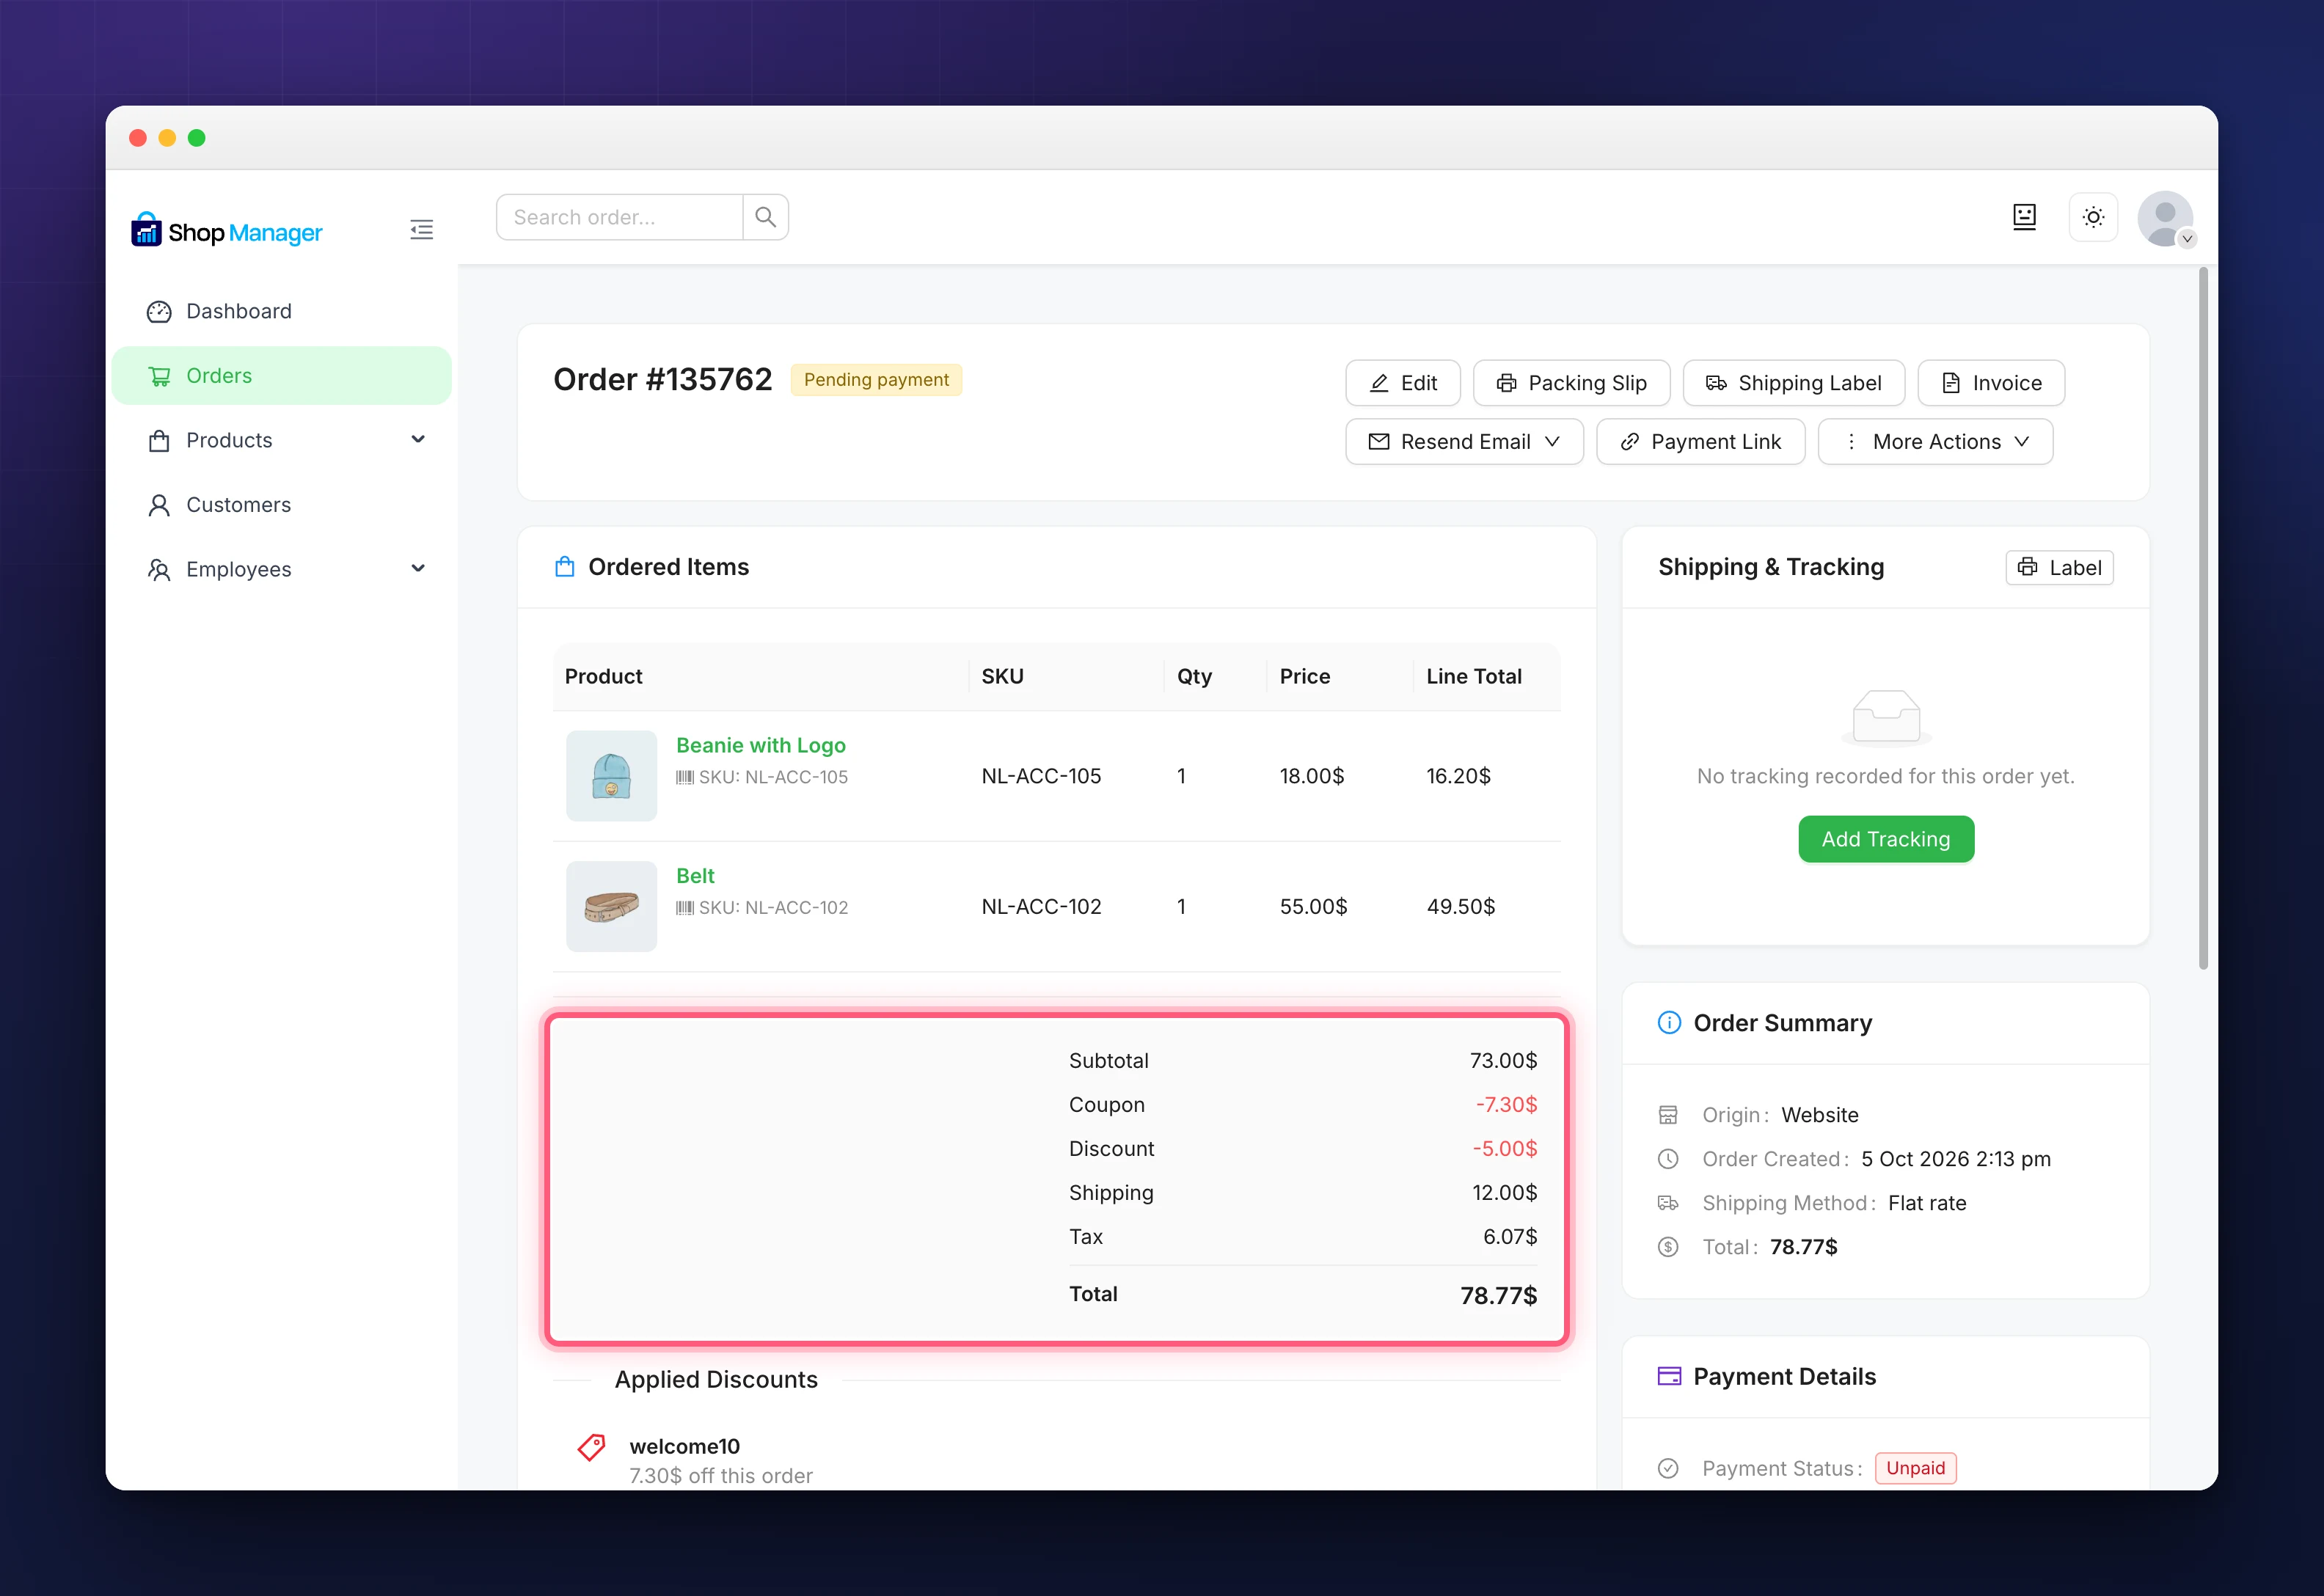
What you have made is a real WooCommerce order. It shows up in WooCommerce exactly as it does here, and WooCommerce adjusts stock for it according to your own inventory settings and the status you chose, just as it would for an order placed on your storefront. Open it and the totals read back the way you built them:
Editing an Order Later
Open Orders and click an order number, or use Edit in the row’s actions menu. The same form opens with everything filled in, and the button reads Update Order. This needs the Edit Orders permission.
Everything the order already carries comes back with it: its shipping charge, its coupons, and Charge tax switched on if the order charges tax. Turning that switch off clears the tax rather than leaving the old figure behind.
Coupons can only be changed while the order is waiting to be paid. That is Pending payment or On hold. After that the codes are shown but locked, and the panel says which status is needed. A coupon rewrites every line on the order, and an order your customer has already paid for should not have what it is worth changed underneath them. WooCommerce applies the same rule on its own order screen.
Troubleshooting
Create Order does nothing.
An order with no products will not save, and you will see “Please add at least one product”. Otherwise check the required fields, including State/Province where the country has one. Errors appear at the top of the screen.
A coupon will not apply.
The reason is shown under the field, in WooCommerce’s own words. The usual ones are a minimum spend the order has not reached yet, an expired coupon, or a coupon restricted to products the order does not contain. If a coupon is refused while you are creating an order, no order is created at all, so you are never left with one at the wrong price.
No shipping rates are offered.
Rates need a product on the order and a delivery country, and they come from your WooCommerce shipping zones. If a zone covers the address and a rate still does not appear, check that the method is enabled for that zone. You can always pick Custom charge and type the amount yourself.
There is no Add New button.
Your role is missing the Create Orders permission. An administrator can add it.
A variable product will not add.
Variable products open a picker first. Choose a specific variation and it becomes a line.
The customer did not get an email.
That follows your WooCommerce email settings for the status you picked. To send one yourself, use Resend Order Emails.
Related Documentation
- WooCommerce Order Management: the order list and everyday workflow.
- Custom Order Status: statuses beyond WooCommerce’s own.
- All order management guides